Seasonal Sew Wardrobe: Deep Stash sewing challenge

I completed the latest Seasonal Sew Wardrobe (SSW) challenge from the Sew Alongs and Sewing Contests a few weeks ago. The latest challenge was to make up eight items using patterns from deep in your stash. Perfect for me, since it’s been a goal of mine to sew up my stash patterns anyway.

My original plan was to make up a spring capsule using Simplicity 1430 Dress in cotton batiste, ALENA Top in white on white stripe jersey, Cozy Comfy pjs in blue madras plaid, Capitol Hill Dress in sequined black jersey, NICKI capris in black DBP, Gypsy dress in wax print cotton or rayon challis, and figure out two more as I went along.

15800400_10208774550182555_3567708571040648182_o

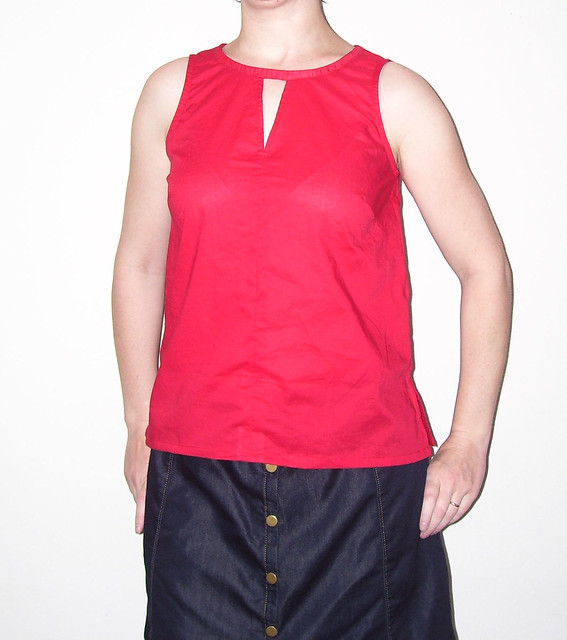
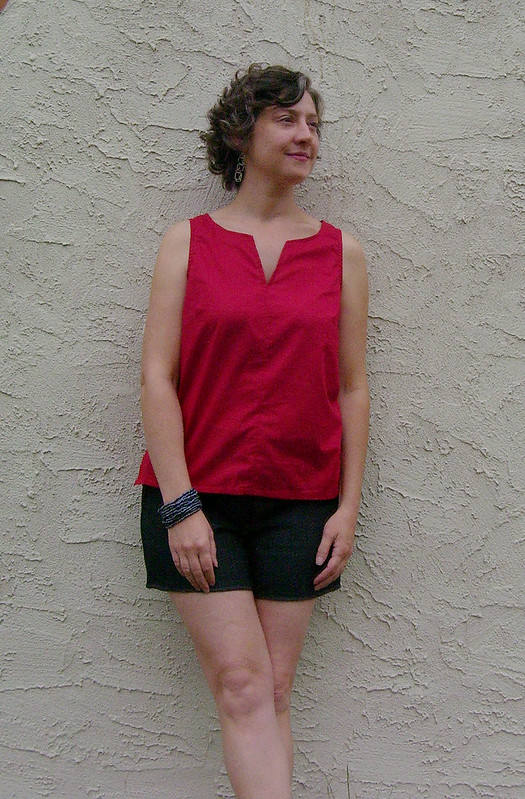
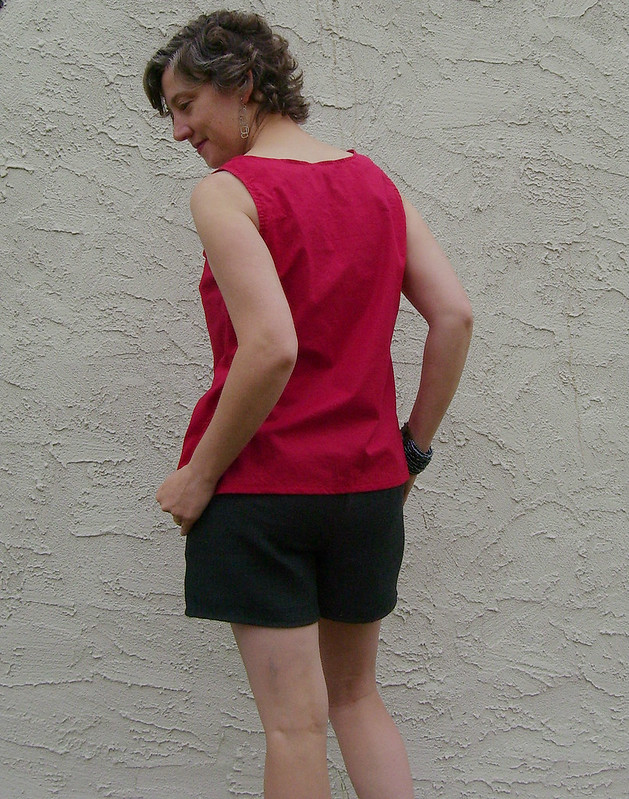
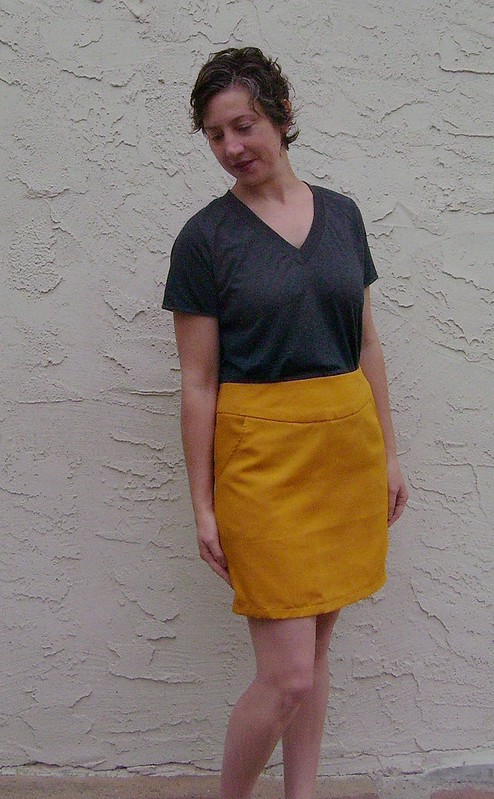
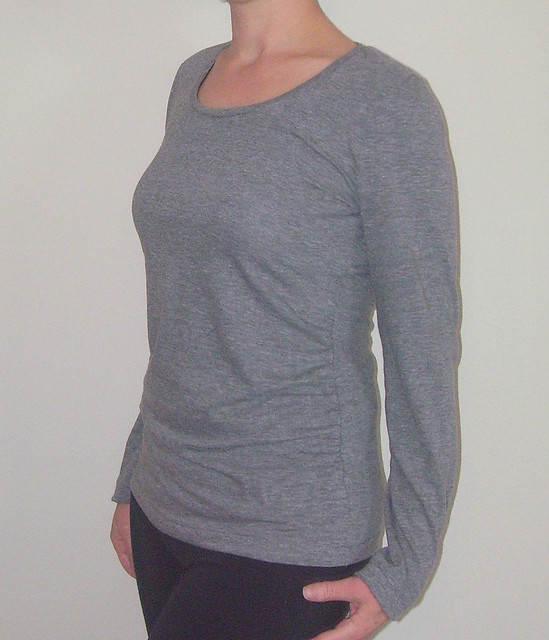
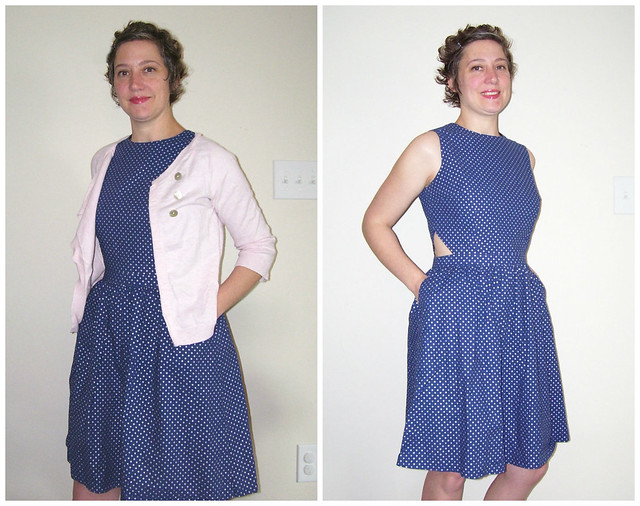
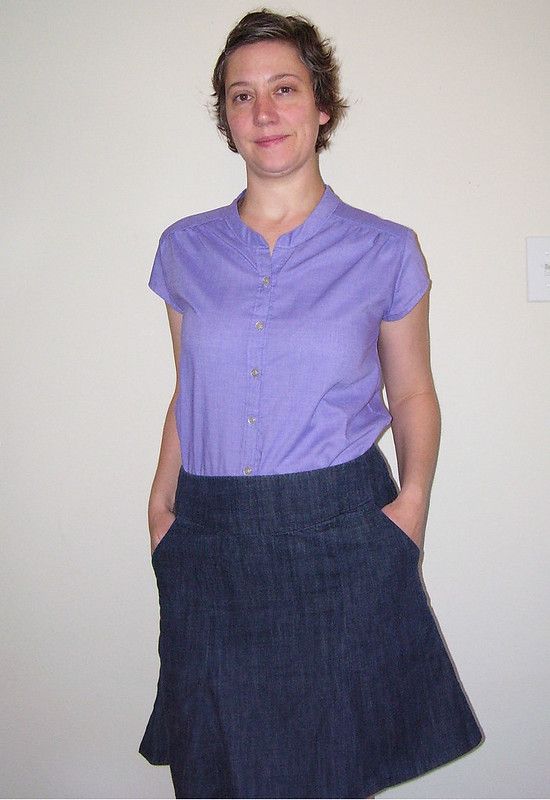
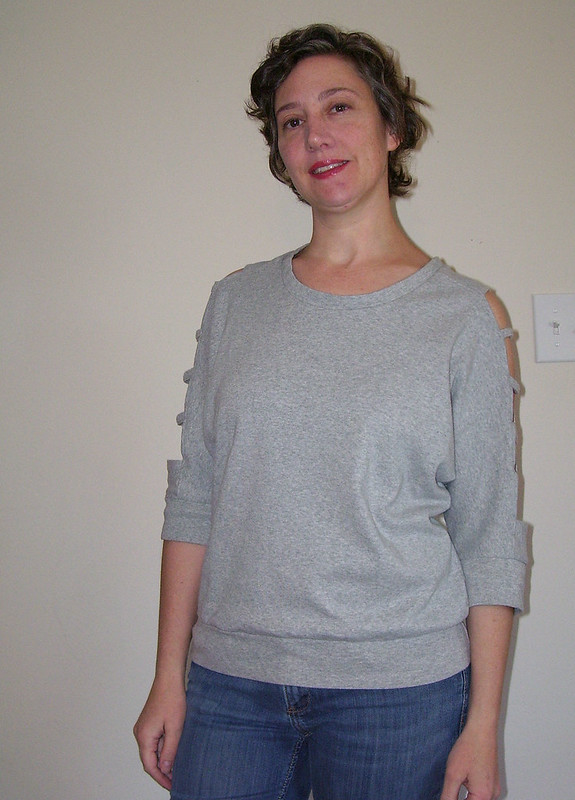
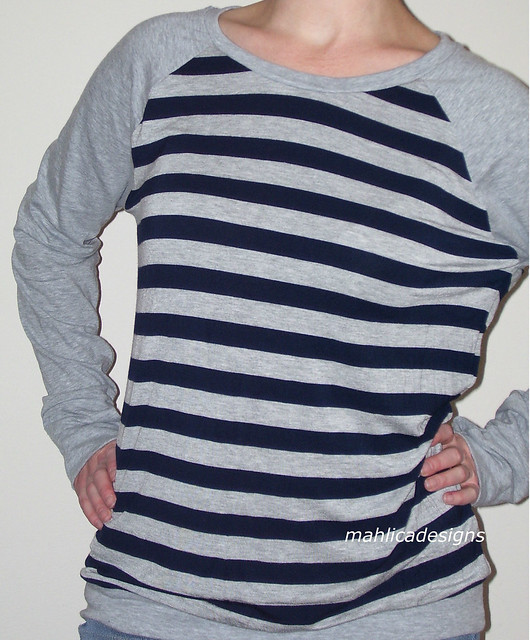
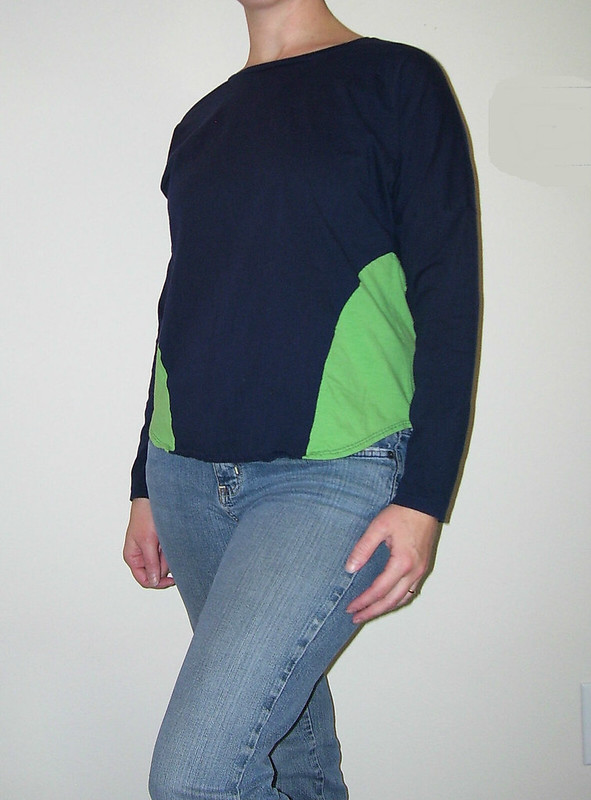
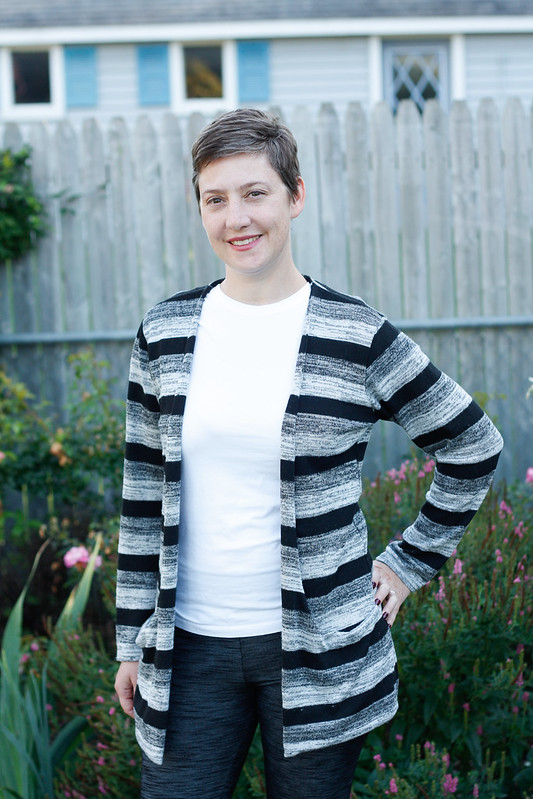
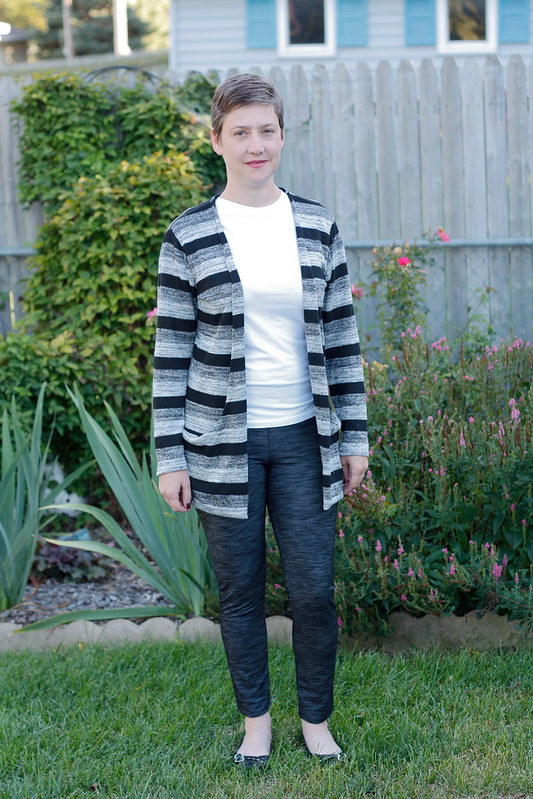
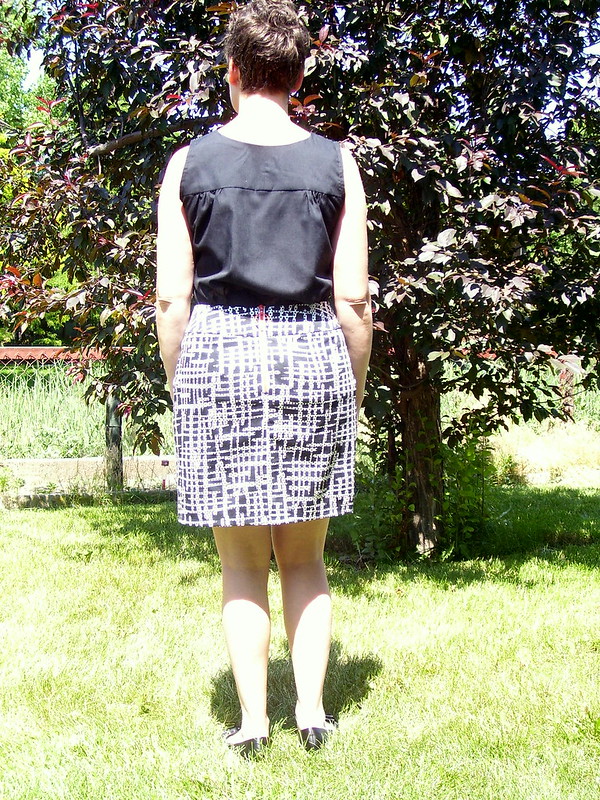
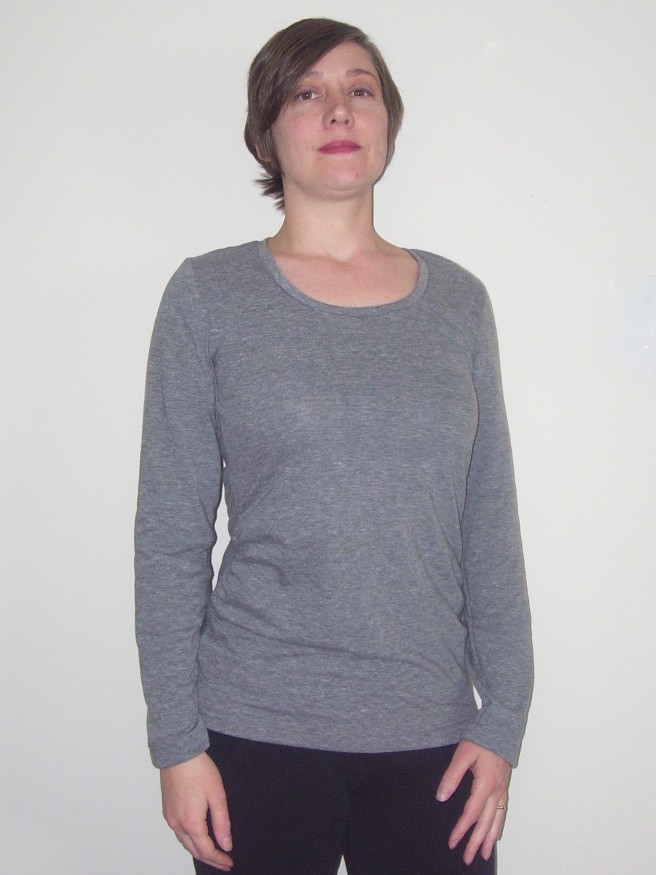
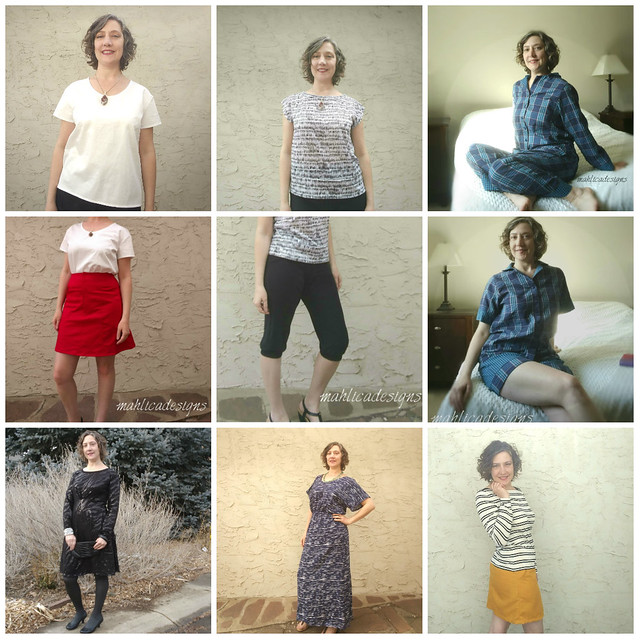
My final mini capsule (left to right, top to bottom) contains the Onyx Shirt, ALENA tee, Comfy Cozy pajamas, Ally Skirt, NICKI capris, Comfy Cozy pajamas, Capitol Hill Dress, Gypsy Dress, and my modern boatneck.

SSW DS collage

I have seperates that work with each other, pajamas that are not an after thought, a versatile summer dress, and an event worthy dress.

It has been a long time coming, but I’m starting to feel like I have a pretty cohesive wardrobe to work with. The challenges in the Sew Alongs and Sewing Contests group aren’t about building a capsule wardrobe necessarily; but they are a great at getting me to focus on my sewing goals, one of which is building outfits.

Would you like to participate in the next sewing challenge? The next challenge starts soon. Hop on over, join the group, and get sewing with us.

Destination Pants… a mini capsule for fall

I joined the Sew Alongs and Sewing Contests group in the last Seasonal Sew Wardrobe (SSW) challenge with “Destination” as the theme. Making & fitting pants was my major sewing goal (destination) for 2016, so I built my mini capsule around jeans and pants.

My original plan with outfits going horizontally:

SSW Destination suduko

Liana Stretch Jeans, Megan Blouse, Santiago Jacket; Fold Over Clutch, Birkin Fares, Zircon Sweater; SVEA Pants & Mechelen Sweater

My final mini capsule:

SSWD Pants complete collage

Links to my completed pieces: Birkin Flares,  Ocean Waved Clutch and Zircon Sweater; Liana Stretch Jeans, and Onyx Shirt; Alizia Top, SVEA Pants, and Matilda leggings.

I still need a lot of practice planning and sewing whole outfits, so I fully plan on continuing to participate in the SSW challenges.

Would you like to join in? The next challenge starts soon. Hop on over, join the group, and get sewing with us.

Sarah Top and Dress – Pattern Review

On the Cutting Floor is putting out some really interesting patterns, with unique details that take them above and beyond the many basics you see out there in the Indie pattern world. I have many of them on my list to make.

I started with the Sarah Top and Dress Pattern** Those origami-like folds, oh yeah, so very cool. I had the perfect color ponte in my stash to fit into my Core Wardrobe too.

The pattern comes with lots of options, 24 all together, so you need to read the “How to Print” instructions to get the pattern pieces you need.

Sarah Top and Dress technical drawing

The easily understandable instructions walk you through how to complete the many options and they’re organized so there’s no confusion. Sewing the pleated panel was a breeze because of good markings and clear instructions.

Item of note: The curve from waistline to hip is not a gentle one. This is great for pear shapes like me, but if you’re a rectangle or inverted triangle shape you might want to check that.

My alterations, which I have to do to most patterns. A drop shoulder adjustment of 3/8in. Shortened 3in at hem line, I had to eliminate the bottom pleat to make it look right. Shortened the sleeve by 3in to make it a length I like.

Next time, I’ll use a binding on the neckline instead of folding over and topstitching. I prefer a binding or facing.

I had a few fit issues with the test version of the pattern. (I don’t see adjustments for these in the final version)

1. I got a lot of gaping at the center front neckline of my muslin (not shown). I ended up removing two 1/2in wedges from the neckline to compensate.

2. I found the neckline sat high up on my neck at the shoulder line. I ended up removing 1in here.

3. I found the front piece 1/2in narrower than the back piece in the same size. I used a size 10 front piece and size 8 back piece in my final version.

The fabric: One yard of a nice ponte de roma from Finch Fabrics. (sold out)

The Pattern: Sarah Top and Dress in size 8/10. Pleated front, short sleeve options.

The Sarah Top & Dress is 50% off until Friday to celebrate the pattern release, so hop on that now.

The pleated front, short sleeve version of the Sarah Top should take you about 1.5 hours to complete.

Total Cost: $2          Fabric $2           Pattern $ 0- Free as a pattern tester


**Affiliate link, meaning your purchase provides me a modicum of compensation to fuel my hobby.

V Slit Blouse Simplicity 1430

Today I’m going to share just a little bit about the V front blouse that I included in the spring capsule wardrobe I worked on for the Sew Alongs And Sewing Contests fb group.

Me Made May really showed that I was missing some of the Core Colors from my wardrobe, so I immediately started making Simplicity 1430 View B in a red lawn from Fabric Mart and crossed off a long waiting project.

V Slit blouse

This cute number went together pretty easily until I hit the neck band technique. My gut instinct was to apply a bias binding, but I decided to follow the pattern. Uh-Oh. The instructions have you apply a pieced neckband, a neckband facing, and stitch through all the layers. That adds up to seven layers at the shoulder seams. The result, even in a lightweight lawn, was a  thick rope-like neckband.

V Slit blouse 1

I hated this neckband, so I ripped it off and added a 1in facing instead. I’m so much happier with the fit and feel. To keep that cut out look, you could use a bias binding.

V Slit blouse

V Slit blouse

The pattern: Simplicity 1430 View B, size 12. Stupid neckband removed and replaced with a facing, closure at CB eliminated and 1/2in added to hip.

V Slit blouse

The fabric: 100% cotton lawn from Fabric Mart, long sold out.

V Slit blouse


Notes: Choose an easier option for the neck binding and skip the back closure if you want to.

Simplicty 1430 view B should take you about 3.5 hours to make. A size 12 used 1yd of fabric.

Total cost: $3.50         Fabric $3.50             Pattern $0-stash

A small spring capsule

If you’ve been following my blog, you will have heard me mention my Core Wardrobe efforts. My approach has been to add pieces here and there to build up a Core of basics that can work with most everything else. I’d say the results are O.K.

It’s true that I do have a pretty good selection of basics, but I still look at my closet and feel like I have nothing to wear. Me Made May was useful for getting a little practice in making outfits and gleaning some helpful conclusions, but another project that I’ve been working on the last few months really has been the best for getting me to the next step of making a cohesive wardrobe.

The Sew Alongs and Sewing Contests group started a Seasonal Sew Wardrobe contest.  The goal was to make 8 pieces of my choosing, on a theme of my choosing, over a four month time frame. I love that kind of flexibility. (The group has started a new Seasonal Sew Wardrobe: Sleepwear Edition challenge. Hop on over, join the group, and get sewing with us)

My theme: Sew a lot of things and hope they match!

I think I got close to making a mini wardrobe of items that go together; and for the first time trying the idea, I’m satisfied with my results.

My mini wardrobe: Marigold Blouse, Georgia Top, Zamora Blouse, Marigold Dress, Jade skirt, S1430 blouse, Ally Skirt, Union St Tee, and Goldenrod Skirt.

SSW1 collage

I really like the approach of making a set of pieces that are made to go together and definitely want to do it again. I’m getting a better handle on the colors I want to wear and nailing down my personal style, so hopefully the next mini wardrobes I put together will have a cohesive connection to each other.

How do you find success making your wardrobe?

Wardrobe Workup after Me Made May


Though a lot of drudgery is involved in taking pics of yourself every day, Me Made May was a good and useful exercise. I got a little bit of practice putting together outfits and put together thoughts on how to make some improvements.

Actions:

I’ve added things to the sewing list and alterations list. More importantly, I’m going to refocus on building outfits instead of the one-off pieces that have led me to a closet of tops and no pants.

I’ve already made another S2451 skirt and a red blouse (unblogged) to fill wardrobe holes. Trousers and pants will wait until fall.

Union St Tee w/ S2451 skirt


While spending time evaluating my existing wardrobe this month, I also spent a little time focusing on how I’m spending my sewing/blogging time.

There have been several times over the last few months that sewing has been more stressful because of deadlines than it has been fun. I’m refocusing on how much I can realistically accomplish, so I can maintain a balance that works for me.

Moving on with Me Made May week four

Wearing handmade items every day this month for Me Made May is moving into unexciting repeat land, so I’m glad to be wrapping it up this week.

What I wore last week…

Sunday: Pin Peg Mini paired with a purple tee, after trying a few things first.

May 22 collage

Monday: Lindy Petal skirt and Kirsten Kimono tee.

May 23.2

Tuesday: Old tee and jeans for major yardwork day. No pics-your welcome.

Wednesday: Marigold Dress for dinner with the boys.

May 25.1

Thursday: Old tee and jeans for another yardwork day.

Friday: Union St Tee and rtw jeans

May 27


Week 4’s takeaways are…

  • Pin Peg skirt added to the list of items to alter. I’d like to take it in at the waist for a better fit. My version is reversible and I’m also considering taking it all apart and making two skirts out of the one.

So, there are a couple days left in May, but I’m done with Me Made May for this year. I’ll have a wrap up post in a few days to put it all together.


I took a leap this week.

I’ve been making a few navy tops lately and didn’t really feel like they paired up well with the bottoms is my wardrobe. After a little brainstroming, I got an idea.

Goldenrod Yellow – Meet my toned down color palette and work some magic!

Union St Tee w/ S2451 skirt

I’ve had it in my mind that I cannot wear yellow because of some bad color choices in the past that made me look sickly. I’ve also been wanting a yellow jacket for the longest time and kept hoping to find the right yellow tone that would work for me.

S2541 Golderod Skirt w/ Union St Tee

Enter a TNT skirt pattern and this goldenrod fabric from my destash pile and a small prayer that this idea would work.

S2541 Golderod Skirt w/ Georgia Top

I think I have a small victory here. I can wear yellow and my wardrobe is now better rounded.

S2451 in Goldenrod

The pattern: Simplicity 2451 view D with front pleats removed in size 14. Removing the pleats was the only alteration. I simply folded/pinched out the pleats from the pattern tissue before cutting.

The fabric: I pulled this cotton(?) woven out of my giveaway/sell stack. I inherited it some time ago and it was so close to being donated.

Notes: My first time making a lapped zipper; oh my, so much easier than an invisible zipper. Despite reviewing my notes from the last time I made this skirt, I forgot to add some length. I had a narrower hem to work with than I’d like, but really no big deal.

Styling: I’ve paired my Goldenrod skirt with a charcoal Union St. Tee (unblogged), my lace Georgia hack, and a rtw blouse (meh).

Goldenrod Skirt collage

Simplicty 2451 view D should take you about 3 hours to make. A size 14 used 1yd of fabric, hem tape, and a purchased zipper.

Total cost: $2.00    Fabric $0-stash     Notions(zipper) $2        Pattern $0-stash

Have you been making any bold sewing moves lately?

Week Away Wardrobe for Me Made May week three

Wearing Me Made items every day this week was a challenge. We took a week away in Breckenridge and I packed without spending the time to think about creating outfits. Still, I wore Me Made, but there isn’t much here to work with as far as gleaning info on my wardrobe. Here goes anyway.

What I wore last week…

May 15

May 15th, I wore my Fancy Tiger dolman on a cool rainy day in Breckenridge.

May 16

May 16th, wearing the Zircon Sweater in fleece hoping this is the last snow I see until November.

May 17

May 17th I chose my Ann T, one of my Core basics.

May 18th My first Me Made repeat. I wore my Jasper Sweater with jeans

May 19th I broke my streak by wearing rtw sweater and jeans.

May 20.1

May 20th Back on the wagon with a slouchy Tonic 2 Tee.

May 21st This Tonic 2 Tee pattern hack.(Did’t get a pic)

Week 3’s takeaways are…

  • Wow, I have enough pieces to wear Me Made for almost three weeks.

Wardrobe checkup with Me Made May week two

So far I’m still sticking to my goal of wearing Me Made items every day this month and taking a quick pic to help evaluate pieces of my wardrobe.

What I wore last week…

May 8 collage

May 8, Mother’s Day I wore my Bonnell Dress with a rtw cardigan.

May 9.2

May 9 I wore my Marigold Blouse hack and Simplicity 2451 skirt.

May 10.2

May 10 was a blah day for sure in my Easy Tee Raglan and rtw jeans.

May 11.1

May 11 rockin’ my Georgia Top hack.

May 12.1

May 12 Union St tee and Sloan Leggings. What can I say, some days are just like this.

Lane 6

May 13th Lane Raglan.

May 14

May 14th Aurora Tee.

Week 2’s takeaways are…

  • Adding a better fitting light colored cardigan to the List
  • Added a note to my Marigold pattern for better shoulder fit.
  • Really like S2451 skirt’s fit, should make again in a straight skirt version.
  • My go-to outfit of jeans and knit top really has me bummed how sloppy and boring I look.  I’m not sure how to rectify that given my lack of choices in pants/trousers at the moment.
  • Lane Raglan added to the list of things to be reworked.

Any suggestions?

Wardrobe evaluation time with Me Made May week one

I joined in on Me Made May again this year ’cause I’m still far from where I’d like my wardrobe to be. Despite my work on building my Core Wardrobe, I still am finding lots of holes in my wardrobe and still often feel like I have nothing to wear.

I’m using MMM to get a real look at what I’m wearing so I can make a plan to fill in those wardrobe holes, weed out items that just are not working for me, and to try out new combinations.

The first week of May I started off well, but quickly slipped into the jeans and tee uniform.

MMM16 week1.1 collage

Simplicity 2451 skirt, Georgia top, Kirsten Kimono top & Ally skirt (unblogged), One hour top.

MMM16 week1.2 collage

Shoreline boatneck, Union St Tee (unblogged), Jasper Sweater.

From this week I solidified what I already knew, that I barely have any jeans or pants that fit me, let alone any that are handmade. I’m already working on (procrastinating about) making my own jeans and have it on my list to try trousers in the fall.

A top in my Core Color, red, will give me more versatility in making outfits. I have Simplicity 1430 view B on my cutting table this week.

I’ve worn my striped Shoreline twice now and the length and the hemline shape needs to be adjusted. On the mending list.

Feel free to leave any input in the comments.

Core Wardrobe in review

At the beginning of this year I was feeling pretty committed about working on my Core Wardrobe. My strategy was to follow along with Wardrobe Architect from Colette and the Vivian Files.

What worked and what didn’t:

I found the Wardrobe Architect hard to follow. I felt like I was always searching around the Colette site for the latest post on the Wardrobe Architect and the time between their posts made me feel like I never quite knew what I was supposed to be doing. I take the blame here, my attention was lacking.

I had a reminder in my calendar to continue working through the Vivian Files, but just kept ignoring it.

On the positive, I feel like I have a better idea of what styles I’d like to be wearing and what looks good on me. When picking projects, I was more thoughtful about what role an item was filling in my wardrobe, if the style fits me, and if the colors fit my Core Color scheme.

Core Colors: Black, Ivory/Cream, Charcoal Gray. Cobalt blue and biker Red accents.

I continue to like the Core Colors I chose at the the beginning of the Wardrobe Architect process, but may switch out the black which is not great against my fair skin and use navy instead. I’m still deciding on that because the navy won’t pair up with the cobalt blue.

Looking back at the items I made this year and the fabrics I continue to buy, I have a lot of charcoal gray. I need to refocus on adding all the Core Colors I chose.

I wasn’t planning this at the time, but I also reduced purchasing ready to wear clothing almost entirely. I purchased a dress for a Christmas party and a pair of pants off clearance racks this year. I hope to continue to avoid purchasing clothes altogether, save for undergarments and socks.

Going forward:

I’m still going to use the ideas I’ve learned and have a list of the basic items that need making, but don’t know when I’ll get back to completing the Wardrobe Architect process.

I find I have the greatest success when I plan out ahead of time what I want to do for the next season. In September, I started planning my spring/summer pieces for 2016 by looking at what pieces I wanted to add, what patterns in my stash met the need, and then collecting fabrics. So far I have many tops planned and a vague idea that I should figure out how to make pants sometime. I’d like to continue to be able to plan ahead like this, but you know, stuff.

Jalie Drop Pocket Cardigan for Core Wardrobe building

Holi-Daze week for my Sew Long Summer sew along was a bit of a challenge sewing wise. I was hoping to make a big batch of tees or undies, but it just didn’t happen. Weekends are not where I get my sewing time, so I just barely finished the Jalie cardigan I was working on to show off with my sewing tips post.

Drop Pocket Cardigan 1

I’ve had the Jalie Drop Pocket Cardigan on my list since I saw Jamie’s last December. I’ve also been seeing Hacci knits around and wondered what they are like to sew and if using one would give me a warmer cardigan. The jury is still out on the warmth; it’s not quite cardigan weather yet. I purchased my Hacci sweater knit from Girl Charlee during their July 4 sale.

Drop Pocket Cardigan by mahlicadesigns

A little about the pattern. Jalie patterns come on a large sheet for you to trace off and include a huge range of sizes. The seam allowance on this one was pretty narrow at 1/4inch. Since I was using my serger I was ok with it, but otherwise I would recommend you think about adding more of a seam allowance as you trace. The pattern is put together to enclose as many seams as possible, because of this there were points in the instructions that I definitely would have been lost without the diagrams, so have both handy.

The pattern is a fabric hog, needing four of the front pieces shaped like a big “L” so the pocket part folds over the front. With stripe matching and my best pattern Tetris skills, I got a size U for 36in bust out of 2.25 yards (60in wide).

Drop Pocket Cardigan by mahlicadesigns

Hot Tip: Check your length before you cut. The pocket does not allow for much to be just cropped off the bottom if you forget.

Working with the Hacci sweater knit was very similar to working with a jersey knit; a little rolling at the edges but no fraying. I had some trouble getting the tension adjusted on my Janome 4618LE sewing machine to handle the stretch of the Hacci, but had no problem using my serger for the majority of the construction. I would think twice if I only had my machine to use.

Jalie’s Drop Pocket Cardigan should take you about 3.5 hours cut to finish.

Fabric $9      Pattern $ free     Total $9

The Wendy Top Simplicity 3964 for Core Wardrobe building

My blogging calendar says I should be planning ahead for fall and I even worked up a long sleeve tee in obedience, but the summer heat says “Sun’s out Guns out” and who am I to argue. I still need summer pieces for my Core Wardrobe.

There are a lot of cute woven tanks roaming about the internet and I have the Ella Top and Isabella Tank on my list, but I decided I’d make up a stash pattern. Simplicity 3964, a Built By Wendy design that I purchased last year.

Wendy Top by mahlicadesigns

I made a few modifications to the pattern. Flutter cap sleeves look dopey on me, so, sleeveless. This was super easy, you just skip the sleeve in the instructions and proceed on to inserting the armhole facing.

Wendy Top S3964 by mahlicadesigns

I decided to do a button and loop for the back closure instead of bias binding for the neckline and a tie. When I was choosing a button, I thought I should see if I could just slip the top on with the back opening closed and voila! No neckline opening is even needed. I unpicked the back opening and sewed it shut (making it a CB seam in the back yoke). I then attached the facing pieces right sides together with the bodice, understitched and turned the facing to the inside to get a cleanly finished neckline without having to use bias binding.

Wendy Top by mahlicadesigns

For a cleaner look, I eliminated a lot of the top stitching  by sewing the back facing and much of the front facing to the seam allowance of their corresponding bodice pieces. I did have to do a little hand stitching around the facing for the insert, but not much.

I used French seams at the sides by sewing 5/8, trimming, pressing, and then sewing again using a 3/8 seam allowance. Looking at my photos I think I took in the sides too much. They are pulling across my high chest though it doesn’t feel snug.

Wendy Top by mahlicadesigns

Now, let’s talk about where this pattern beat me down. Those angles, arrgg. The center front angle on the insert just would not come out sharply or without a pucker. Dang it. After many tries, I just said good enough and moved on. With pressing it doesn’t look bad, but with wearing the angles start to look mooshy.  I’ve done some post make investigating on how to do it better for next time.

wendy Top by mahlicadesigns

Paired up with a closet orphan (an item I have nothing to wear with)

Fabric: Black cotton/poly voile.

Fabric $8  Pattern $12.50  Total $20.50

Simplicity 3964 took me about 6 hours including extra time for some hand stitching.

Summer StashAThon SQ2

Throwback Sew Days with Butterick 5029

Me Made May was quite a spark for me to continue evaluating my wardrobe.  I had already paired down my closet and done a little work with the Wardrobe Architect series, so taking pictures and trying to make outfits during MeMadeMay was a logical step in continuing the process. So, while digging through my closet for me made clothes to wear,  I was confronted with my decision to save anything handmade from my initial paring down session.

Frankly there’s stuff in there that doesn’t get worn much. My solution is to trot it out for all to see and ask you to chime in on it. And hence, my Throwback Sew Days posts begin.

First up for evaluation is this Butterick 5029 dress I made a few years back. It’s a cotton in an almost tribal print detail.

Butterick 5029 by mahlicadesigns

My evaluation: At the time, I modified the front cross over portion of the bodice to cover a bit more. You can see I wasn’t quite successful. I have more coverage but it’s too wide where the ties cross my shoulders. I think putting in a little tuck will make it more narrow at the shoulder and may help with the gapping at the bust. The waist yoke is also a little too wide. I should have adjusted it more for my short waist. There’s no fixing it now.

Butterick 5029 by mahlicadesigns

I go back and forth on if this color is flattering for me, it’s pretty close to my skin tone.

Butterick 5029 by mahlicadesigns

So what do you think? Is it a keeper or should I put it in the upcycle pile?

Me-Made-May ’15 Wrap Up #2

My Me-Made pledge was to wear three handmade items per week. My goal in participating was to use these pictures to help with my Core Wardrobe work.

Week Three I wore: Ann T top, jeans and jacket; Simplicity 2601 blouse and jeans; Peasant Blouse and Lindy Petal Skirt. My observations:  T-shirt and jeans are nothing special, but hey, I wore a belt and jacket too! The silver/gray stripes on the simplicity 2601 blouse are really hard to pair up and I feel the peplum part sits too high on my waist, I think it is giveaway bound. Peasant blouse and skirt go well together, which I’m glad since they are both part of my core wardrobe and thats the point.

Week Four I wore: Orange Zip skirt with silk blouse; Lindy Petal Skirt and knit top. My observations: I like the Lindy skirt and knit top, I don’t look so frumpy. Silk blouse and Orange Zip Skirt are not bad, the poofy skirt would look better with a slimmer black top. Please feel free to chime in with your feedback. Do you think these outfits work? Are they the right shape and color for me? Any suggestions on how to do it better?

Lindy Petal Skirt from Itch To Stitch; Core Wardrobe Building

Lindy Skirt by mahlicadesigns

A lot of times I hem and haw when deciding on a pattern and then spend even more time on fabric. As you may know, I’m slowly working on building my Core Wardrobe. One of the items on my list is a summer weight skirt in charcoal gray. I associate charcoal gray with the winter season, so it’s been a challenge to find a pattern and fabric inspiration for this piece.

Lindy Petal Skirt
Lindy Petal Skirt

The Lindy Petal Skirt pattern was released a couple weeks ago and gave me that ah-ha moment I needed. The Lindy is a knit skirt, which I hadn’t thought of doing, and I had just enough of this rayon terry left over from one of my Jaspers to use. The length, silhouette, and wrap look of the petals all said spring/summer to me.

100_4045

If you’re looking for a quick and easy sew that ends with a great look the Lindy has what you need. The pattern is free from Itch To Stitch and it looks like she takes care to make quality patterns.

I used a medium weight terry knit, I think using a lighter weight knit like a jersey with a little stretch would be ideal so you don’t get some of the lumpiness at the side seams like mine. Shortening by 1in was my only pattern alteration. I’m 5’4.

So what do you think? Did I get a spring/summer success? I feel pretty good about it.

Oh, and yeah I got a hair cut between photos.

The Lindy Petal Skirt should take you about 1.5  hours.

Fabric $8  Total Cost: $8  Yea, more stash busting.

Me-Made-May ’15 Wrap Up #1

My Me-Made pledge is to wear three handmade items per week. My goal in participating is to use these pictures to help with my Core Wardrobe work.

Week One I wore:Peasant Blouse & bootcut jeans; Jasper Sweater & bootcut jeans; Cobalt shorts and embroidered tee; Orange Zip Skirt & Teal Tee.

My observations: Wear cobalt shorts with that tee tucked in and a belt.

Week Two I wore: Rose Tee & straight leg trousers; Bonnell Dress; Simplicity 4420 skirt (unblogged) & tee.

My observations: Rose tee looks a bit matronly, maybe this will be an around the house tee.

Please feel free to chime in with your feedback. Do you think these outfits work? Are they the right shape and color for me? Any suggestions on how to do it better?

Me-Made-May 2015 pledge

As a participant of Me-Made-May ’15, I’m endevouring to wear three outfits weekly containing a handmade garment for the duration of May 2015.

me-made-may'14

My hopes in participating in MeMadeMay 2015 are to help with my Core Wardrobe efforts. By focusing on creating outfits and photographing them; I hope to further pare down my closet,  get a better idea of what looks good on me, identify wardrobe gaps, and generally break out of my mommy uniform of jeans/shorts and tshirt.

My plan is to take photos along the way and do a wrap up post every other week. Any input you want to give at that time will be appreciated.

 
Follow my blog with Bloglovin

Peasant Blouse from MellySews, Core Wardrobe part 6

Peasant blouse by mahlicadesignsAhhh, spring wardrobe sewing is so glorious. Color and breezy materials are what I’ve been missing. I am very ready to say goodbye to thick fabrics, layers, and wearing socks to bed.

I happened upon this polyester charmuese at Denver Fabrics a few months ago and thankfully got enough yardage to make the Peasant Blouse from Melly Sews. I’m thinking a red like this will be one of the main colors for my Core Wardrobe.

100_3862I was a bit nervous about working with this kind of fabric for the first time. My strategy: keep it sharp and pin the stuffing out of it. I made sure my rotary blade was sharpened, used a brand new Microtex needle, and pulled out my “good” sharp pins.

I took the sewing pretty slowly to keep those slippery edges neat and to make sure my machine didn’t eat the fabric. I also spent a lot of extra time making French Seams to containing the fraying edges. The neckline is finished with bias binding that also is the casing for elastic. The sleeves and bodice are finished with a fold over hem.

100_3863The Peasant Blouse is a free pattern from Melly Sews blog and her post gives some really good tips on how to style a peasant blouse, just the kind of hand holding I need. The instructions are streamlined since they are given in a blog post as a tutorial, so some sewing experience is assumed. I had no problem with the instructions, but did have a little wonkiness along the neckline where the sleeves met the bodice front and back. The pieces just did not match up to make a smooth neckline. Operator error? Beats me. I just smoothed out the line a bit when I attached the bias binding.

100_3853The instructions recommend 23-26in elastic length around the neckline; 23in made a pretty high neckline and pulled the sleeves a little snug at the underarm. 28in of elastic for the neckline worked best for me and gave a little more room at the underarm.

I used elastic thread for the first time on this project. I hand wound the elastic thread on my bobbin, used the longest stitch length on my machine, did a test, and added one row of shirring 1/2in from the sleeve hem.

This project took 3.75 hours to complete. I’m guessing half that time was making the french seams. Working with a fabric that does not require the french seams would cut down your time.

McCalls 6559 Summer Stripes dress; Core Wardrobe part 5

Come on warm weather, I’d like to see you.

100_3794

The warmth is still a ways off for us, but that’s why we take vacations right? In honor of warm vacations to come and because I just need/want to focus on spring and summer Core Wardrobe pieces I’m trying a pattern out of my stash. McCalls 6559.

100_3796

I found this striped knit, in my Core colors, in the Joanns red tag section. It was pretty stiff feeling, but at $2.5/yd I thought it would make a good beach cover up and give me some practice matching stripes. To my surprise, it softened up nicely after washing. Now I have a nice striped dress for summer, bonus!

100_3801

I sewed up view D in a size 12. I went with the maxi length after I realized I had bought more yardage than I remembered and what the hey, why not test out how maxi length looks on me using a bargain fabric. I can always shorten it.

I made a few simple modifications to the pattern and instructions.  I used a 1/4in seam allowance at the sides because I was concerned about having enough width at my hips and thighs, this turned out to be unnecessary. Instead of turning and topstitching, I used self fabric as neck and armhole binding, I just think this looks better. I removed 3in from the length, I’m 5’4, and sewed the hem at 5/8in.

100_3802It took extra time of course, but I’m pretty pleased with the pattern matching at the side seams.

I can see this pattern being pretty useful in a lightweight knit as pajamas, as a beach coverup in the shorter length as I originally planned, and to show off some awesome prints.

McCalls 6559 took 3 hours, including the extra time needed to match stripes and add neck and armhole bindings.

Ann T Top from Style Arc; Core Wardrobe part 4

SewYourPatternStashSq213

Today I’m working on building my Core Wardrobe and participating in Sew Your Pattern Stash 2015. I’m hoping to work through more of my unused patterns this year.

100_3786

The Ann T Top pattern is from Style Arc. Their size chart suggested I should make a size 10, but after flat measuring the pattern I used an 8 instead and a 3/8in seam allowance instead of the 1/4in allotted. I was drawn to this pattern because of the draping across the tummy area, while still appearing to be a fitted tee.

100_3788

The pattern instructions would be too sparse if you’re a novice, for example there is no instruction on how to use the clear elastic to create the gathers on the front or how to insert a neck binding. If you’ve sewn knit tees before, there is nothing here to challenge you, other than using the clear elastic to make the gathers.

100_3787

Perhaps the fabric I used, a rayon jersey knit, affected the draping, perhaps I need to go down a size through the waist and arms, but I found the overall fit still needs some work for me. I was wanting more draped folds across the tummy, instead it just bags out a little and the arms are too baggy, but these fit problems are easy fixes. I  think I’ll adjust the arm width and remove the front gathers to make this a TNT pattern.100_3793

This project took 2.75 hours.

This is the last fall/winter Core Wardrobe piece for now. I’m turning my focus to spring/summer in hopes that I can get a few items done to wear when the warmth returns.

And, so I can feel a sense of accomplishment here’s what I made for my fall/winter Core Wardrobe:

I’m counting the Kirsten Kimono Tee as a head start on my spring/summer Core.

Kirsten Kimono Tee
Kirsten Kimono Tee

I’m feeling the itch to take a break from making the basics I need and these basic colors. I have a couple projects lined up that I think will lift my spirits with some color.

Jasper Sweater by Paprika Patterns; Core Wardrobe building part 3

I was pleased as spiked punch to participate in pattern testing for Lisa over at Paprika Patterns for her second pattern release, the Jasper Sweater. Check out her first offering, the Jade skirt.

And Ta Da my two work ups of the Jasper.

100_3768

I love how it looks. It’s not too boxy and slouchy as some sweatshirts can be and the welt pockets keep it looking trim at the waist. I also like that the collar isn’t too big. I like a cowl, but not a big fan of them draping all down the front of my shirt.

The epaulet is attached by sewing on the button through the layers. I may remove it or reposition it down a bit.

Ah, you just have to love what a princess seam can do for your shape.

100_3770

This was my second go at the Jasper, following the pattern without modifications. For the cowl version above, I sized up to a 4, but should have stayed at a 3 from waist up.  I used a French terry with about 15% stretch that I found on RaspberryCreekFabric. I just love this fabric.

Bonus! This fits perfectly into my core wardrobe needs.

The Jasper pattern calls for sweater weight fabrics with minimal stretch. I worked up the hooded version below first, in a size 3, in a sweatshirt cotton poly blend with no stretch. In this fabric, it takes just a little wiggling to get it over my shoulders when taking it off. This one may go into my etsy shop. (So, I sized up on the second version. Shouldn’t have though, since the second version used a knit with stretch. whoops)

I followed the instructions as is and did use the suggestion to topstitch down the interior seams around the neckline and within the hood.

Jasper Sweater

Look at the asymmetry and buttons at the collar, that’s always a big draw for me. The hood is pretty big compared to most, think: no terribly messed up hair.

Jasper Sweater

Jasper Sweater

Lisa made modifications the pattern after I made my hooded version and again after the cowl neck version. So the final pattern may be slightly different from what you see here.

I’ve used a variety of pattern downloads (PDFs) from indie pattern designers to the one offs that other bloggers kindly share and Paprika Patterns are by far the best I’ve seen. It’s like they took a little peep into my mind and addressed all the things that annoy me about pattern downloads. I appreciated the efficient layout and a printing guide so you only print the pages you need. Paprika Patterns also has links for help on construction steps and tutorials for pattern alterations.

Jasper Sweater

I’m thinking I need to make the Jade skirt from Paprika Patterns too.

The obligatory 2015 resolution list

Every year about this time I scoff about people making resolutions for the New Year. Why waste your time when utter failure is coming your way in less than two months? I really should eat some humble pie because I feel like I’m in a constant state of trying to get my act together and never getting there. So really, I’m frustrated all the time, instead of one big dose of it in January or February. So this year I’m making some resolutions like everybody else.

I’m sharing my list to keep myself accountable and I know some of you have similar goals. We can partner together to encourage each other to get it done. I’m trying to be realistic here. Some of these goals need more than one year, but its about getting the habits started.

Sewing

In 2015 I’d like to learn how to make a lapped zipper and try fancy seam finishes.

I already have a fair start on my Core Wardrobe resolution but need to finish it out.

Work on the UFO pile, finishing four in 2015. Below is one of my UFOs.

I need to do some serious destashing, there’s stuff in there that I’m just not going to use, but can’t bring myself to donate. I at least need to make a plan for getting rid of some of it.

Sister Suns quilt top

Organization

Part one is getting things neatly in a place they belong. Small bites at a time, one closet or bookcase per month.

Part two is unpacking boxes from our move 1.5 years ago. They’re all in our garage and it would be nice to get both cars in there. One box per month.

Part three is downsizing. I’ve got stuff that needs to go! Not sure how to measure this other than one thing/batch per month.

100_3440

Wouldn’t it be nice if everything lined up so nicely?

I’ll be giving updates on my facebook page. Follow me there if you want to see how I do and leave me a facebook comment if you are interested in helping each other on a similar goal.

Some inspiration: This week I emptied one box of books from the garage, gave away our really big artificial tree on Freecycle, and listed some destash items in one of my etsy stores, and got a couple things up on craigslist. Thats pretty impressive, for me.

Kirsten Kimono Tee by Maria Denmark Core Wardrobe part 2

Back to building my core wardrobe, for now anyway. I’m at a bit of a block trying to figure out what to make while trying to find the right fabrics for the few things I do have figured out.

Today’s tee is using the Kirsten Kimono Tee pattern from Maria Denmark. The pattern is free when you sign up for her newsletter.

mahlicadesigns

I just loved this subtly printed knit when I saw it at Joanns (can you see the foil chevrons?) and bought 1.5yrds without a specific plan other than to use it for a Core Wardrobe piece. It’s a light weight knit, so I opted for a short sleeve tee for the summer months and chose the Kirsten Kimono pattern to keep trying new designers and silhouettes. The fabric is very transparent so be prepared to wear a camisole underneath if you get this same color.

100_3720

The only draw back to the pattern was having to add a seam allowance to the pattern pieces. Kind of a pain. I didn’t look at the pattern directions, so I can’t give a review of those but I do think this is a great fit and style, well worth making. I would make this again with a small adjustment to make the hip a bit wider for me. This may become a Go To pattern for me, I hate shirts being tight under my arms and the kimono sleeve is just right for me.

The pattern calls for less than 1yd of fabric, so at 60in wide and 1.5yrds I had enough fabric to make two size smalls. If your fabric shrinks more than mine (only 2in in length) you might not have this luck. Now to figure out who gets the second small my etsy shop or a Christmas gift.

100_3722

Hmm, I’m wondering if I need to start doing a sway back adjustment?

This project took 3.75 hours for the two tees.