Toaster Sweater & Tabor V-Neck Mashup Tutorial

Hi there. I hope you are happy and healthy.

{mahlica’s note: Hey, if you are not seeing photos, please try clicking through to the post (click the post title) instead of reading on my home page. Bear with me as I figure out this glitch}

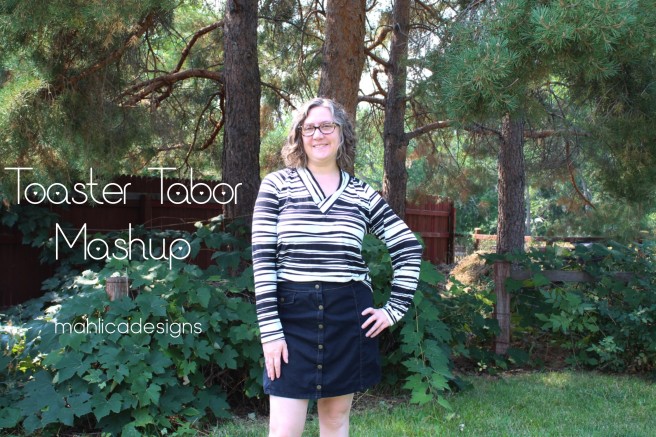
Last week I made up a pattern mashup using the Toaster Sweater and Tabor V-Neck patterns from Sew House Seven. My goal was to recreate a GAP tee from my “Stripes” pinterest board. I think I got there with the design lines, but with the irregularly striped fabric I used from my stash, I’d give myself a 9 out of 10 based on not having the stripes matched up on the raglan seam.


Here’s how I did it.

Supplies needed:

Toaster Sweater Version 1 and Tabor V-Neck patterns assembled and cut to your size, tracing paper, 3 different colored pencils/pens, fabric, and basic sewing supplies.

Alter the Toaster’s front bodice.

Fold the Toaster sleeve piece in half lengthwise lining up the underarm seams. Mark your fold for several inches at the upper edge of the sleeve pattern to denote the shoulder line.

Trace off the Toaster front bodice. Leaving about 8in of paper below the bottom cut line and 10in above the top of the neckline. (Set aside for a minute.)

Line up the front bodice and sleeve pattern pieces along the raglan seam. Overlap the pieces by 5/8in to remove the seam allowance and temporarily tape the pieces together. They need to line up along the upper part of the seam near the neckline. They won’t line up further down the seam.

Reposition your tracing over the front bodice/sleeve. Using a contrasting colored pencil (orange), trace along the extended neckline and upper edges of the sleeve. Mark the shoulder line for several inches. These traced lines will be your points of reference for future steps.


To draw the v-neck line, place the Tabor front bodice piece on top of your tracing. Line up the Tabor with the Toaster’s shoulder and make sure the Center Front fold lines are parallel. Trace along the Tabor’s v-neck line. (Keep your pattern pieces under the tracing paper for future steps)


Lengthen the Toaster bodice to eliminate the bottom band. I added 6.5in below the original cut line and extended the side seam down. You may need more length depending on your height. I’m 5’4″. Keep in mind that the Toaster is a semi cropped style, so if you need room at the hips, you’ll want to curve that side seam, instead of extending it straight down.

Alter the Toaster’s back bodice.

You can trace off the Toaster back bodice piece leaving extra paper above the neckline or simply tape on a scrap piece of tracing paper like I did. Overlap the Toaster back bodice and back portion of the sleeve along the seam allowance. Like the process for the front, you’ll be able to overlap the seam allowances close to the neck line, but they won’t match up along the lower portions. Using a contrasting colored pencil (blue), trace around the upper portion of the back bodice to create reference lines. Set the back bodice aside for a minute. Extend the Center Back fold line up, then free hand or use a curved ruler to draw in a new, higher neck line that matches up with the curve on the sleeve (Gray lines in the pic below). Tape on a scrap of tracing paper and trace over the new neckline curve you created. Lastly, add length to the back bodice piece just as you did the front.


Alter the Toaster’s sleeve.

No need to trace off a new sleeve. Lay your sleeve piece over your tracing paper, lining up the upper edges with your traced reference lines (orange). Fold down the front triangle point along the line you traced for the vneck (green area) and add a small triangle at the back edge to fill in the gap (green area).


Lay the Toaster’s cuff piece over the bottom edge of the Toaster’s sleeve, lining up the two pieces to make a smooth cutting line along the side edges of the sleeve. Temporarily tape together.


Alter the Tabor’s neckband (maybe).

I used the wide lapped neckband from the Tabor pattern. In the end, I shortening the neckband by 1in to get my rayon jersey to lay flat. This may not be needed for more stable fabrics. I suggest basting in the neckband and determining if you need to shorten it. I took out the extra length from the center back neckband seam.

Now you can cut out your new lengthened Toaster bodice with a v neckline pattern piece and the back and sleeve pieces if you traced those off.

Sewing overview:

Apply the small piece of interfacing to the bottom of the Vneck and stay stitch according to the Tabor’s pattern/instructions.

Assemble the bodice and sleeves according to the Toaster’s instructions.

Sew and insert the neckband according to the Tabor’s instructions.

Hem your sleeves and bodice according to your liking.

You’re finished with your Toaster Tabor Mashup! I hope you love it. Tag mahlicadesigns on Instagram, so I can see your version.
As always, thanks for reading today.

You can follow me on instagramBloglovin, or by entering your email in the right side bar.

You might like to see my Toaster with Tapirs, Toaster in sweater knit, Tabor vneck, Tabor layered vneck tutorial.

Pin it for later!


CHENILLE Sweater for Minerva

My fabric stash and my dresser drawers can attest to the fact that charcoal grey knit is my spirit fabric. I’m sticking to what I love with the grey sweater knit fabric that I chose to make a Chenille Sweater from Kommatia Patterns (now Studio Calicot).

Today you can read about the Chenille that I made for the Minerva blog. You can see the full details here.

Until next time,

Melissa E of mahlicadesigns

Find Me on instagram

ITS Spotlight on the Hepburn Turtleneck

Today I’m contributing to the ITS Spotlight September with three versions of the Hepburn Turtleneck from Itch to Stitch (ITS). I made my Hepburns in three fabric types to show off the different looks you can achieve with one well designed pattern. (Keep reading for tour details, a discount code, and a giveaway)

Version 1: Ribbed Knit.  Horizontal Stretch: 100%  Vertical Stretch: 60%  Weight: 9 oz.  Cotton/Rayon/Spandex Blend

My first attempt at sewing with knits about 8 years ago was with a ribbed knit on my sewing machine. I had no idea what I was doing and the result was a complete fiasco. I haven’t touched ribbed knit again until this project.

With a little bit of experience under my belt I had a few ideas on how to do it better. I spent a little time tweaking my overlocker settings trying to get them right. I felt like I was circling around my target but not hitting the bulls eye.

Finally I just googled for some suggestions. I got lucky when the first place I looked was using my exact machine. When I  adjusted the settings to match up to Indie Sews’ recommendations, overlocking in direction of greatest stretch worked perfectly. I then adjusted the differential feed back toward the 1 setting (feed dogs moving equally) when overlocking along the grainline. I used my walking foot and a lengthened zigzag stitch on my regular sewing machine for the hems.

Rib knit conquered !

Version 2: Sweater knit. Horizontal Stretch: 95% Vertical Stretch: 25% light weight.

I’ve sewn with this sweater knit before (here), so I was able to knock it out on my overlocker and then using a walking foot and lengthened zigzag stitch for the hems on my sewing machine. I think I need to pair this one with a cardigan to get a professorial look.

Version 3: Double Brushed Poly. Horizontal Stretch: 100% Vertical Stretch: 75% light weight. 100% Polyester.

I made this one specifically for layering. I think it will look great with my cardigans without being bulky and as a base layer for some outdoor winter activities.

The Pattern Hepburn Turtleneck from Itch to Stitch made in a straight size 8.

The Hepburn is on SALE TODAY ONLY as part of the ITS Spotlight Tour. Use code 916itsblogtour25 to save 25% off the Hepburn Turtleneck. To find more patterns on sale, visit all of today’s bloggers. Check the tour every day, for daily discounts.

The Fabrics Striped rib knit and double brushed poly from Boho fabrics. Grey sweater knit from DG Patterns.

I modeled my Hepburns with my well loved Lindy Petal skirt and Liana Jeans both from Itch to Stitch.

**This post may contain affiliate links. If you purchase through my links, I get a small commission to help pay for my sewing hobby.

The ITS September Spotlight Itch to Stitch Blog Tour features these talented sewists:

September 16th 
September 17th 
September 18th 
September 19th 
September 20th 

Visit our Sponsors and enter our Rafflecopter Giveaway for a chance to win one of 2 amazing prize packages:

Prize # 1
Itch to Stitch: 3 PDF patterns of choice
Raspberry Creek Fabrics: $100 Store Credit
D&H Fabrics Co: $50 Store Credit
Simply By Ti: Prize of $20 Store Credit

So Sew English Fabrics: Prize of $40 Store Credit
Sly Fox Fabrics: $25 Store Credit

Prize #2
Itch to Stitch: 3 PDF patterns of choice
Beautiful Textiles: $100 Store Credit
D&H Fabrics Co: $50 Store Credit
Surge Fabric Shop: $20 Store Credit
Knitpop: $50 Knitcoin Credit

Viewridge top- pattern review

This spring I’m finally getting around to starting in on those woven tanks I’ve been meaning to make for the last three summers. It feels like I have oodles of patterns in the stash to try, but I’m starting with the Viewridge Top from Straight Stitch Designs that I won in last year’s Indie Pattern month on The Monthly Stitch.


I like loose fitting tops for summer, but gathers and pleats seem to add too much volume at the bust for my taste. The Viewridge does have small gathers at the front, but I think they are nicely balanced by structured side and yoke pieces.

Viewridge view B includes small gathers at center front. Photo from Straight Stitch Designs

The Viewridge should be pretty easy for an advanced beginner sewist due to the use of bias tape to finish the neckline and arm hole and making even gathers. Even so, I managed to make it difficult on myself. I didn’t press my fabric when I pulled it back out of my stash. Slightly wrinkled shifty and slippery rayon wovens are not fun to cut and I ended up with one piece slightly off grain. I definitely had some hair pulling as I tried to figure out why one piece ended up slightly lopsided (because it was off grain and wrinkly) and how to fix it.

As I was working through that, Rachel of Oakblue Designs was sharing her success in cutting the same type of fabric after treating it with a spray stabilizer. Noted.

I also found a small error on the pattern at the shoulder. The pattern marking doesn’t line up. Use them to help you know which pieces go together, but you’ll be fine lining up these pieces without them.


The Pattern: Viewridge Top from Straight Stitch Designs, view B in size 10 and shortened 2in at the adjustment line. I chose a size 10 based on my 37.5in bust measurement. The pattern instructions suggest that for larger cups sizes to try one size larger for the front pattern pieces than you use for the back pieces. I stuck with a straight 10 and feel like it fits well.  Overall I give the pattern an A, the instructions are well put together and the pattern is well drafted. That one misaligned pattern marking is easily overcome.

The Fabric: I picked up this floral rayon a year or so ago at Joann Fabrics. It’s beautiful and unfortunately it was only available for a moment.


As always, thanks for reading today.

You can follow me on instagram, Bloglovin, or by entering your email in the right side bar.

This post may contain affiliate links. If you purchase through my links, I get a small commission to help pay for my sewing hobby.

You might like: My Ella Cami Set made in the same fabric.


Save For Later  Pin this image, so you can come back when you’re ready to start sewing your version.

Parker Peplum Dress Hack

I’m back today with a simple hack I’ve done with the Parker Peplum Top pattern turning it into a dress and using the organic bamboo jersey from DG Patterns Shop*

Turning the Parker into a dress is quite simple. All you need is a circle skirt pattern or draft your own. There are tons of tutorials online to walk you through it.

I cut my circle skirt 19.5 in long and simply attached it to the bottom of the completed bodice. Viola, Parker Peplum Top is now a dress!


The Pattern: Parker Peplum top from Seen & Sewn Patterns in size medium. I added a circle skirt to make mine a dress. The Parker is a loose-fitting peplum with an option for a regular tee.

The Fabric: Organic bamboo jersey in black and white stripes. This was my first experience sewing with organic bamboo jersey. It’s quite similar to rayon jersey in its weight and drape, but this has a silkier smooth feel to it.


As always, thanks for reading today.

You can follow me on instagram, Bloglovin, or by entering your email in the right side bar.

*As a DG Patterns Fabric Ambassador I receive complementary fabric from the DG Patterns fabric shop to use any way I like in exchange for sharing about it with you.

This post contains affiliate links. If you purchase through my links, I get a small commission to help fund for my sewing hobby.

Save For Later: Pin this image, so you can come back when you’re ready to start sewing your version.


Breaking Ground with the Tracey Bee Top

I’m Breaking Ground with the Tracey Bee Top from new to me Seen & Sewn Patterns. I’m also hoping to break out of my ongoing sewing funk by using some energizing colors for spring in the midst of our ice and snow. (Oh hey, keep reading for tour details and to enter the giveaway)


What I like most about the Tracey Bee are the insert details. These create interesting design lines if you sew it up in a solid fabric and opportunities to mix fabrics if you like colorblocking.

I made my Tracey Bee with a rayon challis type of fabric. The drape is wonderful, but it did get a little clingey with static around my waist. Instead of a double fold hem, I decided to use a cotton bias binding and that seems to have helped the fabric stand away from my skin enough to resolve the problem.


The Pattern: Tracey Bee Top** in size L, cropped view. Due to the challenge of sewing inserts, I’d recommend this top for an advanced beginner or above. Other than the challenge inserts can offer, the pattern goes together easily. There was a small mismatch at the side seam when the dart was folded, so I sewed the dart at half the width and that resolved the mismatch and didn’t affect the fit for me in the least. (the designer is checking the pattern to correct).

The Fabric: Rayon woven paired with scraps of teal eyelet from the ole stash.


I’m still having a hard time getting excited about a next sewing project, but starting with fabrics in my stash that do give me some energy is a good strategy. I do wish it was warm enough to wear my spring projects instead of just looking at them.

The Braking Ground Blog Tour includes all these creatives… we hope you’ll visit us each day:

Monday March 11That’s Sew Lily, Sewing A La Carte, Mijn 11jes & ik

Tuesday March 12mahlicadesigns, Embrace Everyday, Jot Designs, auschick sews, Raising Stripling Warriors

Wednesday March 13Musings of A Seamstress, Very Blissful, Sew4Five, Just Sew Something, Hazelnut Handmade, Crafting Through Time, Tales From A Southern Mom

Thursday March 14Make It Sew with the Bear and Pea Atelier, Ronda B Handmade, SequioaLynn Sews, Sewing with D, The Sewing Goatherd, OOYAmade, My Golden Thimble, Custom Made by Laura

Friday March 15–  Sew Cute Couture by Kathy, Sewing Novice, Ronda B Handmade, Momma Bear Sews, MeMade, My Golden Thimble, Lulu & Celeste

Breaking News: our tour sponsor Phat Quarters is offering 2 patterns of choice from her pattern shop to one lucky winner.

Enter Here!

***

We’d love to see how you’re Breaking Ground this month. Share with us what you’re working on by using the hashtag #BreakingGround2019 across social media.

As always, thanks for reading today.

**This post may contain affiliate links. If you purchase through my links, I get a small commission to help fund for my sewing hobby.

Tessa Sweater Dress- featuring DG Patterns Ribbed Knit

The Tessa Sweater Dress I made to share this week helps me get close to having all the winter wardrobe pieces I need this year. I really like wearing dresses, but it can be hard to feel warm enough in the cold months, so I’m hoping a nice sweater dress will do the trick.

When Daniela listed this ribbed sweater knit in her shop, I knew I wanted to try sewing with it and hoped it would work for a sweater dress. I’d not sewn a dress with sweater knit before, so I was a little concerned that the length of the piece would cause the fabric to stretch and lengthen when worn. In this case I believe the structure that the ribbing offers and the smaller weave keep things in nice shape.

My plan was to sew up the Tessa Dress last minute to wear for Thanksgiving. I’d look nice, be comfortable all day, and have room for an expanding belly. I came down sick just before the big day and only just got the meal prep I was responsible for complete with the help of my husband- thanks my dear.

Sewing was not happening when I just wanted to crawl into bed, so the Tessa and I missed Thanksgiving. No worries though, I got to wear her to my office Christmas party last week and had a wonderful time.

The Pattern: I used the Tessa Sweater & Dress Pattern from DG Patterns in a size 10 based on my measurements. Through the hips I graded down to an 8 for a closer fit. Depending on the stretch of the fabric, I could easily sew up a straight size 8 next time.

The Fabric: Striped ribbed sweater knit (similar) from the DG Patterns shop.

As always, thanks for reading today.

You can follow me on instagram, Bloglovin, or by entering your email in the right side bar.

You might also like the Lazo Trousers I made in the DG Patterns’ Organic Tencel.

Save For Later: Pin this image, so you can come back when you’re ready to start sewing your version.

*As a DG Patterns Fabric Ambassador I receive complementary fabric from the DG Patterns fabric shop to use for a project in exchange for sharing it with you.

Onyx Shirt in Elephant Print Crepe

I’m slowly getting back into the swing of sewing again with the Onyx Shirt made with the Elephant print crepe woven from the DG Patterns Shop*

I’ve made the Onyx shirt twice before, so I know the fit is just right without any alterations, but this was my first time using the longer sleeve add on for the pattern. I chose the 3/4 sleeve length for a less formal look and because there is a cuff option.

I’m very pleased with my crepe version of the Onyx shirt. I will be watching how well the folded cuff keeps it’s shape in the crepe. Since the crepe does not hold a crisp press, I may need to tack the cuff in place on the outer edge.

The Pattern The Onyx Shirt (with sleeve expansion pack) from Paprika Patterns in a straight size 4. Since I was using a crepe woven for the top,  I used French Seams throughout to keep those seam allowances nice and neat and prevent any fraying down the road.

The Fabric The Elephant print polyester crepe from DG Patterns. This seems like a light/medium weight woven to me. It’s a good weight woven for summer or fall wardrobe pieces. I used a universal size 9 needle and the lowest heat setting on my iron to work with the fabric.

As always, thanks for reading today.

You can follow me on instagram, Bloglovin, or by entering your email in the right side bar.

Save For Later: Pin this image, so you can come back when you’re ready to start sewing your version.*As a DG Patterns Fabric Ambassador I receive complementary fabric from the DG Patterns fabric shop to use for a project in exchange for sharing it with you.

*The post may contain affiliate links. As an affiliate, I receive a sales comission to help with my sewing hobby.


Bonn Shirt – featuring Simply By Ti Stretch Poplin

Here we are with my Itch to Stitch Bonn Shirt made with Simply By Ti’s Stretch Poplin**

I don’t think I’ve sewn a blouse that was easier to make. After muslining the bodice I shortened things up to fit me and it was smooth sailing from there.

The Bonn pattern instructions are super easy to follow, making the construction no big deal.

The only trouble I had with the project was with my button-holer. I’ve used it loads of times, but for this I managed to botch it up over and over again. I think I ripped out the same button-hole on the cuff five times.

The Pattern The Bonn Shirt from Itch to Stitch made in a straight size 6. I shortened the bodice 1/4in at the upper adjustment line and 1/2in at the lower adjustment line. The sleeves are shortened by 1/4in. I did not need to grade out to a larger size for my hips like usual. Next time I may shorten it a little more in the bodice as it is still quite long.

The Fabric Teal stretch poplin from Simply By Ti**  The stretch feels wonderful in the more fitted areas of the Bonn and I’d use this weight of woven for any cool weather season. I had to do a lot of seam ripping and handling of the fabric. With all the back and forth I had to do with this project, the fabric still looked wonderful, had hardly a fray at the edges, and withstood all my unstitching.

As always, thanks for reading today.

You can follow me on instagram, Bloglovin, or by entering your email in the right side bar.

**As a Simply by Ti Ambassador I receive complementary fabric from the Simply By Ti shop to use for a project in exchange for sharing it with you.

This post may contain affiliate links. If you purchase through my links, I get a small commission to help pay for my sewing hobby.

Save For Later

Pin this image, so you can come back when you’re ready to start sewing your version.

ITS Time To Sew an Uvita

Click through the links in the above graphic to see all the posts

ITS about time I sewed up the Free Uvita pattern* from Itch to Stitch (ITS) to wear this fall with my Liana jeans. What Itch to Stitch pattern have you been putting off making? Now’s the time to get it figured out, because during the blog tour this week Kennis is featuring a daily sale. You’ll need to read the days blog posts to find out about the sale patterns. (Read on to see today’s sale and a GIVEAWAY)

The Uvita is a relaxed, dropped-shoulder top perfect for getting comfy and cozy in the cool weather. I wanted to do a colorblocked version in French Terry from my stash and this color combo of greys ended up working the best together. The good thing is I busted some remnants, the bad thing is I made myself yet another grey top to add to my stacks of grey tops for fall/winter.

My new Uvita pairs perfectly with my Liana jeans. The Liana’s are the first pair of pants/jeans I ever made almost two years ago now. Aren’t they holding up well? These are going to last me a good while.

I made my second pair of Liana’s last fall and had a little hiccup with the waistband. I over stretched the front corners so they look weird and I forgot to add the twill tape to stabilize the top edge of the wasitband and that turned out to be a big woopsie in this stretch denim. As I wear them, the top edge of the waistband stretches and flips out in the front. It is totally annoying. I thought I could live with it, but no. These are under alteration so I can love them like they deserve.

My third pair of Liana’s is in the planning stage. I have a medium blue denim washed and ready, but I can’t seem to get past the step where it is just sitting on my cutting table.

If you are ready to get the Liana Jeans Pattern, Itch to Stitch is offering the patterns featured in today’s tour posts for a special one day sale price. The Liana Jeans* are $9 , Mila Top $9, Anza Dress $9, Arenal Top $9, Bonn Shirt & Dress $9, La Paz Jacket $9, and Beasoleil Top & Dress $9. The Uvita top is FREE everyday.

Mabel Madison, one of the tour sponsors is offering $10 off a $50 order with the code ITSTOUR through September 30th.

And yes, there is more…

Visit our sponsors and enter our Rafflecopter giveaway for a chance to win this unbelievable prize package:

Itch to Stitch: 2 PDF patterns of choice
Simply By Ti: Prize of $20 GC

So Sew English Fabrics: Prize of $30 GC
Mabel Madison Modern Makers: Prize of 3 yard coordinated bundle
Sly Fox Fabrics: $25GC
Raspberry Creek Fabrics: $50 GC
Surge Fabric Shop: $20 GC
Organic Cotton Plus: $25 GC
WarmCrochet: Pair of scissors

(ENTER HERE)

As always, thanks for reading today.

You can follow me on instagram, Bloglovin, or by entering your email in the right side bar.

*This post contains Itch to Stitch affiliate links. If you purchase through my links, I get a small commission that I put toward my sewing hobby.

You might like my other Itch to Stitch creations:

Lindy Petal Skirt, Lisbon Cardigan and Liana Jeans #2, Brasov Wrap Top, Paro Cardigan, Liana Jeans #1, Idylwild Tank


Dana Top pattern review

I’ve been keeping it pretty simple in the sewing room this summer. Can we say Summer Break!

Working through my stash has been a motivator though. My feelings about my stash tend to swing between “I’m glad to have this resource” to “I’m never going to be relieved of this burden.” This summer I’ve been in the “stash burden” zone as stash overflow has piled up in front of my fabric shelves.

Making the Dana top and a pair of Chi Town shorts to go with, helped bust through some stash and were pretty easy projects for my lazy summer approach to sewing.

I originally planned to replace the side tie on the Dana with a cool looking buckle, but when it came to it the buckle just looked and felt too heavy. Any suggestions? I feel like something to add a little interest would be good.


The Pattern The Dana top from DG Patterns in size 10. Made without the side tie. I added two hidden snaps along the cross over to keep the top from gaping open at the bust and when I bend at the waist. If you’re looking for an easy pattern that gives you a nicely put together look, I think the Dana top is a good pattern for you.

Chi Town Chino shorts. These are my fourth pair, so nothing new to add. See my previous pairs here and here.


The Fabric Dana was made in a shirt weight woven that I picked up from Hancocks before they closed down. These Chi Towns are made in a cotton twill I picked up from Joann Fabrics.

Total stash busted:  1.25 yards for Dana and 1 yard for Chi Towns.

As always, thanks for reading today.

You can follow me on instagram, Bloglovin, or by entering your email in the right side bar.

This post may contain affiliate links. If you purchase through my links, I get a small commission to help pay for my sewing hobby.

Save For Later

Pin this image, so you can come back when you’re ready to start sewing your version.

Sail Away Tank featuring Simply By Ti Fabrics

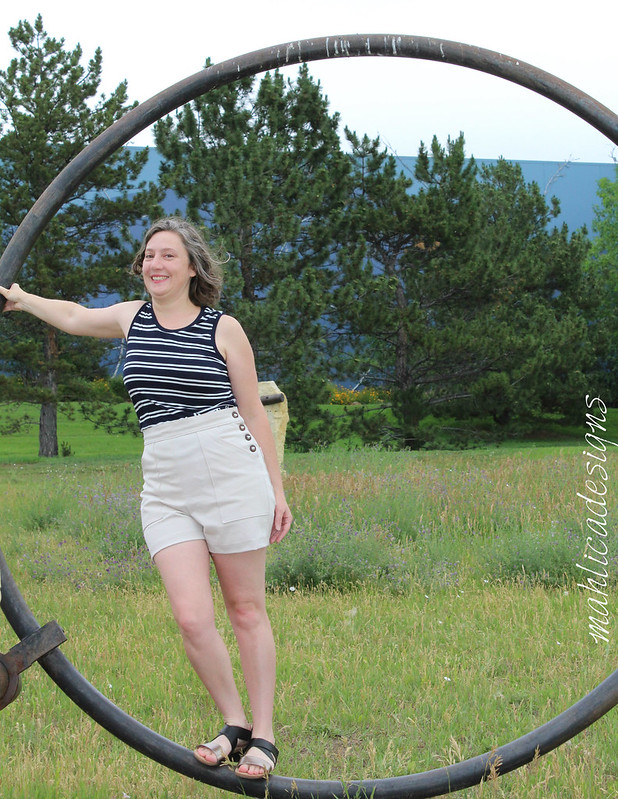
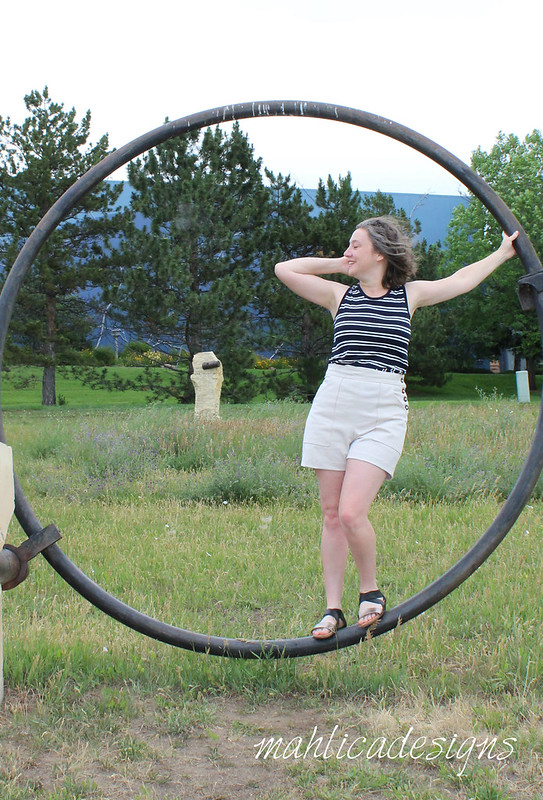
I’m coming at you today with my Sail Away tank hack made with Simply By Ti fabric** My intention was to show my Sail Away outfit together, but I goofed and didn’t get pictures of the tank and Landers together.

See all of my Sail Away outfit inspiration here.

The Pattern The free Durango Tank modified as described below. Size 10. Also shown are the Lander shorts from True Bias.

The Fabrics Navy with ivory stripes rayon for the tank and khaki stretch twill for the shorts. Both from Simply By Ti** Rayon jersey is great for its drape and that’s what I really wanted for the tank to lay well over my hips. The stretch twill is the perfect fabric for shorts. The stretch is great for making a trim fitting pair of Landers, doesn’t bag out, and the weight is just right for bottoms.

The Hack

Durango Tank in size 10. I shortened the tank by 1in at the waist line and did a 1/2in sway back adjustment to fit my particular shape. I also dropped the neckline by 1 in at CF and CB. Next, I traced the full front bodice to draw my contrast piece.

To make my S-curve contrast piece, I measured 9 3/4in up from the CF hem line to mark my natural waistline at the CF and at the left (as worn) side seam. On the right (as worn) side seam I marked 4 1/2in up from the CF hem line. I used my french curve to draw a convex curving line from the left side flattening out at the CF, then curving in a concave curve from CF to the right side.

Grab another piece of tracing paper and trace the bottom of your bodice piece marking the S curved line very clearly. Mark a notch at the CF of the curved line. Make sure you have space above the curve on your new tracing to add a seam allowance. Add your seam allowance to the top of your piece and transfer the CF notch to the new cut line. I use a compass to add seam allowances to curved lines. Be sure to draw your grain line marking and the perpendicular bias line marking if you are going to switch up your stripes like I did. Trim away excess paper from your new pattern piece

Go back to your main bodice piece and add the same seam allowance below the original curve line you drew and mark the CF notch. Trim away the excess paper below the new curve line you’ve drawn.

Now cut out your fabric. Attach the lower portion of the bodice to the top bodice piece before continuing with the pattern instructions as normal.

Make yours even better by making your curve more S-shaped than mine.

As always, thanks for reading today.

You can follow me on instagram, Bloglovin, or by entering your email in the right side bar.

**As a Simply by Ti Ambassador I receive complementary fabric from the Simply By Ti shop to use for a project in exchange for sharing it with you.

You might also like Sail Away Lander shorts.

Save For Later

Pin this image, so you can come back when you’re ready to start sewing your version

Lander Shorts – Who Made It Best

Welcome back to Who Made It Best from mahlicadesigns.


Who Made It Best is a friendly challenge where one of my sewing friends joins me in making up the same pattern to see Who Made It Best. The challenge rules are simple: 1. We agree on a pattern to use 2. sew it up to suit our personal styles 3. share it with you and ask you to vote. (Oh, and we keep what we’re up to a secret from each other)

WMIB Label 4

Arielle from Seen & Sewn Patterns has joined me in making up the Lander Shorts for this week’s challenge. Please also check out Arielle’s blog here to see her super cute version. Isn’t this print she choose wonderful?

Arielle collage

The Lander Shorts are a high waist button fly short/pant pattern with optional expansion pack for a zipper fly.

Lander wm 2

I’ve already made a pair of Lander shorts (here) and pants (here) and was ready to try something different with this pair. My inspiration started with a picture of a side button closure and grew into a board of ideas for what I’m calling my Sail Away outfit.

Lander wm 4

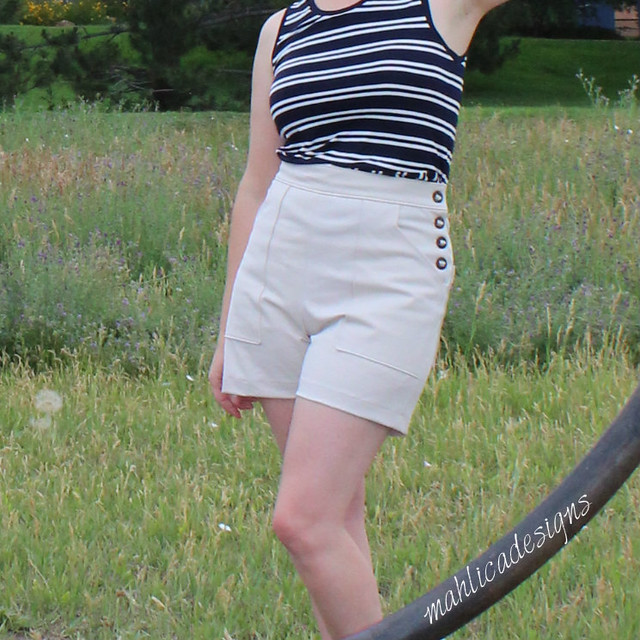
The details I settled on for the shorts are an angled pocket opening, button fly closure moved to the side seam, and a high waist.

I’m wearing a Durango tank from Hey June that I modified with a lower neckline and a contrast piece at the lower bodice. Totally forgot to get photos of that- geesh.

** I’ll have a seperate blog post soon to walk you through how to make these modifications. (Find the tutorial here)

Lander wm 1

Lander wm 5

The Pattern: Lander Shorts made in size 6 and modified as described.

The Fabric: Khaki stretch twill from Simply By Ti. I only needed 1 yard!

Lander wm closeup

So, who do you think made their Landers the best?

Please visit Seen & Sewn Patterns for more pictures of Arielle’s version, then place your vote for Who Made It Best. The poll will be on both blogs, so you can see both versions before you choose your favorite. Voting open for one week and results will be posted on Instagram.

VOTE HERE

You can also take a look at the Bronte Tee, Shoreline Boatneck, Sorbetto Top,  Greenwood Tank, Cheyenne Tunic, Chi Town Chinos, and  Ladies Caroline Dress that were part of past Who Made It Best challenges.

You can follow me on instagram, Bloglovin, or by entering your email in the right side bar.

As always, thanks for visiting and voting today.

Tabor Vneck and Lander Shorts

Have you seen the newly released Tabor Vneck from Sew House Seven?

There are many options to choose from in the pattern, but I was most drawn to the cropped sweater version. I thought it would look great with a pair of Lander Shorts I’ve been planning.


About the Tabor

The Pattern: Tabor Vneck view 5 (cropped sweater) in size medium with no alterations. This is an easy pattern to put together, but setting in the point on a Vneck can be tricky to do without puckers. The pattern instructions walk you through a construction technique for the V that I’ve had the most success with.

The Fabric: The Tabor was sewn using baby French Terry in two toned burgundy from Simply by Ti Fabrics*. This view of the Tabor is made for sweater knits with stretch and the fabric works perfectly. I have the stretch that is required and the baby FT is light enough for spring weather and drapes well.


About the Landers

The pattern: Lander Shorts from True Bias Patterns in size 10. No alterations.

The fabric: Stretch Denim from Simply by Ti Fabrics*. I did not size down to account for the stretch and they fit just fine for photos, but after a hot humid day at a Florida amusement park they were feeling a little loose. I’d go down a size next time. I’d recommend starting with your regular size and slim down at the side seams if needed (this fitting step is included in the pattern instructions anyway).

As always, thanks for reading today.

You can follow me on instagram, Bloglovin, or by entering your email in the right side bar.

*As a Simply by Ti Ambassador I received complimentary fabrics for this post from the Simply By Ti shop to use in exchange for sharing it with you.

You might also like: The Lander Pants I made for the Breaking Ground Blog Tour.

Save For Later

Pin this image, so you can come back when you’re ready to start sewing your versions.


VS Pattern Showdown: 5 Women’s Tank Patterns Go Head to Head

Welcome back to VS.

An occasional series here at mahlicadesigns with the aim of pairing similar style patterns against each other in a friendly showdown to see which pattern better suits me, all while working through my pattern stash.


Today I’m comparing 5 knit tank tops:

Dahlia Tank from Leala Jeyne

Durango Tank from Hey June Handmade

Greenwood Tank from Straight Stitch Designs

Idyllwild Tee from Itch to Stitch

Lago Tank from Itch to Stitch

VS. Tanks front collage 2

The Dahlia Tank is “a well-fitting tank top for use with knit fabrics in cup sizes A-E. The scoop neckline is finished with bindings, not bands, for a professional look. Hip and crop lengths.”

The Durango Tank is a “casual sleeveless shirt with a center back seam and longer flared hem… is fitted at the shoulder and bust and loose through the waist and hip for an easy fit.”

The Greenwood Tank features “a wide open neckline and two back options.”

The Idyllwild Tee is a “fitted t-shirt and dress pattern… jam-packed with options… you can literally make 42 garments with different looks!”

The Lago Tank is a relaxed fit racerback tank with slightly scooped neckline.

For all my tanks I used the 10oz cotton lycra solids from Simply By Ti. I’ve used this C/L in many projects as I love the weight and quality (here & here & here & here & here). As a Simply by Ti Ambassador I received complimentary fabrics for this post from the Simply By Ti shop to use in exchange for sharing it with you.

Now let’s compare.

VS. Tanks front collage 1

VS. Tanks front collage 2

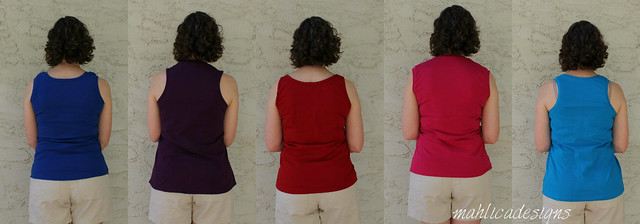
Left to right: Dahlia in Cobalt, Durango in Eggplant, Greenwood in Tomato Red, Idyllwild in Fuchsia, Lago in Turquiose

Instructions.

Dahlia: Beginner friendly and easy to follow. I still managed to finish the neck and arm opening with a band instead of a binding by mistake.

Durango: Beginner friendly and easy to follow.

Greenwood: Beginner friendly and easy to follow. Link to video demonstrating binding technique.

Idyllwild: Beginner friendly and easy to follow. Pattern notches included to line up curved side seams and position the bands.

Lago: Beginner friendly and easy to follow. Pattern notches included to line up curved side seams and position the bands.

VS tanks back collage 1

VS tanks back collage 2

Left to right: Dahlia in Cobalt, Durango in Eggplant, Greenwood in Tomato Red, Idyllwild in Fuchsia, Lago in Turquiose

Fit.

Dahlia: Size small graded to medium at the hip per my measurements. A little bit of bunching at the shoulder seam area.

Durango:  Size 10 per my measurements. Dropped shoulder adjustment of 3/8in was critical to reduce gaping. I don’t think I stretched the binding around the armscye, enough as you can see there is still gaping going on there.

Greenwood: Size 10 per my measurements. Shortened front and back straps by 1/4in and then did a 1/4in dropped shoulder adjustment.  Shortened 1/2in at hemline.

Idyllwild: Size small graded to medium at hips. Shoulder seam sits back about 1/4in from my shoulder point. A 1/4in dropped shoulder adjustment to the front bodice should fix that. Neckband pattern piece seems a tad too long around the CF curve. It will need to be shortened 1/2in.

Lago: Size 6 graded to 8 at the hips. No shoulder adjustment needed (due to racerback shape?) Bands fit perfectly.

** For all these patterns I’ll need a sway back adjustment and to grade the back piece a little larger at the hip to account for my full seat.

VS tanks side collage 3

VS tanks side collage 2

Left to right: Dahlia in Cobalt, Durango in Eggplant, Greenwood in Tomato Red, Idyllwild in Fuchsia, Lago in Turquiose

Style.

Dahlia: Standard and cropped options. I like the gently curved hem.

Durango:  CB seam allows for easy swayback adjustment if needed and potentially easier to use up your remnants. Swing style minimizes the need to grade for wider hips. Racerback bra needed.

Greenwood: Wider scooped neckline. Straps give great coverage.

Idyllwild: Sleeveless style gives more coverage across the shoulders.

Lago: Cute racerback curves, but racerback bra needed.

VS tanks side collage 2

Left to right: Dahlia in Cobalt, Durango in Eggplant, Greenwood in Tomato Red, Idyllwild in Fuchsia, Lago in Turquiose

Investment.

Dahlia: $11  Two length options included.

Durango: $0 One view included.

Greenwood: $10-$12 Two neckline options included.

Idyllwild: $10 includes multiple sleeve, neckline, and length options.

Lago: $0 One view included.

Durango collage

For me, the Durango is the winner. I like the fit through the body and the pattern just needs a little tweaking to adjust for my swayback.

As always, thanks for reading today.

You can follow me on instagramBloglovin, or by entering your email in the right side bar.

This post contains affiliate links, if you purchase through my links I get a small commission to help pay for my sewing hobby.

Save For Later

Pin this image, so you can come back when you’re ready to start sewing your version.


Synthia Top pattern review

We are in the midst of winter here in Colorado and I am longing for spring weather. I find myself sewing a mix of warm clothing for my freezing reality and springy pieces out of hope for the future.


I made up the Synthia Top from Designer Stitch* as part of her pattern testing team and I just adore this blouse. I’m not really into ruffles as they can seam too girlish for me, but this feels feminine and sophisticated.

My floral fabric plus the lightness of the ruffle make me ready for warmer days.


The Pattern Synthia Ruffle Top from Designer Stitch in size 3 (C cup) and shorter length. I used a 9in zipper instead of the 20in length that is recommended and really could have gotten away with not using one at all This will really depend on the person though. The Synthia also comes in a version without the ruffle that will make a great basic piece for your wardrobe.

As is usual for Designer Stitch, the pattern drafting and instructions are top notch. I always appreciate a pattern that comes in different cup sizes saving me the trouble of the alteration. The ruffle is so cleverly constructed that you’ll have a delightful ah-ha moment after you complete it.

The Synthia Top pattern is on sale for $7 (reduced from $10) for a limited time.

The Fabric Stash woven with a lovely drape. Purchased from Boho Fabrics about 2 years ago. Yay for stashbusting!

As always, thanks for reading today.

You can follow me on instagram, Bloglovin, or by entering your email in the right side bar.

*This post may contain affiliate links, if you purchase through my links I get a small portion to help pay for my sewing hobby.

Georgia Top and Alyse Slim Pant featuring Simply By Ti Fabrics

Ladies and gents, today I get to share my first project as a Simply By Ti Ambassador.

You may be pleasantly surprised to see me wearing color and a bold print. I love my cold weather color pallet of all greys, but when I can’t tell one garment from the other in my drawer, it’s time to add in some color.

A few months back I made a pair of the Alyse Tapered Leg pants from Designer Stitch* (unblogged) but they were a tad loose and I didn’t love the silhouette on me. I thought the Slim Leg version might suit me better and wanted to try again. I chose the stretch twill in burgundy from Simply by Ti for this go around. The color is so rich I knew it would make a great wardrobe piece.

For my second pair of Alyse pants I pinched out a little from the center front rise but it looks like I need to do a little more work to eliminate some wiskering. Even though I sewed the same size as before, the slims are a bit snug around my curves, but I’m going to roll with it.

To top off my Alyse Slims, I returned to my TNT Georgia Top from Blue Dot Patterns in a chevron stripe cotton/lycra. I don’t do large prints, so I was worried about if this would overwhelm my frame. I really like how it turned out. The stripe is bold but not overwhelming, makes interesting shapes along the Georgia’s shoulder seam, and gives me a dramatic look.

The outfit is just what I was hoping for.

The Patterns: Alyse Slim Fit Pant from Designer Stitch* in size 4. A 1/2in adjustment to the length of the front rise was done. The Georgia Top from Blue Dot Patterns in size small. 2in added to the length of the arms.

The Fabric Stretch twill in burgandy has great stretch and recovery. It’s just perfect for bottoms and jackets. Chevron stripe cotton/lycra jersey has a great wieght to it to minimize curling and clinging.

As always, thanks for reading today.

You can follow me on instagram, Bloglovin, or by entering your email in the right side bar.


As a Simply by Ti Ambassador I receive complementary fabric from the Simply By Ti shop to use for a project in exchange for sharing it with you.

*This post may contain affiliate links, if you purchase through my links I get a small portion to help pay for my sewing hobby.


Chi Town Chinos- Who Made It Best

Welcome back to Who Made It Best, a series on mahlicadesigns.

Who Made It Best is a friendly challenge where one of my blogger friends joins me in making up the same pattern to see Who Made It Best. The challenge rules are simple: 1. We agree on a pattern to use 2. sew it up to suit our personal styles 3. share it with you and ask you to vote. (Oh, and we keep what we’re up to a secret from each other)

Ct side by side 2 label

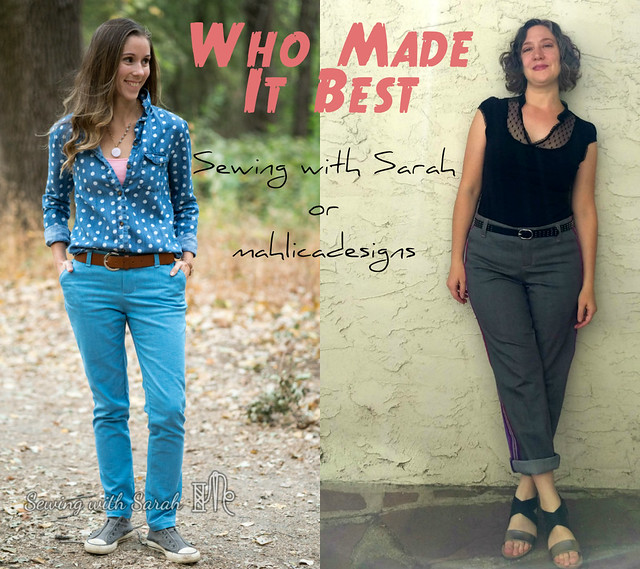
Sewing with Sarah has joined me in making up the Chi Town Chinos for this week’s challenge. The Chi Town Chinos are a relaxed fit short and skirt pattern with optional expansion packs for a fitted trouser or fitted longer short. Alina Sewing & Design was so kind to provide Sarah with a complimentary copy of the original pattern plus expansion pack for our challenge.  Please check out Sarah’s blog here to see what she made.

I’ve had the inspiration for todays Chi Town jean hack waiting on a Pinterest board until my pant making chops were a little more practiced and for the right boyfriend cut jean pattern to come my way. I had been waiting for the Morgan boyfriend jean pattern to go on sale, when a facebook friend pointed out that I could use my Chi Town pattern instead. Bingo!

To get the boyfriend cut look, I added 1/2in at the hem line to both the inseam and outseam of the front and back pieces, then graded that increase down to zero just above the knee point. Next, I added width to the pocket pattern piece so I could add a couple tucks to the pocket detail.

My final pattern modification was to shift the location of the side seams. I wanted the woven striped panel to cover part of the front and back side while still being able to encase the raw edge of my striped woven. I trimmed away 1in from the side seam of the front piece and added 1in to the side seam of the back piece.

After my pattern alterations I was able to follow the pattern instructions like usual to construct the pants, with one additional step. Before sewing up the side seams, I basted the woven panel to the side seam edge of the back piece and also topstitched the selvage edge of the woven down.

Details for my enjoyment: 1. Hong Kong finished side seams 2. bound waistband facing 3. label on the fly shield 4. tuck detail on the pocket.

Blooper reel: 1. button-hole is wonky and a smidge tight 2. I made the front pockets effectively useless by shifting the side seam.

The Pattern: Chi Town Chino Expansion pack #2 made in size 6 and altered as described.

The Fabric: Grey stretch denim(sold out)  from Finch Fabrics and what I think is a Guatemalan striped woven from inherited stash. The stretch in my denim is a big player in accomplishing the boyfriend fit.

So, who do you think made their Chi Town’s best? Please visit Sewing with Sarah for more pictures and details on her version, then place your vote for Who Made It Best. The poll will be on both blogs, so you can see both versions before you choose your favorite. Voting open for one week and results will be posted on Instagram.

VOTE HERE

You can also take a look at the Bronte Tee, Shoreline Boatneck, Sorbetto Top,  Greenwood Tank and Cheyenne Tunic that were part of past Who Made It Best challenges.

Are you interested in a challenge? Contact me at mahlicadesigns@gmail.com to join in the WMIB fun for 2018.

You can follow me on instagram, Bloglovin, or by entering your email in the right side bar.

As always, thanks for visiting and voting today.

Brasov Wrap Top

Kennis of Itch to Stitch has created the Holy Grail in the Brasov Wrap Top: a wrap top with a modest neckline. I didn’t think it was possible, but look at how she did it.

There’s so much to like in this top. The high back neck that smoothly transitions into the front neckline, pleats at the shoulders and side to create nicely draping folds across the bodice, and a curving hem line to reflect the feminine lines of the wrap and draping.

The Brasov fits very comfortably, but I find myself fiddling with the crossover so it won’t lay too high across my chest.  I’ll resolve this by lowering the front neckline just a bit next time.

The Pattern: Brasov Wrap Top from Itch to Stitch in a size 6 graded to size 8 at the hips with no other alterations. I did not have to shorten the sleeves as usual for me, Kennis did lengthen the sleeves in the final pattern. (I sewed my Brasov as part of the pattern testing group )

The Fabric: Tomato red cotton/lycra jersey from Simply by Ti. Ti’s cotton/lycra is a little heavier weight which I like for most of my sewing.

You can follow me on instagramBloglovin, or by entering your email in the right side bar.

*I received the Brasov for free as a pattern tester. I have included Itch to Stitch affiliate links.


Sew Long Summer…hello Chi Towns and Toaster Sweater

I’m saying Sew Long Summer with two items that have been a long time coming.

I’ve needed a classic pair of trousers (that fit), since my son was born five years ago.

Feeling pretty good about the Chi Town Chino shorts that I’ve been making, it seemed a natural choice to use the Chi Town expansion pack to make my first pair of trousers.

I’m really pleased with how they came out; though after an hour and a half into making the welt pockets I thought I’d never reach the end of them. Hang in there, the pockets come out so nicely and the rest of the pant moves along quickly.

The Pattern: Chi Town Chino Pants (expansion pack) in Size 8.

The Fabric: Black twill from Imagine Gnats (now sold out)

For my top, I’m revisiting the Toaster Sweater. When I made it last spring (here) I honestly didn’t think I’d make another one, but it turns out the Toaster was just the pattern for showcasing my surface design idea.

I’ve had my heart set on some tapir fabric since seeing some on etsy last year. After watching Elizabeth Made This use fabric stamping so often, I was really encouraged that I could give stamping my own fabric a try (it took about a year of thinking about it though).

I used a Speedball kit (similar) and Jacquard fabric paint from my stash. I think I spent about thirty minutes carving the stamp and another ten stamping the fabric. After Elizabeth’s advice, I heat set the fabric paint for a good five minutes and let the fabric dry an additional week before laundering. So far so good.

The pattern: Toaster Sweater from Sew House Seven size medium with no alterations.

The fabric: French terry in mint from Simply by Ti Fabrics – oh my goodness is this so soft and cozy.

As always, thanks for reading today. I hope you’ll visit todays bloggers in the Sew Long Summer Blog tour.

Tuesday: mahlicadesigns, My Heart Will So On, Couturious, Anne-Mari Sews, Adventures With Bubba and Bug


Cheyenne Tunic- Who Made It Best

Welcome back to Who Made It Best, a series on mahlicadesigns.

Who Made It Best is a friendly challenge where one of my blogger friends joins me in making up the same pattern to see Who Made It Best. The challenge rules are simple: 1. We agree on a pattern to use 2. sew it up to suit our personal styles 3. share it with you and ask you to vote. (Oh, and we keep what we’re up to a secret from each other)

Victoria from Very Blissful has joined me in making up the Cheyenne Tunic from Hey June Handmade** for this weeks challenge. Please check out Victoria’s version here.

I chose to do two hacks on my Cheyenne for the challenge. The first was to make it sleeveless following the tutorial on the designers blog, well, because it’s July and I’m hot.

The tutorial is ok if you are comfortable with drafting, but I’m not the “just draw a new armscye” type. I redraft my patterns all the time, but freehanding an armscye curve leaves too much room for error for my taste. This tutorial/hack will work best if you have a tnt sleeveless pattern that you can trace off.

My second hack was to extend the right collar band across the front to make a key hole opening.  You can see below how I extended the collar band out 2.5in from the bottom edge and retraced the curved leading edge. I could use a smidge more room for the button-hole, so you might try extending it out 3in if you want to copy my look.

I’ve been needing to try more of the blouse patterns in my stash, so I’m very glad Victoria asked to make the Cheyenne for the challenge. White blouses are always a staple in my mind and I feel like I have a winner with this one.

So, who do you think made their Cheyenne Tunic best? Please visit Very Blissful for more pictures and details on her version, then place your vote for Who Made It Best. The poll will be on both blogs, so you can see both versions before you choose your favorite. Voting open for one week and results will be posted on Instagram.

VOTE HERE

You can also take a look at the Bronte Tee, Shoreline Boatneck, Sorbetto Top and Greenwood Tank that were part of past Who Made It Best challenges.

You can follow me on instagram, Bloglovin, or by entering your email in the right side bar.

As always, thanks for visiting and voting today.

**This post may contain affiliate links, if you purchase through my links I get a small portion to help pay for my sewing hobby.

Greenwood Tank – Who Made It Best

Welcome back to Who Made It Best, a series on mahlicadesigns.

Who Made It Best is a friendly challenge where one of my blogger friends joins me in making up the same pattern to see Who Made It Best. The challenge rules are simple: 1. We agree on a pattern to use 2. sew it up to suit our personal styles 3. share it with you and ask you to vote. (Oh, and we keep what we’re up to a secret from each other)

Elizabeth from Elizabeth Made This has joined me in making up the Greenwood Tank from Straight Stitch Designs for the challenge and you can check out her version here.

Almost everyone needs summer tanks and they are a wardrobe workhorse for me in my non air-conditioned house, but to be honest I struggled a little with how to make a straight forward design seem interesting enough for the Who Made It Best challenge. My challenger, Elizabeth, is a whiz at pattern hacking and surface design, so I felt pretty intimidated trying to go one of these routes and they really didn’t feel “me” for this project.

I put together a Greenwood Inspiration pinterest board with all kinds of ideas I want to try, but I settled on accenting the geometric print of my fabric with a triangular insert at the center back neckline. This does feel “me”.

For the body of my Greenwood, I used the Circuit Ashen knit from Art Gallery fabrics and a stretchy metallic looking mystery fabric for the triangle insert.

I was super careful getting the placement correct for the triangle insert; measuring and double checking and I still got that sucker kinda crooked. Gah!

So, who do you think made the Greenwood Tank best? Please visit Elizabeth Made This for more pictures and details on her version, then place your vote for Who Made It Best. The poll will be on both blogs, so you can see both versions before you choose your favorite. Voting open for one week and results will be posted on Instagram.

VOTE HERE

You can follow me on instagram, Bloglovin, or by entering your email in the right side bar.

You can also take a look at the Bronte Tee, Shoreline Boatneck, and Sorbetto Top that were part of past Who Made It Best challenges.

As always, thanks for visiting and voting today.

Ella Cami & Shortie set from Designer Stitch

I got to test out* the new Ella Cami set from Designer Stitch last week and now I feel complete, in the summer pj department : )

I love the loose flowing pieces to keep me cool and feel pretty on trend with the ruffled cami.

You can also style the cami as a summer top. It works perfectly with my Chi Town chino shorts.

The Pattern and my alterations: The Ella Cami set from Designer Stitch includes a cami with ruffled band and a flowing bottom in short or pant length. I made two alterations to the pattern. I’m not a big ruffle person, so I took a total of 10 inches out of the length (front and back) of the ruffle band. I still think there’s plenty of ruffle here. On the shorties I added my usual 1 inch Full Seat Adjustment (FSA) and lowered the rise (front & back) by 3 inches making them a low rise short. If lowering your rise, be sure to check that you are leaving enough room for the elastic casing above the top of your pockets. My casing landed just above the pockets and I might consider lowering it another 3/8in next time so I can secure my pocket bags under the casing seam to keep them in place.

The Fabric I found this delightful Mini Floral rayon woven at Joann Fabrics amongst a ton of polyester in their Silky category. I used about 2 yards for my cami and shorties set.


The Ella Cami set and all Designer Stitch patterns are on sale for a limited time. Now’s the time to grab them up.


As always, thanks for reading today.

You can follow me on instagramBloglovin, or by entering your email in the right side bar.


This post may contain affiliate links, if you purchase through my links I get a small portion to help pay for my sewing hobby.

*I received a free copy of the Ella pattern in exchange for my work reviewing the pattern instructions before release. These are my straight up thoughts on the pattern.

Laela Jeyne Summer Collection has landed

Main Blog tour graphic

After making my two sets of the Comfy Cozy pajamas, I knew I wanted to try more from Laela Jeyne patterns. Then she started giving hints on instagram of a new collection including a cool looking swim suit. Can you guess what’s next? Oh, yes. I’m hopping on a blog tour to show off the new Summer Collection from Laela Jeyne.

I’m not ready to take on sewing a swim suit yet; but, inspired by Mallory of the Self Sewn Wardrobe I decided to take a big step out of my comfort zone and chose to make the cropped Dahlia tank top and Rose circle skirt*. Did you see me say cropped?

The axiom with cropped tops is balance your coverage: If you show a little abdomen, then have more coverage elsewhere like with a higher neckline or sleeves on your top. Full coverage on your bottom half; like a maxi skirt or pants is a good counter balance too. I’ll be honest, I had a big fear about showing too much skin and I was pretty anxious that a cropped tank top and a knee-length skirt was not going to give me enough balance between reveal and coverage.

Well, sometimes you just don’t know until you try. I made up the tank first and was elated at the fit and coverage. Yes-coverage in a cropped tank. First off, the Dahlia tank comes with cup sizes A-E, so you’re saved an FBA to avoid a tight fit across the bust, the front and back hem line scoops very nicely for a more subtle cropped look, and a good neckline and sleeve width give good coverage up top.

With the tank complete, I moved onto the Rose circle skirt. The skirt partners perfectly with the cropped tank since you choose your skirt size by measuring where you want it to sit on you. Wear it low on your hips if you like or wear it high for more coverage. I made my Rose to sit right at my natural waist. I’m showing less skin this way and most of my mommy tummy is hidden.

The Rose comes in quarter, half, and full circle options; as well as multiple length options ranging from mini to maxi. I went with the quarter circle and the 20in length and it’s just the look I like. I’m so glad to have this versatile pattern at the ready. A circle skirt pattern is a wardrobe basic that I’ve been missing.

I love how the outfit turned out and my fears about being too revealing where resolved by the design of the Dahlia tank and the fit options of the Rose skirt. I can’t believe how fast these patterns sew up and how little fabric I used. I think I spent about an hour on each of them and about 1 yd x 30in for each pattern.

So are cropped tops for you? I didn’t think they were for me, so maybe you should give it a try. If you don’t like it for streetwear, a cropped tank would be great for summer sleepwear.

Please, would you take a minute to look at what the other bloggers in the tour have made up from the Summer Collection? I’m sure they’d love you to stop by and share your thoughts.

Monday Anna’s Heirloom BoutiqueSwimming in a Sea of EstrogenOlive Ashby

Tuesday MahlicaDesignsPear Berry LaneSewing with Sarah

Wednesday Sewn at SeamsNini and AshThe Crafting FiendSew a Piece of Joy

Thursday I am Mami de SofionaSew and Tell ProjectMy Heart Will Sew On

Friday LoveThings!Idle SunshineLovely for LifeNeva Couture


As always, thanks for reading today.

You can follow me on instagramBloglovin, or by entering your email in the right side bar.

*Laela Jeyne provided the Dahlia and Rose patterns to use for my post. These are my straight up opinions.

This post may contain affiliate links, if you purchase through my links I get a small portion to help pay for my sewing hobby.

Bronte Top – Who Made It Best

Welcome back to Who Made It Best, a new series on mahlicadesigns.

Who Made It Best is a friendly challenge where one of my blogger friends joins me in making up the same pattern to see Who Made It Best. The challenge rules are simple: 1. We agree on a pattern to use 2. sew it up to suit our personal styles 3. share it with you and ask you to vote. (Oh, and we keep what we’re up to a secret from each other)

Rachel from Sew RED-y has joined me in making up the Bronte Top from Jennifer Lauren Handmade for the challenge and you can check out her version here.

This is my first try at making a Bronte Top and I’d say it’s only a so so try. I was between sizes and accidentaly cut the size smaller instead of the size up. I’m getting pulling and bunching on the shoulder overlap and the shoulder seam is pretty wonky. After I snapped these photos, I noticed I completely missed the instructions to tack them down to prevent this very problem.

I’m not sure if I can get over the snug fit on this one. I feel like I prespire a lot, so tops that are snug under my arms make me very uncomfortable.

On the bright side, I’m very pleased with this outfit. I’m a chicken when it comes to mixing prints, but I think these work well together.

So, who do you think made the Bronte Top best? Please visit Sew RED-Y for more pictures and details on her version, then place your vote for Who Made It Best. The poll will be on both sites, so you can see both versions before you choose your favorite. Voting open for one week and results will be posted on Instagram.

VOTE HERE

You can follow me on instagram, Bloglovin, or by entering your email in the right side bar.

As always, thanks for visiting and voting today.

If you’d like to join me in a challenge this fall, shoot me a message at mahlicadesigns@gmail.com