Lily Wrap Skirt- Let’s Sew Together

Designer Stitch is developing a set of Let’s Sew Together patterns that are designed to be sewn with a novice or friend that you can help along the way and share the love of sewing with.

The concept of having a line of patterns that are beginner friendly and bring people together is so lovely and Ann of Designer Stitch really hit the mark in the first implementation of her idea- the Lily Wrap Skirt.

Lily 1

Why the Lily works.

The design is interesting with the two sides that fold over each other, reminding me of origami and there’s something about the shaping that brings to mind mathematical curves and lines.

The Lily is not only a beginner friendly pattern but it is thoughtful in its design to make it easy to help someone brand new to sewing. For example: 1. A 1/4in seam allowance is used along the curved edge with the tab. The narrower seam allowance removes the need to clip along that curve saving time and construction steps. 2. Using hook and loop as a closure is simple and easy to apply and much quicker that other types of closures.  3. The need for fitting is minimized. You may need to adjust your darts, but no alteration to fit the width of your waist or hips is needed in this design.

The Lily also works because it’s a great project to use fun fabrics with and heck, a reversible skirt is fun for all ages.

buckle close up

Take your Lily to the next level

After making the Lily, I have a few notes on how to add some of your intermediate sewing skills to the project. 1. Upgrade your closures. I used buckles and a hidden slide clasp because I’m not planning on wearing mine as reversible. Sewing with D used some really cute buttons on hers. 2. Add a facing or interface your waistband edge. The waistband is a turned over edge, I think this is probably fine for most, but I just feel like I need a little more support in my waistband.

Lily 3

How to partake in the fun without a “novice” to sew with you.

The timing wasn’t right for me to work with someone who would need a little help learning to sew the Lily skirt, so I explored two other options. Firstly, I paired with Diane of Sewing with D to talk through the process using video chat in facebook messenger. Secondly, since Elizabeth of Elizabeth Made This and I live in the same city, we arranged to do a sewing meet up to work on our skirts together.

In the initial chat with Diane we talked about the pattern, fabrics, and ideas we were considering. We were able to work out any questions we had about the pattern, get a second opinion about fabric choices, and of course just chat about whatever. Our second video conversation took place after we both had most of the construction completed. We talked about what we might do differently the next time we made the pattern, shared pictures of button and buckles we were deciding on and gave our opinions, and of course more sewing chit-chat. Most of my sewing friends are online, so I really liked having the video chats with Diane, whom I’d been acquainted with for some time, but never actually spoken to or met with in person.

Meeting with Elizabeth in person was another fun way to work on the project. We shared some tea and cinnamon rolls and then as two moms with limited sewing time are want to do, got right down to the business of sewing. Now neither Elizabeth or I need hand holding, but it is really nice to be able to say “what are you doing here”, or “how are you coming along on this step” and so on. So much better than talking to myself in my sewing room.

Thanks Elizabeth and Diane for being my sewing buddies on this project!

Lily 2

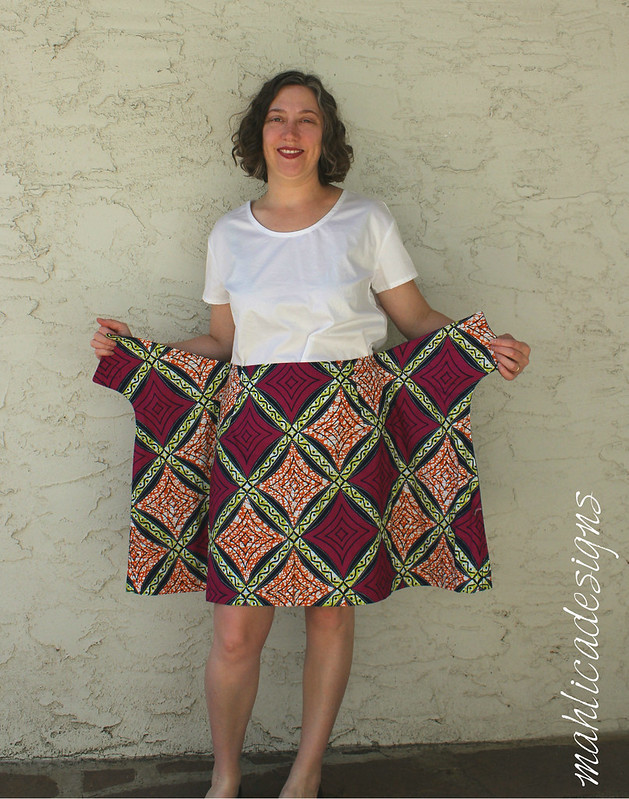
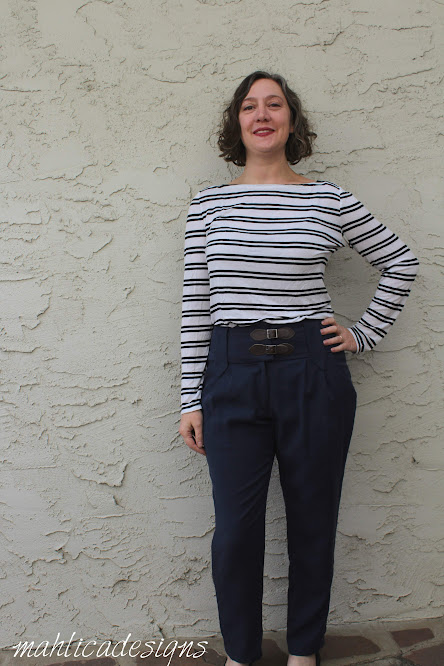
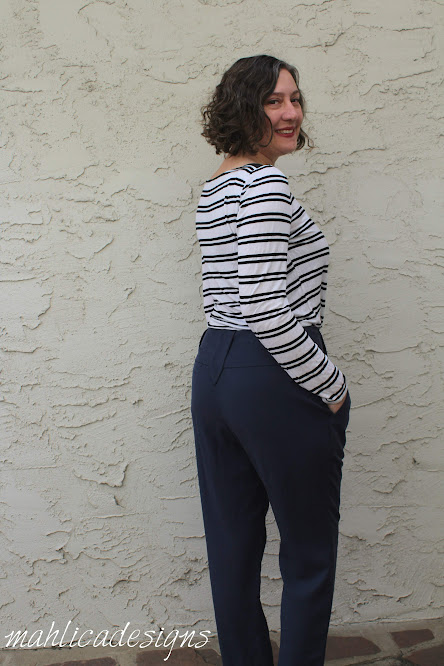
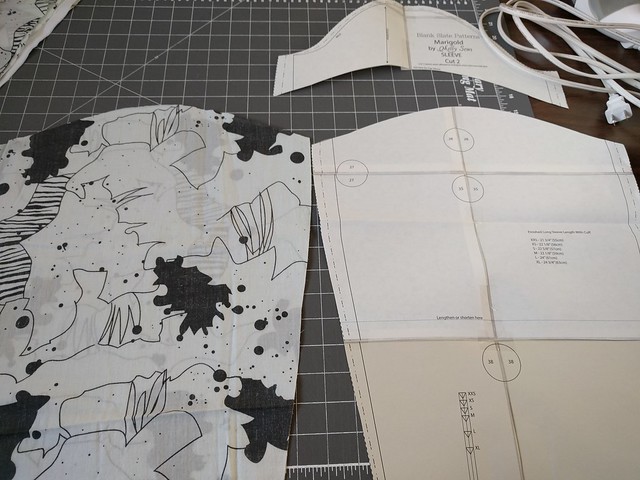
The Pattern: Lily Wrap Skirt in size 4. I shortened mine by 4in to hit above my knee.

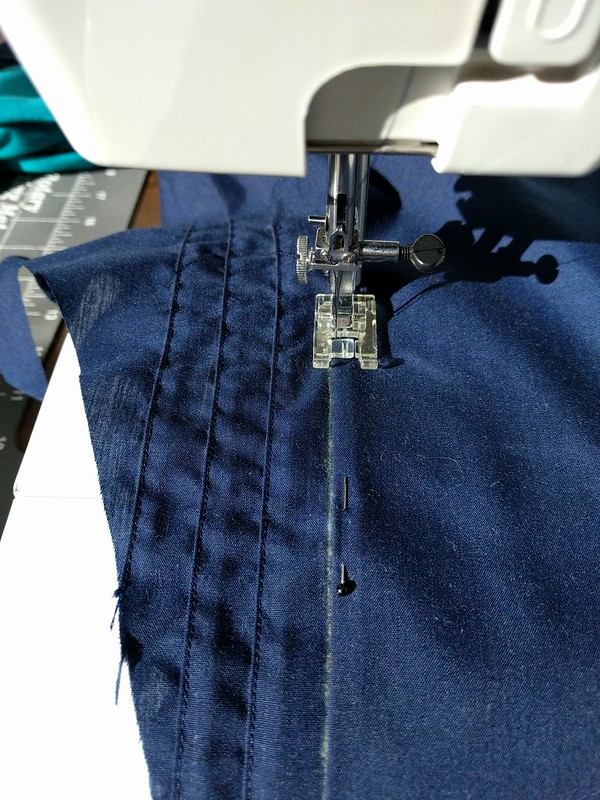
The Fabric: Navy cotton sateen and a cotton wax print from my stash.


As always, thanks for reading today.

You can follow me on instagram, Bloglovin, or by entering your email in the right side bar.

This post may contain affiliate links, if you purchase through my links I get a small commission to help pay for my sewing hobby.

Save For Later

Pin this image, so you can come back when you’re ready to start sewing your version.

Lazo Trousers from Thread Theory- featuring DG Patterns Organic Tencel

It took me about a month to get it done, but I sewed up my first pair of Lazo Trousers from Thread Theory. The pattern isn’t hard at all, November was just slow going on the sewing front.

I originally picked up the Lazo pattern hoping to use them to knock off this look I found on pinterest, but my interest in that project has waned.

Picking up a big bag full of discounted closures at Hobby Lobby did bring the Lazos back into focus though. I really like the look they have with two buckles at the waistline and now I can totally do that.

The Pattern: Lazo Trousers in size 10 and shortened 2in. After my muslin, I pinched out a 1/2in wedge from the center back yoke.

Pattern feedback- 1. you should stay-stitch the upper edge of the pants after making your pleats, not after you’ve constructed the whole pant and inserted the fly. I didn’t have a problem with my fabric stretching, but play it safe and do this step early on.  2. I’m not a fan of attaching the zipper to the fly shield as it doesn’t look as neat on the inside. I really like the fly insertion instructions from the Liana Jeans and often use them when making other pants. 3. I inserted the belt tabs into the waistband seam for extra security and a neater finish.

The Fabric: Organic Tencel in navy from DG Patterns shop. If you haven’t sewn with tencel yet I really encourage you to pick some up and give it a whirl. Tencel has nice drape and is super soft to the touch. The silk setting on my iron seamed to work best in combination with a pressing cloth. Direct pressing tended to leave a mark and slight sheen on multiple layers. Tencel woven is one of the recommended fabrics for the Lazos and would work well with any pant, skirt, or dress that needs a nice drape.

As always, thanks for reading today.

You can follow me on instagram, Bloglovin, or by entering your email in the right side bar.

*As a DG Patterns Fabric Ambassador I receive complementary fabric from the DG Patterns fabric shop to use for a project in exchange for sharing it with you.

You might also like The modern striped boatneck top I’m wearing.

Save For Later: Pin this image, so you can come back when you’re ready to start sewing your version.

Dana Top pattern review

I’ve been keeping it pretty simple in the sewing room this summer. Can we say Summer Break!

Working through my stash has been a motivator though. My feelings about my stash tend to swing between “I’m glad to have this resource” to “I’m never going to be relieved of this burden.” This summer I’ve been in the “stash burden” zone as stash overflow has piled up in front of my fabric shelves.

Making the Dana top and a pair of Chi Town shorts to go with, helped bust through some stash and were pretty easy projects for my lazy summer approach to sewing.

I originally planned to replace the side tie on the Dana with a cool looking buckle, but when it came to it the buckle just looked and felt too heavy. Any suggestions? I feel like something to add a little interest would be good.


The Pattern The Dana top from DG Patterns in size 10. Made without the side tie. I added two hidden snaps along the cross over to keep the top from gaping open at the bust and when I bend at the waist. If you’re looking for an easy pattern that gives you a nicely put together look, I think the Dana top is a good pattern for you.

Chi Town Chino shorts. These are my fourth pair, so nothing new to add. See my previous pairs here and here.


The Fabric Dana was made in a shirt weight woven that I picked up from Hancocks before they closed down. These Chi Towns are made in a cotton twill I picked up from Joann Fabrics.

Total stash busted:  1.25 yards for Dana and 1 yard for Chi Towns.

As always, thanks for reading today.

You can follow me on instagram, Bloglovin, or by entering your email in the right side bar.

This post may contain affiliate links. If you purchase through my links, I get a small commission to help pay for my sewing hobby.

Save For Later

Pin this image, so you can come back when you’re ready to start sewing your version.

McCalls7351 Shirt Dress pattern review

Here’s a little story about the Who Made It Best Challenge that isn’t.

I’ve come close to making the popular shirtdress style when I made a Marigold dress a couple years back, but I hadn’t felt like I was losing out on anything by not having a proper one. When Stephanie from the Petite Sewist, suggested the M7351 shirtdress to do together for a Who Made It Best challenge, I was ok with the idea but didn’t think I’d wear it much outside of church on Sunday.


As we worked on our muslins, I found I had to go down a full size in the bodice and was alright from there. Stephanie was so frustrated getting the fit correct that she has put it in the naughty corner. The challenge was off, but I was starting to like the dress.


As I worked through the project I  relearned the lesson to read through the directions ahead of time.  Where I got burned on this was the instruction to hand stitch the entire placket and neckband facing – that equals about 8 feet of hand stitching on my dress. After doing all that handstitching, the next step is to topstitch all along that same seam. Gosh darn it, I could have just topstitched and skipped all that hand stitching. Catherine Daze’s Blog found the same thing in another McCalls shirtdress pattern too.


One of the final steps is the turn under and hem the sleeves. I just didn’t like the look of this, so I settled on the idea of adding a cuff. Going through my patterns I found the cuff from the Onyx Shirt by Paprika Patterns would give the look I was going for. First I shortened the sleeve by 1 1/2in at the hem line and determined that a size 7 cuff from the Onyx would fit my new opening, then attached the cuff following the directions for the Onyx.


The Pattern McCalls7351 view B with no pockets. Size 14 C cup in the bodice and size 16 skirt. My measurements put me in a straight size 16 but after muslining the bodice I sized down to the 14.  Sleeve shortened by 1.5 inches and I added the size 7 cuff from the Onyx shirt pattern.

The Fabric Robert Kauffman yarndye in wineberry. Used 2.5 yards


As always, thanks for reading today.

You can follow me on instagram, Bloglovin, or by entering your email in the right side bar.

You may also like to see: my Marigold Dress

Save for later

VS Pattern Showdown: 5 Women’s Tank Patterns Go Head to Head

Welcome back to VS.

An occasional series here at mahlicadesigns with the aim of pairing similar style patterns against each other in a friendly showdown to see which pattern better suits me, all while working through my pattern stash.


Today I’m comparing 5 knit tank tops:

Dahlia Tank from Leala Jeyne

Durango Tank from Hey June Handmade

Greenwood Tank from Straight Stitch Designs

Idyllwild Tee from Itch to Stitch

Lago Tank from Itch to Stitch

VS. Tanks front collage 2

The Dahlia Tank is “a well-fitting tank top for use with knit fabrics in cup sizes A-E. The scoop neckline is finished with bindings, not bands, for a professional look. Hip and crop lengths.”

The Durango Tank is a “casual sleeveless shirt with a center back seam and longer flared hem… is fitted at the shoulder and bust and loose through the waist and hip for an easy fit.”

The Greenwood Tank features “a wide open neckline and two back options.”

The Idyllwild Tee is a “fitted t-shirt and dress pattern… jam-packed with options… you can literally make 42 garments with different looks!”

The Lago Tank is a relaxed fit racerback tank with slightly scooped neckline.

For all my tanks I used the 10oz cotton lycra solids from Simply By Ti. I’ve used this C/L in many projects as I love the weight and quality (here & here & here & here & here). As a Simply by Ti Ambassador I received complimentary fabrics for this post from the Simply By Ti shop to use in exchange for sharing it with you.

Now let’s compare.

VS. Tanks front collage 1

VS. Tanks front collage 2

Left to right: Dahlia in Cobalt, Durango in Eggplant, Greenwood in Tomato Red, Idyllwild in Fuchsia, Lago in Turquiose

Instructions.

Dahlia: Beginner friendly and easy to follow. I still managed to finish the neck and arm opening with a band instead of a binding by mistake.

Durango: Beginner friendly and easy to follow.

Greenwood: Beginner friendly and easy to follow. Link to video demonstrating binding technique.

Idyllwild: Beginner friendly and easy to follow. Pattern notches included to line up curved side seams and position the bands.

Lago: Beginner friendly and easy to follow. Pattern notches included to line up curved side seams and position the bands.

VS tanks back collage 1

VS tanks back collage 2

Left to right: Dahlia in Cobalt, Durango in Eggplant, Greenwood in Tomato Red, Idyllwild in Fuchsia, Lago in Turquiose

Fit.

Dahlia: Size small graded to medium at the hip per my measurements. A little bit of bunching at the shoulder seam area.

Durango:  Size 10 per my measurements. Dropped shoulder adjustment of 3/8in was critical to reduce gaping. I don’t think I stretched the binding around the armscye, enough as you can see there is still gaping going on there.

Greenwood: Size 10 per my measurements. Shortened front and back straps by 1/4in and then did a 1/4in dropped shoulder adjustment.  Shortened 1/2in at hemline.

Idyllwild: Size small graded to medium at hips. Shoulder seam sits back about 1/4in from my shoulder point. A 1/4in dropped shoulder adjustment to the front bodice should fix that. Neckband pattern piece seems a tad too long around the CF curve. It will need to be shortened 1/2in.

Lago: Size 6 graded to 8 at the hips. No shoulder adjustment needed (due to racerback shape?) Bands fit perfectly.

** For all these patterns I’ll need a sway back adjustment and to grade the back piece a little larger at the hip to account for my full seat.

VS tanks side collage 3

VS tanks side collage 2

Left to right: Dahlia in Cobalt, Durango in Eggplant, Greenwood in Tomato Red, Idyllwild in Fuchsia, Lago in Turquiose

Style.

Dahlia: Standard and cropped options. I like the gently curved hem.

Durango:  CB seam allows for easy swayback adjustment if needed and potentially easier to use up your remnants. Swing style minimizes the need to grade for wider hips. Racerback bra needed.

Greenwood: Wider scooped neckline. Straps give great coverage.

Idyllwild: Sleeveless style gives more coverage across the shoulders.

Lago: Cute racerback curves, but racerback bra needed.

VS tanks side collage 2

Left to right: Dahlia in Cobalt, Durango in Eggplant, Greenwood in Tomato Red, Idyllwild in Fuchsia, Lago in Turquiose

Investment.

Dahlia: $11  Two length options included.

Durango: $0 One view included.

Greenwood: $10-$12 Two neckline options included.

Idyllwild: $10 includes multiple sleeve, neckline, and length options.

Lago: $0 One view included.

Durango collage

For me, the Durango is the winner. I like the fit through the body and the pattern just needs a little tweaking to adjust for my swayback.

As always, thanks for reading today.

You can follow me on instagramBloglovin, or by entering your email in the right side bar.

This post contains affiliate links, if you purchase through my links I get a small commission to help pay for my sewing hobby.

Save For Later

Pin this image, so you can come back when you’re ready to start sewing your version.


Juliet Bodysuit for It’s Gonna Be May tour

Hi sewing friends.  Today I’d like to share something new that I’ve tried for the It’s Gonna Be May blog tour. Brought to you by Petite Stitchery & Co. (Tour details and a giveaway are below-read on)

You may have noticed that I’m pretty slow to follow trends, so again I’m behind the curve on the popular bodysuit. Bodysuits seamed like a bear to fit and I couldn’t see a use for one in my wardrobe. Until now.

We’ll be taking a flight soon and I’m one of those people who has an ideal for what to wear on a plane. I want my legs covered so my skin isn’t touching those super gross seats. I have to carry bags and keep track of a little boy, so I want clothes that are fuss free: no retucking, no riding up, and minimal adjusting. I also like knits so I’m not a wrinkled mess at the end of the day.

I’d already worked out that I like to wear jeans in winter and skirts in summer, but I still struggled with the right topper that didn’t need continual adjusting. Then it dawned on me, a bodysuit!

The Juliet bodysuit and skirt from Petite Stitchery & Co. will make the perfect outfit for plane travel. It ticks off all my boxes.

The Pattern

The Juliet bodysuit in size large with no alterations. I chose to do the low scoop back and full coverage seat. I cut and sewed my lining first to test the fit. I trimmed a little away from the cheek area on the back piece and was good to go. My fitting worries came to nothing.

Next time I’d take advantage of the built-in swayback adjustment.

The Juliet circle skirt size large and cut at the xsmall midi-length hemline for length. Altered to be a 1/4 circle skirt and waistband shortened to 6in finished depth.  I’m not going to share how I made the alteration to a 1/4 circle skirt because I messed it up royally. You really can’t see it on, but believe me it’s there.

Next time, I’ll choose a longer length- just an inch more would be great.

Petite Stitchery provided a complementary copy of the Juliet pattern for me to use in my post.

The Fabric

For the bodysuit- about 3/4 yard each of Art Galley cotton/lycra paired with a rayon/spandex jersey for the lining. I found these paired well together.

For the skirt-  1 1/8 yards of brushed poly from Boho Fabrics.


And now for the rest of the tour…

It's Gonna Be May blog tour

Sunday April 22nd:
Sewjourns,  Kathy’s Kwilts,  Naadjesendraadjes,  Diskordia’s Curvy Sewing,  Sewing Adventures in the Attick,  Sewing Southern Belle
Monday April 23rd:
Margarita on the Ross,  Our Play Palace,  The Scatty Sewer,  Rebel and Malice,  My Heart Will Sew On,  Sewing With D
Tuesday April 24th:
Sea of Estrogen,  Seams Like Style,  That’s Sew Amy,  Mahlica Designs,  Leslie J’s Sewing Shack,  Miss Marah Sewn
Wednesday April 25th:
Liviality,  Lime Leaves,  My Sewing Roots,  Tales From a Southern Mom,  Jot Designs USA,  Seams Sew Lo,  The Needle and The Belle
Thursday April 26th:
Candi Couture Designs,  Momma Sew Savvy,  Blooming Skies,  Stitched By Jennie,  House of Estrela,  Sewing Ambi

Don’t miss this:

Southern Belle Fabrics is offering a giveaway for a $50 store credit to support the blog tour. I think you could make up quite a few It’s Gonna Be May inspired pieces with Southern Belle Fabrics. I personally recommend the double brushed poly for circle skirts.

Enter to win a $50 store credit from Southern Belle Fabrics.


As always, thanks for reading today.

You can follow me on instagram, Bloglovin, or by entering your email in the right side bar.

You might also like:

Ally Skirt & Onyx Top


Synthia Top pattern review

We are in the midst of winter here in Colorado and I am longing for spring weather. I find myself sewing a mix of warm clothing for my freezing reality and springy pieces out of hope for the future.


I made up the Synthia Top from Designer Stitch* as part of her pattern testing team and I just adore this blouse. I’m not really into ruffles as they can seam too girlish for me, but this feels feminine and sophisticated.

My floral fabric plus the lightness of the ruffle make me ready for warmer days.


The Pattern Synthia Ruffle Top from Designer Stitch in size 3 (C cup) and shorter length. I used a 9in zipper instead of the 20in length that is recommended and really could have gotten away with not using one at all This will really depend on the person though. The Synthia also comes in a version without the ruffle that will make a great basic piece for your wardrobe.

As is usual for Designer Stitch, the pattern drafting and instructions are top notch. I always appreciate a pattern that comes in different cup sizes saving me the trouble of the alteration. The ruffle is so cleverly constructed that you’ll have a delightful ah-ha moment after you complete it.

The Synthia Top pattern is on sale for $7 (reduced from $10) for a limited time.

The Fabric Stash woven with a lovely drape. Purchased from Boho Fabrics about 2 years ago. Yay for stashbusting!

As always, thanks for reading today.

You can follow me on instagram, Bloglovin, or by entering your email in the right side bar.

*This post may contain affiliate links, if you purchase through my links I get a small portion to help pay for my sewing hobby.

Coffee House Pant from Blue Dot Patterns

Diane from Blue Dot Patterns has created another pattern with a modern look that has become a closet staple for me. The Coffee House Pant is a loose fitting cropped pant with an elastic waist and “notched” pocket detail.

Being on the short side (almost 5’4″) I just stear clear of cropped pants and capris. I just can’t seem to find that magic length that looks right. So when I saw Diane’s new pattern was a cropped pant, I was happy to make up a pair as a tester, but didn’t imagine I’d end up with something that would actually work for me.

But looky here:

.

One of the chararteristics that appeals to me is that while these are so very comfortable to wear, they look neat and classic.

The Pattern: Coffee House Pant from Blue Dot Patterns in size 8 with no alterations.

The Coffee House Pant is on sale until Jan 14th to celebrate it’s release.

As with all the other Blue Dot patterns that I’ve made, the pattern is well drafted and the instructions professional and easy to follow. I think you would be happy with any of her patterns.

The Fabric: A natural woven that my mother picked up from an estate sale. The original sale tag was dated 1954. It drapes wonderfully and doesn’t wrinkle all that much.

As always, thanks for reading today.

You can follow me on instagram, Bloglovin, or by entering your email in the right side bar.

Ella Cami & Shortie set from Designer Stitch

I got to test out* the new Ella Cami set from Designer Stitch last week and now I feel complete, in the summer pj department : )

I love the loose flowing pieces to keep me cool and feel pretty on trend with the ruffled cami.

You can also style the cami as a summer top. It works perfectly with my Chi Town chino shorts.

The Pattern and my alterations: The Ella Cami set from Designer Stitch includes a cami with ruffled band and a flowing bottom in short or pant length. I made two alterations to the pattern. I’m not a big ruffle person, so I took a total of 10 inches out of the length (front and back) of the ruffle band. I still think there’s plenty of ruffle here. On the shorties I added my usual 1 inch Full Seat Adjustment (FSA) and lowered the rise (front & back) by 3 inches making them a low rise short. If lowering your rise, be sure to check that you are leaving enough room for the elastic casing above the top of your pockets. My casing landed just above the pockets and I might consider lowering it another 3/8in next time so I can secure my pocket bags under the casing seam to keep them in place.

The Fabric I found this delightful Mini Floral rayon woven at Joann Fabrics amongst a ton of polyester in their Silky category. I used about 2 yards for my cami and shorties set.


The Ella Cami set and all Designer Stitch patterns are on sale for a limited time. Now’s the time to grab them up.


As always, thanks for reading today.

You can follow me on instagramBloglovin, or by entering your email in the right side bar.


This post may contain affiliate links, if you purchase through my links I get a small portion to help pay for my sewing hobby.

*I received a free copy of the Ella pattern in exchange for my work reviewing the pattern instructions before release. These are my straight up thoughts on the pattern.

Birkin Flares

After making the Liana Jeans, I was questioning if it is worth the many hours it takes to sew your own jeans. I got some good responses to the question and decided that before I could decide that question for myself, that I really need to sew one or two more pairs. I want to see if I can cut down the sewing time and if I think I’m getting a better fit than store bought.

Just as I was prepping to sew another pair of jeans, I won a Birkin Flare kit in the monthly drawing from IndieSew. Right away, I dove into making the Birkin Flares with some stash denim.


To the pattern I added a 1in full seat adjustment based on my experience with the Liana Jeans, shortened the Birkins 2in at the upper thigh adjustment line, shortened 2in at the lower leg adjustment line, and shortened 2in at the hem.

My fit muslin came out so well, that I finished them out.

Overall I’m pretty pleased with the fit of the Birkins. Next time I might make them a smidge longer, make them slimmer through the upper thigh, and look into changing the construction of the CB seam.

I was able to sew these jeans just a smidge faster and the process was easier the second time around especially since I didn’t have to do a ton of fitting to the muslin. Though I still need to tweak fit, I feel like I’m close there too. I’ve decided that I will continue to make my own jeans.

The Pattern: Birkin Flares in size 29.  1in Full Seat Adjustment, shortened 6in total. 3/8in seam allowance used at inseam and side seam.

The Fabric: Indigo denim from Fashion Fabrics Club.

The Birkin Flares took 10.75 hours to make. I used 1 1/3yard at 54in wide denim.

Total cost $12          Fabric: $9             Pattern $0         Notions $3

Melissa VS Julia: Pattern Showdown for Cardigan Roundup

Today I’m joining Sewing with Ti in her Cardigan Round Up to talk about my favorite cardigan pattern. I thought I’d share about my favorite by doing a pattern comparison, So…

Welcome back to VS.

A theme here at mahlicadesigns with the aim of pairing similar style patterns against each other in a friendly showdown to see which pattern better suits me, all while working through my pattern stash.

Melissa Cardigan from Zierstoff Patterns

Melissa v Julia main collage

 Julia Cardigan from Mouse House Creations

Melissa vs Julia 1 collage

The Melissa Cardigan features a pieced dolman sleeve, fully faced rounded collar, and roomy fit.

The Julia offers cap, 3/4, and full length set in sleeves, options for fully faced or one piece rounded collar, and casual fit.

Melissa vs Julia 3 collage

Let’s compare.

Instructions.

Melissa: Size chart is on website, but not in the instructions. Print/scale checks are throughout the pattern so you can always be sure the pattern printed correctly. The size lines are in color, so if printing in black & white it can be tough when the lines are tight together. The instructions for garment construction are clear and easy to follow.

Julia:  Instructions for construction are clear and easy to follow. The pattern has a few pattern markings to help line up pieces and are useful for stripe/pattern matching.

Fit.

Melissa: Great overall fit. I shortened the sleeves 3in, a typical adjustment for me.

Julia: Runs small. I made one size up and ended up with the right fit. It feels tight to me at the back neck, I think the back neckline needs to be scooped out a little. Not a fan of how the fabric puddles at my hip.

Style.

Melissa: The loose fit open front cardigan style is very on trend, but dolman sleeves are not for everyone.

Julia: The open front cardigan style is very on trend. Long and short sleeve options are included.

Investment.

Melissa: Time; 2.5 hours   Cost; Fabrics $10    Pattern $6   About 2yd @ 60in wide

Julia: Time; 2.75 hours   Cost; Fabrics $5.50    Pattern $6.95*   About 2.5yd @ 60in wide

Opportunities.

Melissa: Colorblocking of collar and sleeves. Variety of fabrics can be used.

Julia: Colorblocking of collar and sleeve length options. Need fabrics with stretch.

Melissa vs Julia 2 collage

For me, the Melissa is the winner. The Melissa is an overall better fitting pattern, has my favorite sleeve style, a better fitting collar, and longer length.

*$6.95 was my price through Up Craft Club for the Julia Cardigan. I received the Melissa pattern for free from Zierstoff Patterns.

Chi-Town Chinos #SewingDare by mahlicadesigns

A couple months back I took a #SewingDare from Gillian at Crafting A Rainbow. Gillian’s challenge: “I love your mustard skirt, and how it stands out against the neutrals in your wardrobe… so I dare you to make something else bright that can mix and match into your wardrobe!”

My stash is almost all neutrals, so I  grabbed the most colorful fabric in there and started brainstorming. Generally I’m not a florals person, but this cotton twill has moved between my stash and my giveaway pile so many times it’s a little silly. The challenge and the recently released Chi-Town Chinos was a good push to getting cutting.

I really like the chino style of the Chi-Towns and have put the skirt version on my Sew Everything list. I definitely want more of these shorts, but that will have to wait for Spring sewing.

The Pattern: Chi-Town Chinos shorts from Alina Design Co. in size 10 based on my measurements. The pattern includes a shorts or skirt version and four options for back pockets.

I liked that you get all the pattern pieces ready right at the start and that the single piece front pocket is nicely finished with facings and french seams. There is a lot of attention to detail that makes everything about the shorts a step above.

The pattern and instructions have fitting built in, which is great for your first time sewing the pattern. The back pattern piece includes an extension that makes it easy to fit the waist and in my case a fuller seat. The instructions walk you through basting and fitting the back piece before you do your final sew.

I found I did not need the extension or need to do a full butt adjustment in my size, but I did have a lot of excess fabric in the back of the legs below my seat. I think this is an indicator that I need to size down and do a full butt adjustment for the smaller size.  I ended up removing 1 in at the inseam and side seam of the back piece only. I like the fit I have now, so I probably won’t experiment with going down a size.

Next time I will also adjust the front crotch curve. I find it scoops out just a little too much for me.

I’m pretty impressed that most of the fitting issues were worked out on the first try by following the pattern instructions.

The fabric: One yard of Cone Mills cotton twill and about a FQ of lightweight cotton both from inherited stash.

I’m pleased that the shorts do work with several tops, but honestly the jury is still out on this print. I’ll need to give these some wearing around before I decide if they are “me” or if they will be downgraded to around the house shorts.

Chi Towns feature banner

The Chi-Town Chino shorts took me about 5 hours to complete, including fitting and adjustments. I’m hoping to cut that down to 3.5 hours next time.

Total Cost: $13.75    Fabric $0 (inherited stash)        Pattern $12      Notions: $1.75

Sarah Top and Dress – Pattern Review

On the Cutting Floor is putting out some really interesting patterns, with unique details that take them above and beyond the many basics you see out there in the Indie pattern world. I have many of them on my list to make.

I started with the Sarah Top and Dress Pattern** Those origami-like folds, oh yeah, so very cool. I had the perfect color ponte in my stash to fit into my Core Wardrobe too.

The pattern comes with lots of options, 24 all together, so you need to read the “How to Print” instructions to get the pattern pieces you need.

Sarah Top and Dress technical drawing

The easily understandable instructions walk you through how to complete the many options and they’re organized so there’s no confusion. Sewing the pleated panel was a breeze because of good markings and clear instructions.

Item of note: The curve from waistline to hip is not a gentle one. This is great for pear shapes like me, but if you’re a rectangle or inverted triangle shape you might want to check that.

My alterations, which I have to do to most patterns. A drop shoulder adjustment of 3/8in. Shortened 3in at hem line, I had to eliminate the bottom pleat to make it look right. Shortened the sleeve by 3in to make it a length I like.

Next time, I’ll use a binding on the neckline instead of folding over and topstitching. I prefer a binding or facing.

I had a few fit issues with the test version of the pattern. (I don’t see adjustments for these in the final version)

1. I got a lot of gaping at the center front neckline of my muslin (not shown). I ended up removing two 1/2in wedges from the neckline to compensate.

2. I found the neckline sat high up on my neck at the shoulder line. I ended up removing 1in here.

3. I found the front piece 1/2in narrower than the back piece in the same size. I used a size 10 front piece and size 8 back piece in my final version.

The fabric: One yard of a nice ponte de roma from Finch Fabrics. (sold out)

The Pattern: Sarah Top and Dress in size 8/10. Pleated front, short sleeve options.

The Sarah Top & Dress is 50% off until Friday to celebrate the pattern release, so hop on that now.

The pleated front, short sleeve version of the Sarah Top should take you about 1.5 hours to complete.

Total Cost: $2          Fabric $2           Pattern $ 0- Free as a pattern tester


**Affiliate link, meaning your purchase provides me a modicum of compensation to fuel my hobby.

V Slit Blouse Simplicity 1430

Today I’m going to share just a little bit about the V front blouse that I included in the spring capsule wardrobe I worked on for the Sew Alongs And Sewing Contests fb group.

Me Made May really showed that I was missing some of the Core Colors from my wardrobe, so I immediately started making Simplicity 1430 View B in a red lawn from Fabric Mart and crossed off a long waiting project.

V Slit blouse

This cute number went together pretty easily until I hit the neck band technique. My gut instinct was to apply a bias binding, but I decided to follow the pattern. Uh-Oh. The instructions have you apply a pieced neckband, a neckband facing, and stitch through all the layers. That adds up to seven layers at the shoulder seams. The result, even in a lightweight lawn, was a  thick rope-like neckband.

V Slit blouse 1

I hated this neckband, so I ripped it off and added a 1in facing instead. I’m so much happier with the fit and feel. To keep that cut out look, you could use a bias binding.

V Slit blouse

V Slit blouse

The pattern: Simplicity 1430 View B, size 12. Stupid neckband removed and replaced with a facing, closure at CB eliminated and 1/2in added to hip.

V Slit blouse

The fabric: 100% cotton lawn from Fabric Mart, long sold out.

V Slit blouse


Notes: Choose an easier option for the neck binding and skip the back closure if you want to.

Simplicty 1430 view B should take you about 3.5 hours to make. A size 12 used 1yd of fabric.

Total cost: $3.50         Fabric $3.50             Pattern $0-stash

Ally Skirt from Blue Dot Patterns

Frankly, I was very happy to let the current “denim everything” trend pass on by me. If I followed the trend back in middle school, I just don’t want anything to do with it.

And yet once again, my mind was changed by a pattern. The Ally Skirt is a six gore skirt with contoured waistband, length options, flap, pocket option, and top stitching.

Ally skirt on mahlcadesigns

Two ideas struck immediately when looking at the Ally; denim with copper snaps and yellow top stitching or corduroy in a camel/caramel color for that 70s feel. So very on trend right now. The new Ally Skirt just called out to be made up in denim.

I tested the Ally Skirt pattern for Blue Dot Patterns. Blue Dot Patterns may sound familiar. I’ve made up two Georgia‘s (here and here), hosted the Creative Sewing Challenge last fall, and one of my ideas for the Margo Blouse is on my sewing table now.

Ally Skirt by mahlicadesigns

I used a lightweight 7 oz. denim from my stash to make up my Ally in a size medium. With some pattern piece Tetris and using an extremely tight lay out, I was able to get my skirt cut out of 5/8 yard x 60in wide. If you have a directional print, fabric with nap, or narrower fabric; you’ll need more.

Ally Skirt by mahlicadesigns

Why I recommend the pattern: 1. Oh my is it so easy. All the pieces could get confusing, but the way they’re labeled and notched makes it no problem. 2. Diane, the pattern designer, even includes fitting as part of the pattern directions. Instead of a 1/2in seam allowance at the sides, I used a 5/8in seam allowance: Fitting Done! 3. A contoured waist band. I’m a pear shape so that’s perfect for me. 4. The style is classic and very on trend right now too.

Get yours! Get your Ally pattern for 30% off, for a limited time, directly from Blue Dot Patterns or from UpCraft Club.

Ally Skirt by mahlicadesigns

I chose snaps that were bigger than the recommended button size, so I skipped the top stitching at the outer edge of the button placket.

Ally Skirt by mahlicadesigns

Hey, I’m pretty proud of my top stitching here.

Ally Skirt by mahlicadesigns

That pocket flap is purely decor. I don’t need pockets in everything, so I’m cool with it. If you are in the pockets on everything camp there’s a pocket option for you.

I styled the Ally skirt with a cowl neck tee; with my banded Kirsten Kimono tee and RTW jacket; and a RTW sweater.

Ally Styling collage

The Ally should take you about 3.75 hours to complete. In a size medium with creative layout I used 5/8 yard of fabric.

Total cost: $6.50           Fabric: $3      Notions: $3.50       Pattern: $0*


*I received the Ally Pattern for free as a tester. Do I have to explain that these are my own thoughts about the pattern? They are.

Fancy Tiger One Hour Top for Diving into Dolmans blog tour

Dive Into Dolmans 3

One Hour Top by mahlicadesigns

Today I’m sharing the One Hour Top from Fancy Tiger Crafts as part of the Diving into Dolmans blog tour hosted by Sewing By Ti. Ti has put together bloggers of all shapes to show how this style top can work for every body shape.

Sewing by Ti as an Inverted Triangle
The Creative Counselor as an hourglass/small pear
Made By Melli as an apple
Sew Sophie Lynn as a rectangle.

Guest bloggers:
Dos Natural Sistas (spoon)
Rebel and Malice (pear)
Sew Far North (apple)
Mahlica Designs (pear)
Lulu and Celeste (inverted triangle)
Adventures with Bubba and Bug (hourglass)

I just love my dolman style Georgia Tops (here and here), so it was only natural that I would want to try another pattern and expand my dolman love. Unfortunately, I did not find true love a second time. I think we’re more of a “like-like” status.

Fancy Tiger One Hour Top by mahlicadesigns

Fancy Tiger One Hour Top by mahlicadesigns

The blandly named One Hour Top is a loose fitting top with a 3/4 length dolman sleeve. True to it’s name, the top goes together very quickly. The instructions are easy and straight forward to follow. I did change one step. Instead of folding over the neckline by 1/2in and stitching down as instructed, I used a clean finish binding. Even with the extra time needed for the neater neckline finish, I still finished in under an hour.

Fancy Tiger Dolman by mahlicadesigns

I found this really cool ponte knit on the clearance rack at Hancock Fabrics, but it was a bit shy of the needed length, so I added a color block band at the bottom to make it a decent length on me. As is usual for me, I had to shorten the sleeves just a bit to hit at the right place.

Fancy Tiger One Hour Top by mahlicadesigns

Fancy Tiger One Hour Top by mahlicadesigns

I was worried that a dolman without a fitted band at the bottom would look really slouchy, but that turned out just fine. The overall fit is just not love for me, as roomy as this is supposed to be, I’m getting drag lines down the front. I often need a FBA, but honestly didn’t think I would need it with as much ease as the pattern has built in. I’ll pass on making this one again. You may have better luck.

Fancy Tiger One Hour Top by mahlicadesigns

Fancy Tiger One Hour Top by mahlicadesigns

Some things to consider about the One Hour Top:

Sizes XS/S to XL/XXL (32/34 to 42/45)
Printable pattern pages/copy shop version 18 (no copy shop)
Skill Level Beginner
Measurements for Rectangle Pieces NA
Line Drawings Yes
Size made XS/S
Options chosen NA
Fabric Requirement for your size 1 ½ (1 ¾ stated in pattern)
Measurement Chart Bust Waist Hip
Cutting Instructions Yes
Pattern Printing Layout Yes
Cutting Layout Yes
Suggested Fabrics Medium weight knits
Layer Printing Option No
Neck Line Options No
Sleeve Options No
Hem Options No
Color Blocking No
Seam Allowance ½ inch
Hem Allowance ½ inch
Separate add-on pack No
Fit Loose
Easy to read instructions Yes
Drawing or photograph instructions Drawings


Marigold Dress by mahlicadesigns

After making the Marigold Blouse, I was ready to step up to making the Marigold Dress from Blank Slate Patterns in a cotton voile I purchased from IndianBeautifulDirect last year.

Marigold 2

100_4483

No fit alterations were needed, not even my usual FBA. I did make a few changes to minimize the print showing through when using layers of the very sheer fabric. I added a lining to the skirt portion, omitted the pockets, and used a piece of the lining material for the inside yoke piece on the bodice. I also made 3/4 length banded sleeves because I made a goof when cutting them out.

Marigold 3

This is not the way to make your sleeves 3/4 length, but it worked out for me because I have short, skinny arms. Since I made the Marigold blouse first, I cut the sleeve pattern apart to use the cap sleeve portion, but forgot to tape it back together before cutting the long sleeve dress version. To fix my mistake, I laid the sleeve head portion of the pattern over the top of my sleeve fabric piece and recut the top edge. I ended up with sleeves at a perfect 3/4 length but I needed to cut a wider band to fit around my forearm. I wasn’t sold on putting a traditional buttoned cuff at the 3/4 length, so I did a simple band instead.

Marigold Sleeve mess up

Marigold 1

If you’d like some more Marigold inspiration, take a look at the Pinterest boards I put together. Marigold Blouses, Marigold Dresses, Marigold Skirts

Marigold back

The Marigold Dress should take you about 5.5 hours, cut to finish. A 3/4 sleeve dress without pockets or sash in size small used 3 1/8 yards @ 45in width.

Fabric $16.95  Lining $6.41  Notions $2  Pattern: $ 4.53*  Total: $29.89

* $9.06 was the sale price I paid. I divided it by two since I made this pattern twice.

Zamora Blouse from Itch to Stitch by mahlicadesigns

I had the opportunity to test the newly released Zamora blouse pattern from Itch to Stitch. The Zamora is a buttoned front, deep V neck with a tie bow. The Zamora is a modern version of a very classic look.

Zamora

I liked the combination of the tucks on the front, the tie, and the slightly loose blousing. Making the Zamora was a good way to replace the classic blouses in my wardrobe that no longer fit.

Zamora Blouse detail

Zamora Blouse

Zamora blouse

Because this is my test version I made very few alterations. I made a dropped shoulder adjustment of 1/4in and graded the back piece from waist to hem increasing by 1/2in in width. This is the bracelet length sleeve option, which is long on me but actually falls at a length I like.

Zamora blouse

I’m not satisfied with how the back bunches up above the waist line. Part of this is due to my need to do a sway back adjustment and possibly grade wider at the hips, but I think some of this is the pattern design. It looks better tucked in, which is how I will wear the blouse. Several other testers removed the back darts all together and I may go back and remove them too. I think that will make the back look so much better and maybe help with a drag line on the front.

This is a size 4 with D cup, made up in a cotton/poly broadcloth. I ended up using 1 3/4yd @44in wide. The techniques in the pattern are not difficult, but it does take some time to complete because of the pintucks and waist darts.

Zamora blouse pin tucks

The Zamora is one of four new pattern releases from Itch to Stitch this week. Itch to Stitch has put all of her patterns on sale this week too.


The Zamora could take you 7 hours to complete.

Fabric $4  Pattern $ 0*  Total cost $4

*I received the pattern for free as a tester.


Marigold Blouse, a first step toward the Marigold Dress.

I’m leading a sew along for the Marigold Dress from Blank Slate Patterns in the Sew Alongs & Sewing Contests facebook group this month. You can join us for inspiration and encouragement as we work through the pattern (I’m not going to teach you how to sew it, just cheer you on and give you ideas. The sew along is not associated with or sponsored by Blank Slate Patterns)

Marigold Blouse by mahlicadesigns

Marigold Blouse by mahlicadesigns

My first try with the Marigold was to make the blouse out of some stash fabric and hope for a wearable muslin. I’m not sold on how peplums look on me, though Teresa’s modified peplum is darn cute; so I played it safe and chose to follow a pattern hack from the Melly Sews website.

Marigold Blouse by mahlicadesigns

The hack shows you how to lengthen the bodice piece and straighten the side seam. Pretty easy. The only thing I’d add to the tutorial is that you also need to square up the hem line. I wasn’t paying attention and got an angled hem line which cost me about an inch in the overall length.  😦

Marigold Blouse by mahlicadesigns

I made only two minor alterations to the construction. I used french seams at the sides and didn’t use the button placement guide. I always place my first button to line up with the fullest part of my bust and work out placement from there.

Marigold Blouse by mahlicadesigns

Thus far I have only one critique of the pattern. The shaping of the sleeve hem puts extra fabric under the arm, not where anyone wants extra bulk. See how it’s wider at the green line than the red line. This extra width and the curve on the hem there adds bulk.

sleeve collage

I haven’t tested it out, but I have a quick solution and a better solution. Quick:  I think making the piece the same width from the curve to the seam will eliminate some of the problem. (blue line for example). Better: Slashing the pattern from hem line up to but not through the seam line to create a pivot (blue dotted line), slide the cut edges over each other to remove about 1/4in to 1/2in from the hem and then make the width even.

Alteration collage

So, a pretty wearable muslin I think. I’m feeling very comfortable moving forward with making the full dress. I think I’ll still need to take a big breath before cutting into the fabric I’ve been hoarding.

Marigold Blouse by mahlicadesigns

The Marigold Blouse hack should take you about 4 hours to make.

Fabric & buttons from stash $0  Pattern $4.53  Total cost $4.53*

* $9.06 was the sale price I paid. I divided it by two since I will make this pattern twice.

Don’t miss what I’m doing next by following my blog, sign up over there on the sidebar.

Matilda VS. Sloan leggings: Pattern Showdown Series

Welcome back to VS.

A series here at mahlicadesigns with the aim of pairing similar styles against each other in a friendly showdown to see which pattern better suits me, all while working through my pattern stash. (Overview here)

Today we’re switching gears over to leggings.


 Sloan leggings from Hey June Handmade

Sloan VS. Matilda 3 square collage

Matilda leggings from Spit Up & Stilettos (download)**

Sloan VS Matilda 1

The Sloan leggings (view B) are a contoured legging with a shaped waistband. Sizing options are included for petite, regular, and tall in addition to the regular, capri and 3/4 length style lines. I used ponte knits with just a little stretch, so I chose my size based on my hip measurement.  The pieced waistband gave me the opportunity to colorblock my front waistband to use up some smaller scraps. I have a few fitting adjustments I’d make to remove a little poofiness from the front rise and a little bit of sag below my bottom. I’m pretty sure that using the suggested stretchy fabrics with recommended smaller size may eliminate these adjustments.

Sloan VS. Matilda 3

The Matilda Leggings are a basic silhouette with rectangular waistband. The rise on these is really short, so I added 1in front and back and would add another 1/2in to the back next time. Only two pattern pieces makes it quick to cut out and quick to sew; but only one piece for the body makes it more challenging to adjust the fit. I probably need to do a full bottom adjustment, but will only be able to adjust the rise to accommodate.  The pattern also seems to be proportioned for a uncurvy shape. I used a standard jersey knit. (See a more thorough review here).

Sloan V Matilda 2

Now let’s compare

Instructions.

Sloan: Thorough and easy to understand instructions with good diagrams. Good tips on picking your correct size and fabrics. I appreciated the tip on adding elastic to the waistband.

Matilda: Straight forward and easy instructions with pictures. The sample in the pictures are in black fabric. Not very helpful, but even a novice sewer can do these with out the pictures.


Fit.

Sloan: Size Large based on hip measurement and fabric with little stretch. Other than the fitting adjustments mentioned above, the fit is comfortable and nicely shaped. I may make the waist band shorter next time. It just seams a little out of proportion on me.

Matilda: Size medium. I found them to run a tad small at the hip and not as fitted from the knee down. The rectangular waistband feels a little loose. I would recommend fabrics with 25-50% stretch and good recovery.

Style.

Sloan: Good seam lines, nice shaping, multiple lengths, and color mixing options. A modern look ideal for casual dressing or athletic wear.

Matilda: Good basic legging.

Investment.

Sloan: 1.75 hours to make, fabric $6, pattern $6.95*, about 1.5yd @ 60in wide

Matilda:  1 hour to make, fabric $8, pattern free, about 1yd @ 60in wide

Opportunities.

Sloan: Color blocking galore, but I really wouldn’t want to mess around with the pattern’s design lines

Matilda: Significant time investment to adjust fit and pattern hack.

.

For me, the Sloan is the winner. They just feel comfortable everywhere, the pattern is well designed and you can do so much with it.

Sloan 7

*$6.95 was my price through Up Craft Club for the Sloan leggings.

**Spit Up and Stilettos has rebranded to Sadi & Sam; a kids pattern company. Sadly for us, all their free womans patterns have disappeared from the internet. Sadi & Sam have given me permission to share the Matilda pattern with you. Download Here.

Lane Raglan VS Easy Tee Raglan: Pattern Showdown Series

Welcome back to VS.

A series here at mahlicadesigns with the aim of pairing similar styles against each other in a friendly showdown to see which pattern better suits me, all while working through my pattern stash. (Overview here)

Today we’re comparing raglan sleeve tops.

Lane Raglan from Hey June Handmade

Lane VS. Easy Tee raglan 3 pane collage

 Easy Tee Raglan from It’s Always Autumn

The Lane Raglan has fitted sleeves, shaped bodice and a wider neck-band. The Lane comes with thumb hole cuff and a hoodie option. I made up my Lane in a rayon jersey for the bodice and a cotton jersey for the sleeves and bands. I forgot to do my normal sleeve adjustment for my skinny arms.

Lanr v easy 3

Lane v easy 4

The Easy Tee raglan is the 3/4 length raglan sleeve version of the free Easy Tee pattern. I used a cotton jersey for the bodice and a stable cotton jersey for the sleeves. Instead of making a pieced sleeve, I cut the sleeves as one piece (removing seam allowance at the top edge and cutting on the fold) and sewed in a shoulder dart where the pattern piece curved in toward the neckline. I also made the sleeves full length by adding 6in but didn’t need to slim them down like I normally do.

Lane v Easy 1

Lane VS. Easy Tee 2

Let’s compare

Instructions.

Lane Raglan: Overall very good. The instructions for the fabric origami needed to make the thumb hole takes you through it step by step, but you really need the instructions and pictures to get you there. The pictures would be more useful if the fabric used had a different color wrong side.

The Easy Tee: Basic instructions are there on the website, but you have to go back and forth from page to page from the basic tee tutorial to the tutorial for the raglan. I just skipped them. Not a fan of a pieced raglan sleeve, I modified it to one piece with a shoulder dart. Further drafting can be done to remove the dart, but I didn’t feel like it.

Fit.

Lane Raglan: Used size Large. I don’t know what I was thinking when choosing my size, I need to be using the medium. Crazy long on me too. I’m going to shorten it by about 4in. Despite my miss on the sizing, I do love my Lane. I have smallish hands, so I would alter the thumb hole cuff for a narrower fit.

The Easy Tee: Pattern comes in Large only, but fit my 35.5in bust just fine. I would need to trim it down a bit for a fitted look. Pretty good overall fit.

Style.

Lane Raglan: The banded waist and cuffs give the Lane a sporty, casual feel to me. I like where the shoulder and bodice lines meet. It just looks more balanced to me.

The Easy Tee: Good basic raglan if you don’t mind the extra sleeve seam.

Investment.

Lane Raglan: 2 hours to make, fabric $7, pattern $6.95*, about 1 1/4yd @ 60in wide

The Easy Tee: 2 hours to make, fabric $8, pattern free, about 1 1/2yd @ 60in wide

Opportunities.

Lane Raglan: The pattern has lots of built in options. Cuffs, hoodie, etc.

The Easy Tee: Basic color blocking options.

For me, the Lane is the winner. The pattern is just so much easier to use out of the box and comes with styling options.


Shoreline Boatneck VS Butterick 6084: Pattern Showdown Series

Welcome back to VS.

A series here at mahlicadesigns with the aim of pairing similar styles against each other in a friendly showdown to see which pattern better suits me, all while working through my pattern stash. (Overview here)

Today we looking at two boat neck tops.

Shoreline Boatneck from Blank Slate Patterns

 Shoreline VS. Butterick collage

 Butterick 6084 (OOP)

The Shoreline Boatneck full pattern comes with sleeve length options and top or dress lengths. I downloaded the free short sleeve tee version before the extended pattern was released for sale. This stripes rayon jersey knit from Girl Charlee just called for a boatneck tee in my mind. The light weight knit is more suitable for spring and summer, so I kept the sleeves short. The fabric is a bit sheer also, so I omitted the neckline facing for a folded over neck band. I used my 1/4in foot to topstitch the folded over neck band in place and it worked really well to keep my top stitching even and it also helped keep the neckband tucked under as I sewed.

Shoreline VS Butterick 1

Shoreline VS Butterick 2

Butterick 6084 is an out of print 2 Hour Fast & Easy pattern in boatneck or V neck and half or three quarters sleeve lengths. This Halston top is the inspiration for my colorblocked version. I made my color line 3in up from the marked bust point for the bodice. For the sleeves I simply added about 8in to the bottom of the 3/4 sleeve. The instructions have you sew your side seams, sew your sleeve seams, baste and gather your sleeve cap, and insert into the arm scythe. Save yourself the trouble by inserting your sleeve cap flat, then sew up your side seams and sleeves in one shot. So much easier.

Shoreline VS. Butterick 3

Shoreline VS Butterick 4

Let’s compare.

Instructions.

Shoreline: I had no instructions. I downloaded the pattern for free; the tutorial and free version were removed from the website after she released the full pattern for sale in her shop. I’ve used other Blank Slate Patterns, so you can be assured the instructions are good.

Butterick: Overall very easy excepting for the sleeve insertion being needlessly complicated. No need to gather the sleeve head and insert into the closed arm scythe. I sewed my sleeves in flat instead.

Fit.

Shoreline:  Used size small. Feels great. I may remove the smallest bit of extra width at the sleeve hem next time.

Butterick: Used size 12 Great fit overall. I need the bodice just a little longer.

Style.

Shoreline: The curved side seams and curved hemline give extra feminine look. I’d like the boat neckline a little wider across the shoulders

Butterick: The traditional, wider  boatneck shaped neckline is just what I like.

Investment.

Shoreline: 2.25 hours to make, fabric $4 pattern free, about 1yd @ 45in wide

Butterick: 2.25 hours to make, fabric $3, pattern free, about 1 yd @ 60in wide

Opportunities.

Shoreline: Pretty easy to colorblock and change sleeve lengths. Drafting into the dress version would be fun to.

Butterick: Pretty easy to colorblock and change sleeve lengths.

For me, the Butterick 6084 is the winner. I like the wider neckline and easy sleeve length options. A mash up adding the curved sideseams of the Shoreline would make the perfect tee.

Butterick 3

Aurora VS Georgia: Pattern Showdown Series

Welcome to VS.

A series here at mahlicadesigns with the aim of pairing similar styles against each other in a friendly showdown to see which pattern better suits me, all while working through my pattern stash. (Overview here)

Today we have two dolman tops.

Aurora Tee from Hey June Patterns

Auroa Tee VS. Georgia collage

 Georgia Top from Blue Dot Patterns

The Aurora Tee features a pieced dolman sleeve, slouchy body, and inserts option. I was drawn to the extra room at the upper arm that a dolman provides and the skinny lower sleeve. I fell between small and medium on the size chart, so considering the slouchy fit and 3in of pattern ease, I chose the small. I’ve never done facings on a knit item and frankly don’t see why I would on this one. I substituted the neckline facings for a neckband instead. I think the fit is spot on for the chest and arms. I’m a big fan of skinny sleeves and these are a perfect fit and length for me. I shortened the bodice just above the inserts by 2in and the top is still plenty long. Shortening it this much shifted up the point where the top starts to flare out though and I think it makes it wider around the waist than I like. If you need to shorten yours and to be a TNT for me, consider reshaping the side seams.

Aurora vs Georgia collage 2

The Georgia is a loose fitting dolman with 3/4 length sleeves and options for colorblocking, banded sleeves and waist, and fabric choices. The small was a perfect fit. I really like how the slouchy look of the top is balanced by the banded waist line. I made my Georgia as part of The Creative Sewing Challenge, so a little extra time was spent being creative with the sleeves. To be a TNT pattern for me, I just need to tweak the sleeves a little bit. Making them a couple inches longer and snugging up the cuff will keep them from riding up above my elbows or shortening them a couple inches so they hit right above the elbow.

Aurora VS. Georgia collage 1

Let’s compare.

Instructions.

Aurora: No finished measurements, but 3in ease stated. No lengthen/shorten lines. 1/4in seam allowance is a bit fiddley. Easy to read instructions.

Georgia: No print guide, but pieces numbered helps. Instructs to sew neckband and cuffs first instead of piecemeal throughout=more efficient. Easy to read instructions.

Fit.

Aurora: Had to shorten bodice by 2in. Slim fit sleeves.

Georgia: Great comfy fit and good bodice length. I need sleeves a bit longer.

Style.

Aurora: I like the dolman shape plus skinny arms. Don’t like loose fit around my waist.

Georgia: I like the fitted waistband as contrast to looser fit bodice.

Investment.

Aurora: Time; 2.5hours Cost; Yardsale fabrics $0.50  pattern $6.95* About 1yd @ 60in wide

Georgia: Time; 2.5 hours Cost; fabric $6  pattern free*  1 1/4yd @45in wide

Opportunities.

Aurora: Colorblocking of inserts and sleeves. Version with insets is a difficult shape to alter.

Georgia: Lots. See my post. Easy to alter.

For me, the Georgia is the winner. I like the fit so much better through the body and the pattern would be more easily adapted to add the skinny sleeves I like.


*$6.95 was my price through Up Craft Club for the Aurora Tee. I received the Georgia pattern for free as part of hosting the Creative Sewing Challenge in December of 2015.

Introducing VS. A Pattern Showdown Series

VS.

I started making a list of patterns from my stash and my Up Craft Club membership that I wanted to try in 2016. If I own it I should at least sew it once; right? Well, maybe. My list ended up having a lot of tee patterns, which to be honest, can make for some boring posts.

So, to spare you from excessive droning on about all these knit tee patterns and to give you something useful, I’m putting similar patterns together in a head to head showdown and will declare a winner. I just may find some TNT (Tried ‘N’ True) patterns too.

I’ll be comparing dolman sleeve, boatnecks, and raglan sleeve style tees. And for a little twist I’m through in some leggings too.

Week 1: Aurora Tee by Hey June Handmade VS Georgia by Blue Dot Patterns

Week 2: Shoreline by Blank Slate Patterns VS Butterick 6084(oop)

Week 3: Lane Raglan by Hey June Handmade VS Easy Tee Raglan from It’s Always Autumn

Week 4: Matilda Legging from Spit Up & Stilettos VS Sloan Leggings from Hey June


Be sure you’re following mahlicadesigns so you don’t miss what I’m doing next. (Over there on the right side bar)


In it for the long haul with Burda 7140 jacket

It’s been a few years since I’ve taken on a time intensive project like the Burda 7140 jacket. On a whim I purchased some faux leather online thinking maybe I’ll make a jacket. So far I’ve made a wristlet, this jacket, and  have plans to work it into a top that’s a few notches down on my sewing list.

Faux leather jacket by mahlicadesigns

I decided to join in a coat sew along hosted by Erica B in October. All of a sudden this “maybe someday” jacket was in the works. I came really close to meeting the suggested deadline too. The night before the sew along ended, I needed to put in my zipper, attach the bottom hem, and close up the lining; simple right. Too bad the suggested zipper length was 1.5 inches too short. Of course I didn’t get to the store for another 10 days to get a replacement zipper. 10 days which I filled up with the Georgia Top and volunteering as a tester for the Zircon Sweater.

Georgia Top by mahlicadesigns

Working with the faux leather wasn’t tough by any means it just took patience;  no pins allowed, tissue paper under the presser foot, press and press again kind of patience.

To add a little body to the faux leather and faux suede accent, I used interlining on all pieces except the sleeves. I ran out of the interlining fabric and figured an interlining wouldn’t be needed in the sleeves any way. I like the finished result and the interlining made resolution of  big problem possible.

I could press the faux leather but it did not keep a press very well. I found myself pressing and repressing over and over and was feeling pretty gloomy about how the jacket was going to work if the seams wouldn’t stay pressed. I was getting to the last steps before completion when…yes, you guessed it! I used a herringbone catch stitch on all those seam allowances. I wouldn’t have been able to fix the problem of the seams without being able to attach them to that interlining. The solution was pretty basic, but having never needed to use a catch stitch before, it was slow to come to me.

Faux leather jacket by mahlicadesigns

I used the pattern instructions only as a general guide. I did not want seam lines on my cuffs and hem, so I tacked the cuff to the side seam to keep it in place. Using a jump hem, and tacking the hem up at the bodice seams was the solution for the hem line.

Details: Burda 7140 View A Size 12.

Alterations: Added 1/2in to the depth of the shoulder darts. Shortened sleeves by 3in and it looks like they could use some more attention. Used a 1/2in seam allowance on the bodice seams to give a little extra ease. The ease stated in the pattern was nowhere to be found in my muslin or final version.

Next time I would slim down the sleeves a bit and consider going up a size to compensate for the lack of ease.

Fabric: knit faux leather from Fabricmart (Similar to), faux suede, poly interlining and lining.

Burda 7140 took me 14.5 hours to complete, but if you choose an easier fabric you could probably get yours done in half that time. Seriously.

Fabric/Supplies $33.50    Pattern $2  Total $35.50

Feeling like a bad a**: Priceless


On another note, I’ve added a Buy It page up there in the menu. I have a few things I’ve made, some fabric to destash, and even a few free things*

*you pay to ship