CHENILLE Sweater for Minerva

My fabric stash and my dresser drawers can attest to the fact that charcoal grey knit is my spirit fabric. I’m sticking to what I love with the grey sweater knit fabric that I chose to make a Chenille Sweater from Kommatia Patterns (now Studio Calicot).

Today you can read about the Chenille that I made for the Minerva blog. You can see the full details here.

Until next time,

Melissa E of mahlicadesigns

Find Me on instagram

#SewInTheNewYear Virtual Sewing Party

Join us on Instagram for a virtual New Year’s Eve party!

We have hosts across various time zones. Be sure to follow everyone on Instagram now so you don’t miss any of the fun tonight! The party runs from 9pm to midnight in each time zone. We will have discussions and giveaways running throughout.

You can enter the giveaways on Instagram or via the rafflecopters below!

Use the hashtag #sewinthenewyear to join the conversation!

Meet your hosts!

Australian Hosts @TropicalJenks @VintageTina

UK Hosts @SewingDirectory @VickyMyersCreations

EST Hosts @SeamsLikeStyle @SequoiaLynnSews @G.MarieSews

CST Hosts @SeamsSewLo @SewingNovice

MST Hosts @CraftingThroughTime @MahlicaDesigns @PhatQuarters

PST Hosts @MadeByJaime @FroggiLady @HeatherSewist


Thank you to our MST Sponsors!

Other Sponsors include:

Amelia Lane Designs Blue Dot Patterns Bubble Baby Custom Fabrics Cotton Cuts DG Patterns Dinkydoo Fabrics and Notions Dressew Duchess and Hare PDF Patterns Ellie and Mac 5OutOf4 Patterns George and Ginger Glam Sprouts Fabric Green Style Creations Hearthrob Threads Helen’s Closet Made By Jaime Peek a Boo Pattern Shop Phat Quarters Pretty Posh Prints Quiet Book Queen Rain City Pattern Co Ragamuffin Patterns Rebecca Page Seams Like Style Seen and Sewn Patterns Sew Blessed SimplyByTi Stitchin Pretties So Sew English Suco By Susana Surge Fabric Shop The Fab Clique The Fabric Fairy The Fabric Market The Handmaiden’s Cottage Twig and Tale Winter Wear Designs …and more!

Click here to enter the #SewInTheNewYear Bundle 1 Giveaway!! Starts 9pm MST

Click here to enter the #SewInTheNewYear Bundle 2 Giveaway!! Starts 10pm MST

Click here to enter the #SewInTheNewYear Bundle 3 Giveaway!! Starts 11pm MST

Come and join in the fun! See you there!

Dana Top pattern review

I’ve been keeping it pretty simple in the sewing room this summer. Can we say Summer Break!

Working through my stash has been a motivator though. My feelings about my stash tend to swing between “I’m glad to have this resource” to “I’m never going to be relieved of this burden.” This summer I’ve been in the “stash burden” zone as stash overflow has piled up in front of my fabric shelves.

Making the Dana top and a pair of Chi Town shorts to go with, helped bust through some stash and were pretty easy projects for my lazy summer approach to sewing.

I originally planned to replace the side tie on the Dana with a cool looking buckle, but when it came to it the buckle just looked and felt too heavy. Any suggestions? I feel like something to add a little interest would be good.


The Pattern The Dana top from DG Patterns in size 10. Made without the side tie. I added two hidden snaps along the cross over to keep the top from gaping open at the bust and when I bend at the waist. If you’re looking for an easy pattern that gives you a nicely put together look, I think the Dana top is a good pattern for you.

Chi Town Chino shorts. These are my fourth pair, so nothing new to add. See my previous pairs here and here.


The Fabric Dana was made in a shirt weight woven that I picked up from Hancocks before they closed down. These Chi Towns are made in a cotton twill I picked up from Joann Fabrics.

Total stash busted:  1.25 yards for Dana and 1 yard for Chi Towns.

As always, thanks for reading today.

You can follow me on instagram, Bloglovin, or by entering your email in the right side bar.

This post may contain affiliate links. If you purchase through my links, I get a small commission to help pay for my sewing hobby.

Save For Later

Pin this image, so you can come back when you’re ready to start sewing your version.

Christmas in July with Michael Miller Fabrics

Merry Christmas in July everyone!


Today I have a fun distraction from the heat of July with some Christmas inspiration.

My fellow Sewing Portfolio Ambassador Lilla Gumma  and I are celebrating Christmas in July with Michael Miller Fabrics.

I’ll give you a little sneak peek of the Michael Miller fabrics we’re using, but you’ll have to click through to each blog post to see what we’ve made up with our festive fabrics.

collage

Please visit: mahlicadesigns &  Lilla Gumma to see our Christmas in July creations.

What’s a Sewing Portfolios Ambassador?

As a Sewing Portfolios Ambassador I believe in helping and connecting all types of sewers and sewing related businesses worldwide. SewingPortfolios.com is a portal for those who sew to connect with pattern designers and sewing related businesses for networking and collaboration. I personally have had several doors open for me in the short time since I created my portfolio on the site, so I recommend joining (it’s free) and getting your portfolio started.

**As Sewing Portfolio Ambassadors we received a sampling of Christmas fabrics from Michael Miller in exchange for sharing our creations on our blogs or social media.

Quilted Jade Skirt for SV Design Crew

Jade Skirt v.2

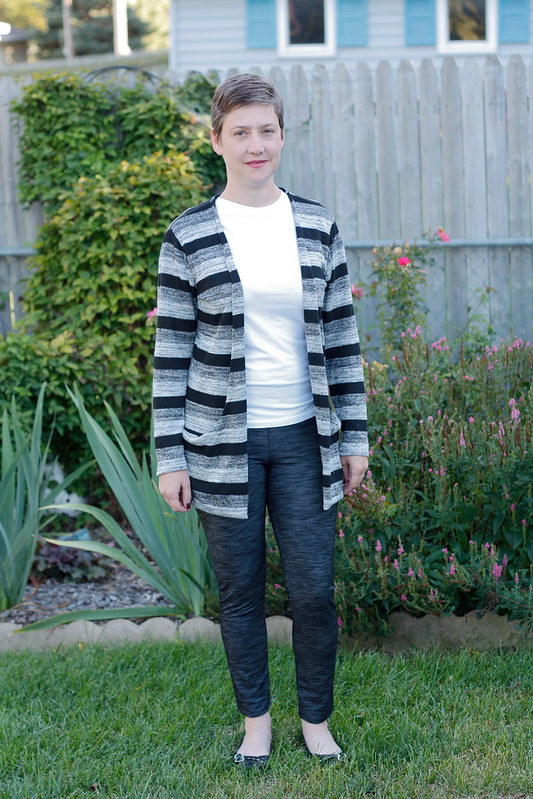
I made up a modified version of the Jade Skirt from Paprika Patterns using a wonderful quilted double knit from Sew Vagabond. I recently joined the SV Design Crew**.

Jade Skirt styling

The Pattern: I’ve made the Jade skirt before here, so I knew it would be perfect for making a mini skirt to show off the quilted texture of this fabric. To skip the folded front, I used the front lining pattern piece as my shell instead. I also lengthened the front and back pattern pieces to 16in. The Jade’s waistband is one curved piece, so to conserve fabric and keep the textured pattern of the fabric a little more lined up, I pieced the waistband instead.

I made up a size 5 again, lengthening it as I said above and then, because the fabric has a good stretch, I end up using a 3/4in seam allowance on the sides instead of 1/2in given in the pattern.

I’ve done an exposed zipper before with only a so-so result, so I wanted to try one again to give the skirt that extra something and to get a better hold on the technique. I struggled getting the zipper in without having little tucks and wrinkles at the bottom corners. I finally got it after a few tries and changing the order of construction. Now I know what I need to do to nail it next time.

Jade Skirt styling

The Fabric: A natural fiber quilted double knit in navy from Sew Vagabond Shop (available late summer) for the shell and a navy jersey knit from my stash for the lining. I’ve actually used a similar fabric before, but wow what a difference between the two. My Jasper dress made in a quilted jaquard made it into my February Fail post because the fabric was just an absolute disaster, it has that slick polyester feel and is snagging and pilling like crazy. This navy quilted knit is holding up so well after washing and even after having to rework that exposed zipper many times and a little seam ripping too.

Fabric comparison

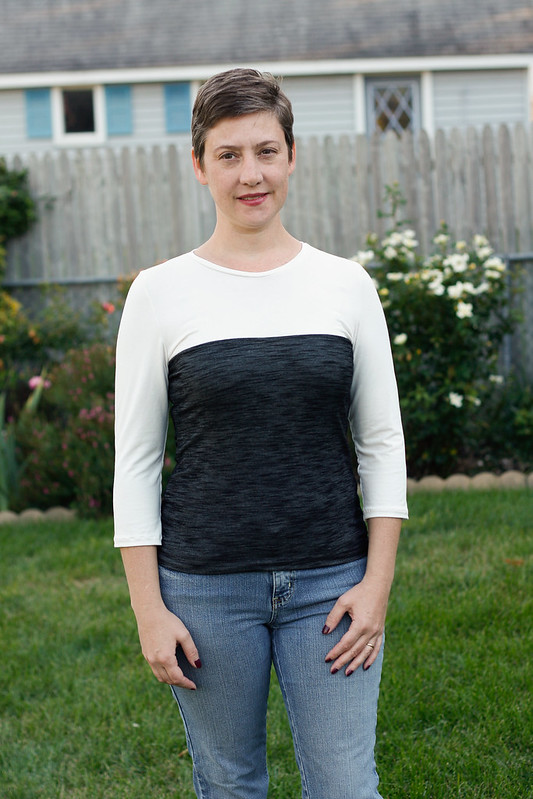
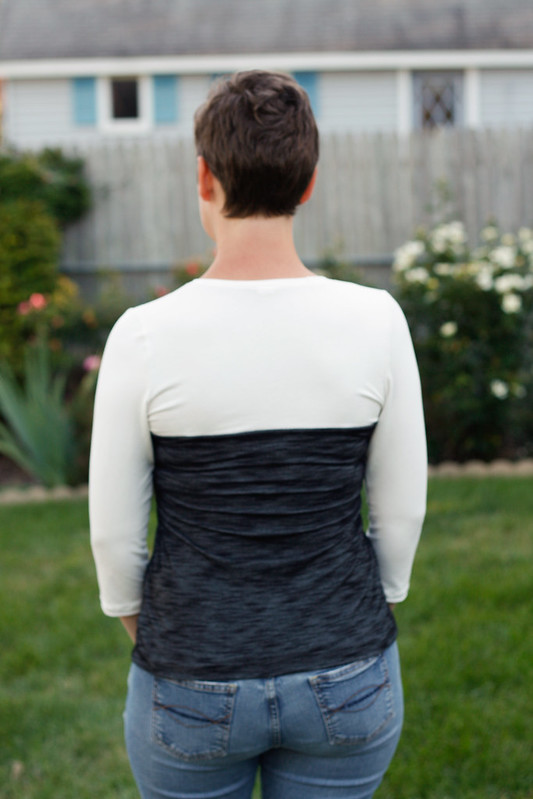
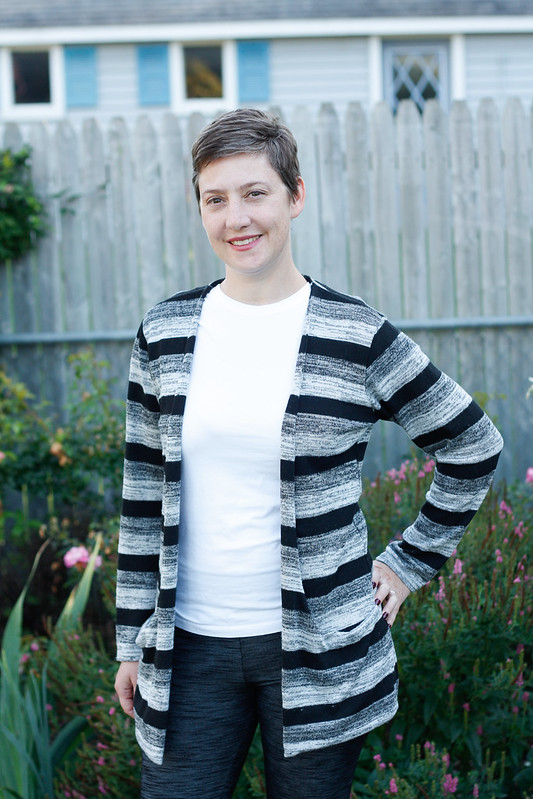
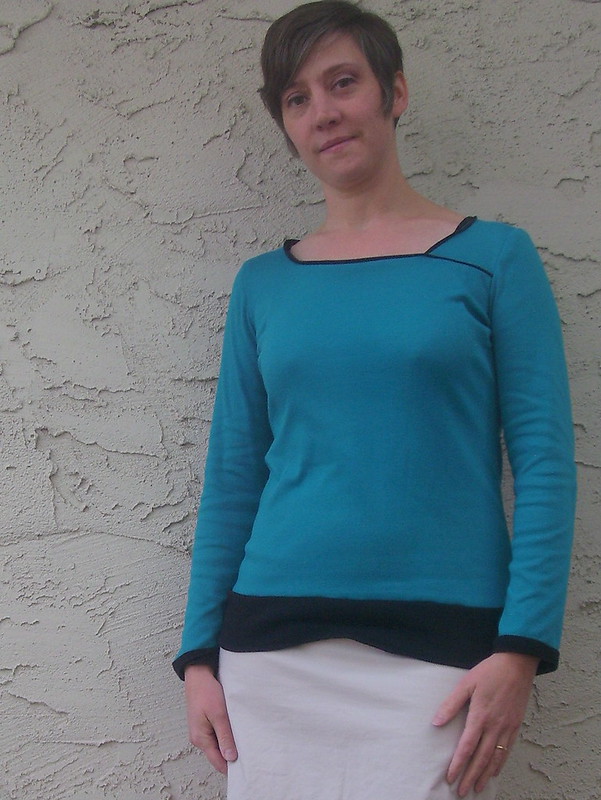
I’ve styled my new Jade with a rtw blouse and my Burda 7140 faux leather jacket, with my Melly Sews Peasant Blouse, and a rtw plain white tee.

Jade styling collage

Making a modified Jade skirt should take you about 3.25 hours, assuming you get an exposed zipper in on the first try. In a size 5 with a pieced waistband I used 1/2yard of the quilted knit and 1/2yard of the jersey knit lining.

Total Cost: $3   Pattern: stash   Fabric shell: Free**  Lining: $1   Notions: $2

** When I make a qualifying purchase as part of the SV Design Crew, I receive 2 free yards of fabric to make what ever I want and Sew Vagabond Shop gets to use my pictures to show off their fabrics.

I’d like to be an Ambassador for Bernina

In the sewing community there are certain sewing machine manufacturers that are considered the best. I don’t own one of those, but you can help with that.

My dear ole’ Janome has served me well, but when I start to think about it, it has some flaws and shortcomings that are frustrating to try to work around. I’m just not at a point where I want to lay out the cash on a new machine or really even invest in comparison shopping, but trying something else out is appealing.

Thankfully Kollabora and Bernina want to solve my dilemma. Bernina is looking for brand Ambassadors and I’ve thrown my hat in the ring.

If you’d like to support my aiming high, hearting my Lane Raglan pic on Kollabora would be appreciated.  Heart here.

815_lane_3


So Simple Shrug the hard way

Without planning it, I  found a way to up my sewing patience by taking a quick and easy pattern and making it difficult.

Shrug 1

The So Simple Shrug, is an apt name for this pattern. One pattern piece, easy fabric, and easy finishing were just what I needed during a busy December. Here’s how it went off the rails.

  1. Velvet seemed to be just the luxe look needed to pair with a sequined dress for my Christmas party. So off I go with my long shopping list, hubby and little guy keeping busy at the store next door. In all the happy alone time fabric shopping I didn’t think to check that the knit velvet I selected had enough stretch for the pattern. It turned out to have next to none.
  2. Spend extra time measuring pattern so I could compensate for lack of stretch. All in all, I just used the largest size, planning to reduce down if needed.
  3.  Because my fabric has a nap, I cut it out single layer and did not cut out the pattern diagonal to the grain line as instructed, resulting in not having enough fabric and a return to the store for more.
  4. I used velvet, that shifty little stinker. Those fibers kept pushing away from each other. I pinned the stuffing out of this, basted and then sewed each seam.
  5. To avoid a noticeable stitch line, I use a blind hem stitch, only to realize the process pressed in a crease. Pretty visible.

Shrug 3

Using the largest size F for 43in bust instead of the  C for 35in bust worked just perfectly to compensate for the lack of stretch in the fabric. The only modification was to shorten the sleeve length by 1/2in, still giving me 1.5in to use for a sleeve hem.

Shrug 4

I added 1/2in to the neckline, front and bottom of back of the pattern before cutting, so I could hem that edge.

Shrug back

Next time, I would modify the front curve to give a little more coverage. Just my personal taste.

Tonic 2 Tee pattern hack by mahlicadesigns

As part of the Sew With Me challenge in September to make four coordinates, I used some of the remaining fabric from my Matilda leggings, to make a color blocked version of the Tonic 2 Tee from SBCC patterns. (Previous Tonic 2’s here & here & here )

Tonic 2 Tee hack by mahlicadesigns

I made a size small with a few adjustments to the pattern this time. I raised the neckline  by 1in at center front, narrowed the neckline by 1/2in at the shoulders and drew a new neckline curve. I also shortened the sleeves to about 17in finished length to make a 3/4 sleeve.

Tonic 2 Tee hack by mahlicadesigns

For the color blocked portion, I used one of my previous versions to determine where I’d like the new sewing line to be, retraced pattern pieces and added seam allowances. I also noted where my center bust point was so I could slightly curve the color block line down from center bust to about 1/2in lower at the sides.

Tonic 2 Tee hack by mahlicadesigns

It didn’t quite come out as hoped. Next time I’ll move the sewing line up a little more above my bust and redraw the curve to be more noticeable. I also learned to consider stretch more carefully. The stretch in the top fabric is much less than previous fabrics used and pulls across the top of my shoulders.

Tonic 2 Tee hack by mahlicadesigns

The Tonic 2 Tee should take you about 2.25 hours cut to finish, plus time to redraft your pattern.

Fabric $5  Pattern $0   Total $5

I also entered my Tonic 2 into the Sewing Indie Month contest.

Jalie Drop Pocket Cardigan for Core Wardrobe building

Holi-Daze week for my Sew Long Summer sew along was a bit of a challenge sewing wise. I was hoping to make a big batch of tees or undies, but it just didn’t happen. Weekends are not where I get my sewing time, so I just barely finished the Jalie cardigan I was working on to show off with my sewing tips post.

Drop Pocket Cardigan 1

I’ve had the Jalie Drop Pocket Cardigan on my list since I saw Jamie’s last December. I’ve also been seeing Hacci knits around and wondered what they are like to sew and if using one would give me a warmer cardigan. The jury is still out on the warmth; it’s not quite cardigan weather yet. I purchased my Hacci sweater knit from Girl Charlee during their July 4 sale.

Drop Pocket Cardigan by mahlicadesigns

A little about the pattern. Jalie patterns come on a large sheet for you to trace off and include a huge range of sizes. The seam allowance on this one was pretty narrow at 1/4inch. Since I was using my serger I was ok with it, but otherwise I would recommend you think about adding more of a seam allowance as you trace. The pattern is put together to enclose as many seams as possible, because of this there were points in the instructions that I definitely would have been lost without the diagrams, so have both handy.

The pattern is a fabric hog, needing four of the front pieces shaped like a big “L” so the pocket part folds over the front. With stripe matching and my best pattern Tetris skills, I got a size U for 36in bust out of 2.25 yards (60in wide).

Drop Pocket Cardigan by mahlicadesigns

Hot Tip: Check your length before you cut. The pocket does not allow for much to be just cropped off the bottom if you forget.

Working with the Hacci sweater knit was very similar to working with a jersey knit; a little rolling at the edges but no fraying. I had some trouble getting the tension adjusted on my Janome 4618LE sewing machine to handle the stretch of the Hacci, but had no problem using my serger for the majority of the construction. I would think twice if I only had my machine to use.

Jalie’s Drop Pocket Cardigan should take you about 3.5 hours cut to finish.

Fabric $9      Pattern $ free     Total $9

Lindy Petal Skirt from Itch To Stitch; Core Wardrobe Building

Lindy Skirt by mahlicadesigns

A lot of times I hem and haw when deciding on a pattern and then spend even more time on fabric. As you may know, I’m slowly working on building my Core Wardrobe. One of the items on my list is a summer weight skirt in charcoal gray. I associate charcoal gray with the winter season, so it’s been a challenge to find a pattern and fabric inspiration for this piece.

Lindy Petal Skirt
Lindy Petal Skirt

The Lindy Petal Skirt pattern was released a couple weeks ago and gave me that ah-ha moment I needed. The Lindy is a knit skirt, which I hadn’t thought of doing, and I had just enough of this rayon terry left over from one of my Jaspers to use. The length, silhouette, and wrap look of the petals all said spring/summer to me.

100_4045

If you’re looking for a quick and easy sew that ends with a great look the Lindy has what you need. The pattern is free from Itch To Stitch and it looks like she takes care to make quality patterns.

I used a medium weight terry knit, I think using a lighter weight knit like a jersey with a little stretch would be ideal so you don’t get some of the lumpiness at the side seams like mine. Shortening by 1in was my only pattern alteration. I’m 5’4.

So what do you think? Did I get a spring/summer success? I feel pretty good about it.

Oh, and yeah I got a hair cut between photos.

The Lindy Petal Skirt should take you about 1.5  hours.

Fabric $8  Total Cost: $8  Yea, more stash busting.

Teal & Black Tee

As far as sewing for myself goes, I took a little break from Core Wardrobe pieces to work up an idea I had for a modified version of the Tonic 2 Tee by SBCC.

100_3703.2

I really like asymmetry in clothing, so I modified the neckline a bit to make it interesting. I used a bit of the left over black knit from my original Tonic 2 Tee as the neckline trim, waistband, and cuff bands.

100_3698

I removed 3 inches from the lower bodice and added a 3in band in the contrasting fabric. From the sleeves I removed 1in in length and added back a 1in band. I measured my new neckline length and subtracted 15% to get my new neckline trim piece. That math worked well. Next time I’ll make the neckline trim a little wider and make the shape of the neckline opening a little more like a crew.

I’m pretty pleased with the result. This go around I made the small and the fit is so much better. Other than the narrow neckline band, it really came out pretty close to what I was imagining.

mahlicadesigns is now at Thread: A Denver Handmade Consignment Boutique

Were you able to guess what’s up from last times little teaser?

100_3448
Folded Front skirt in navy w/ orange

I’ve been working on a small selection of Folded Front skirts to go on sale at Thread in Denver.

100_3443
Medium Folded Front skirt in Navy w/ yellow

The Folded Front skirt is a high waist wrap skirt that features draping across the front and interesting folds at the button closure.

100_3444The waist line can be folded over to reveal the colorful lining, and why wouldn’t you want to do that since it plays off the buttons so well?

100_3445
Small Folded Front Skirt in Navy w/ Cornflower

I used these three coordinating cotton prints from my stash for the linings that peak out at the waistline. Each skirt is still one of a kind, but there is also continuity that will display nicely in the store.

100_3433 - Copy-001100_3447

Check out my new labels.

100_3439

Check back next week for a little more on Thread.