Rose Tshirt from Blank Slate Patterns; pattern review

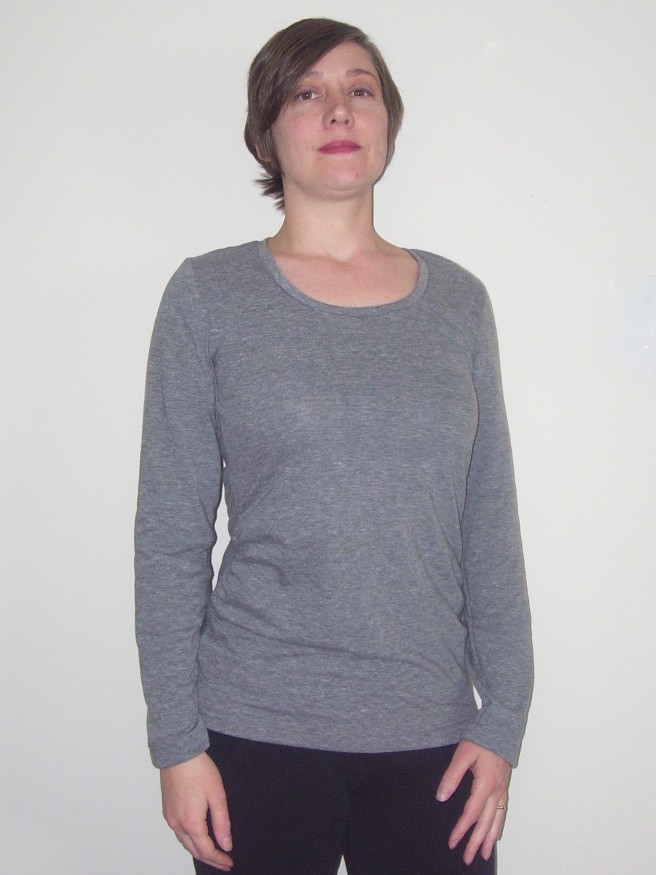
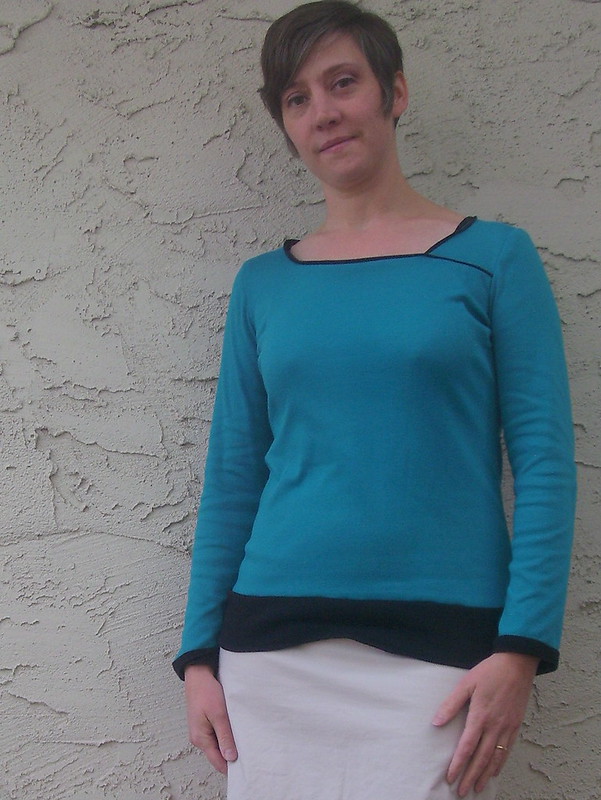
Theres nothing like purple to make me happy and to help break out of the basic colors I’ve been using to build my Core Wardrobe. The first of much more color to come for Spring and Summer, is my version of the Rose Tshirt from Blank Slate Patterns.

Rose Tshirt mahlicadesigns
Body is more of a plum color like the accent pieces


Likes:

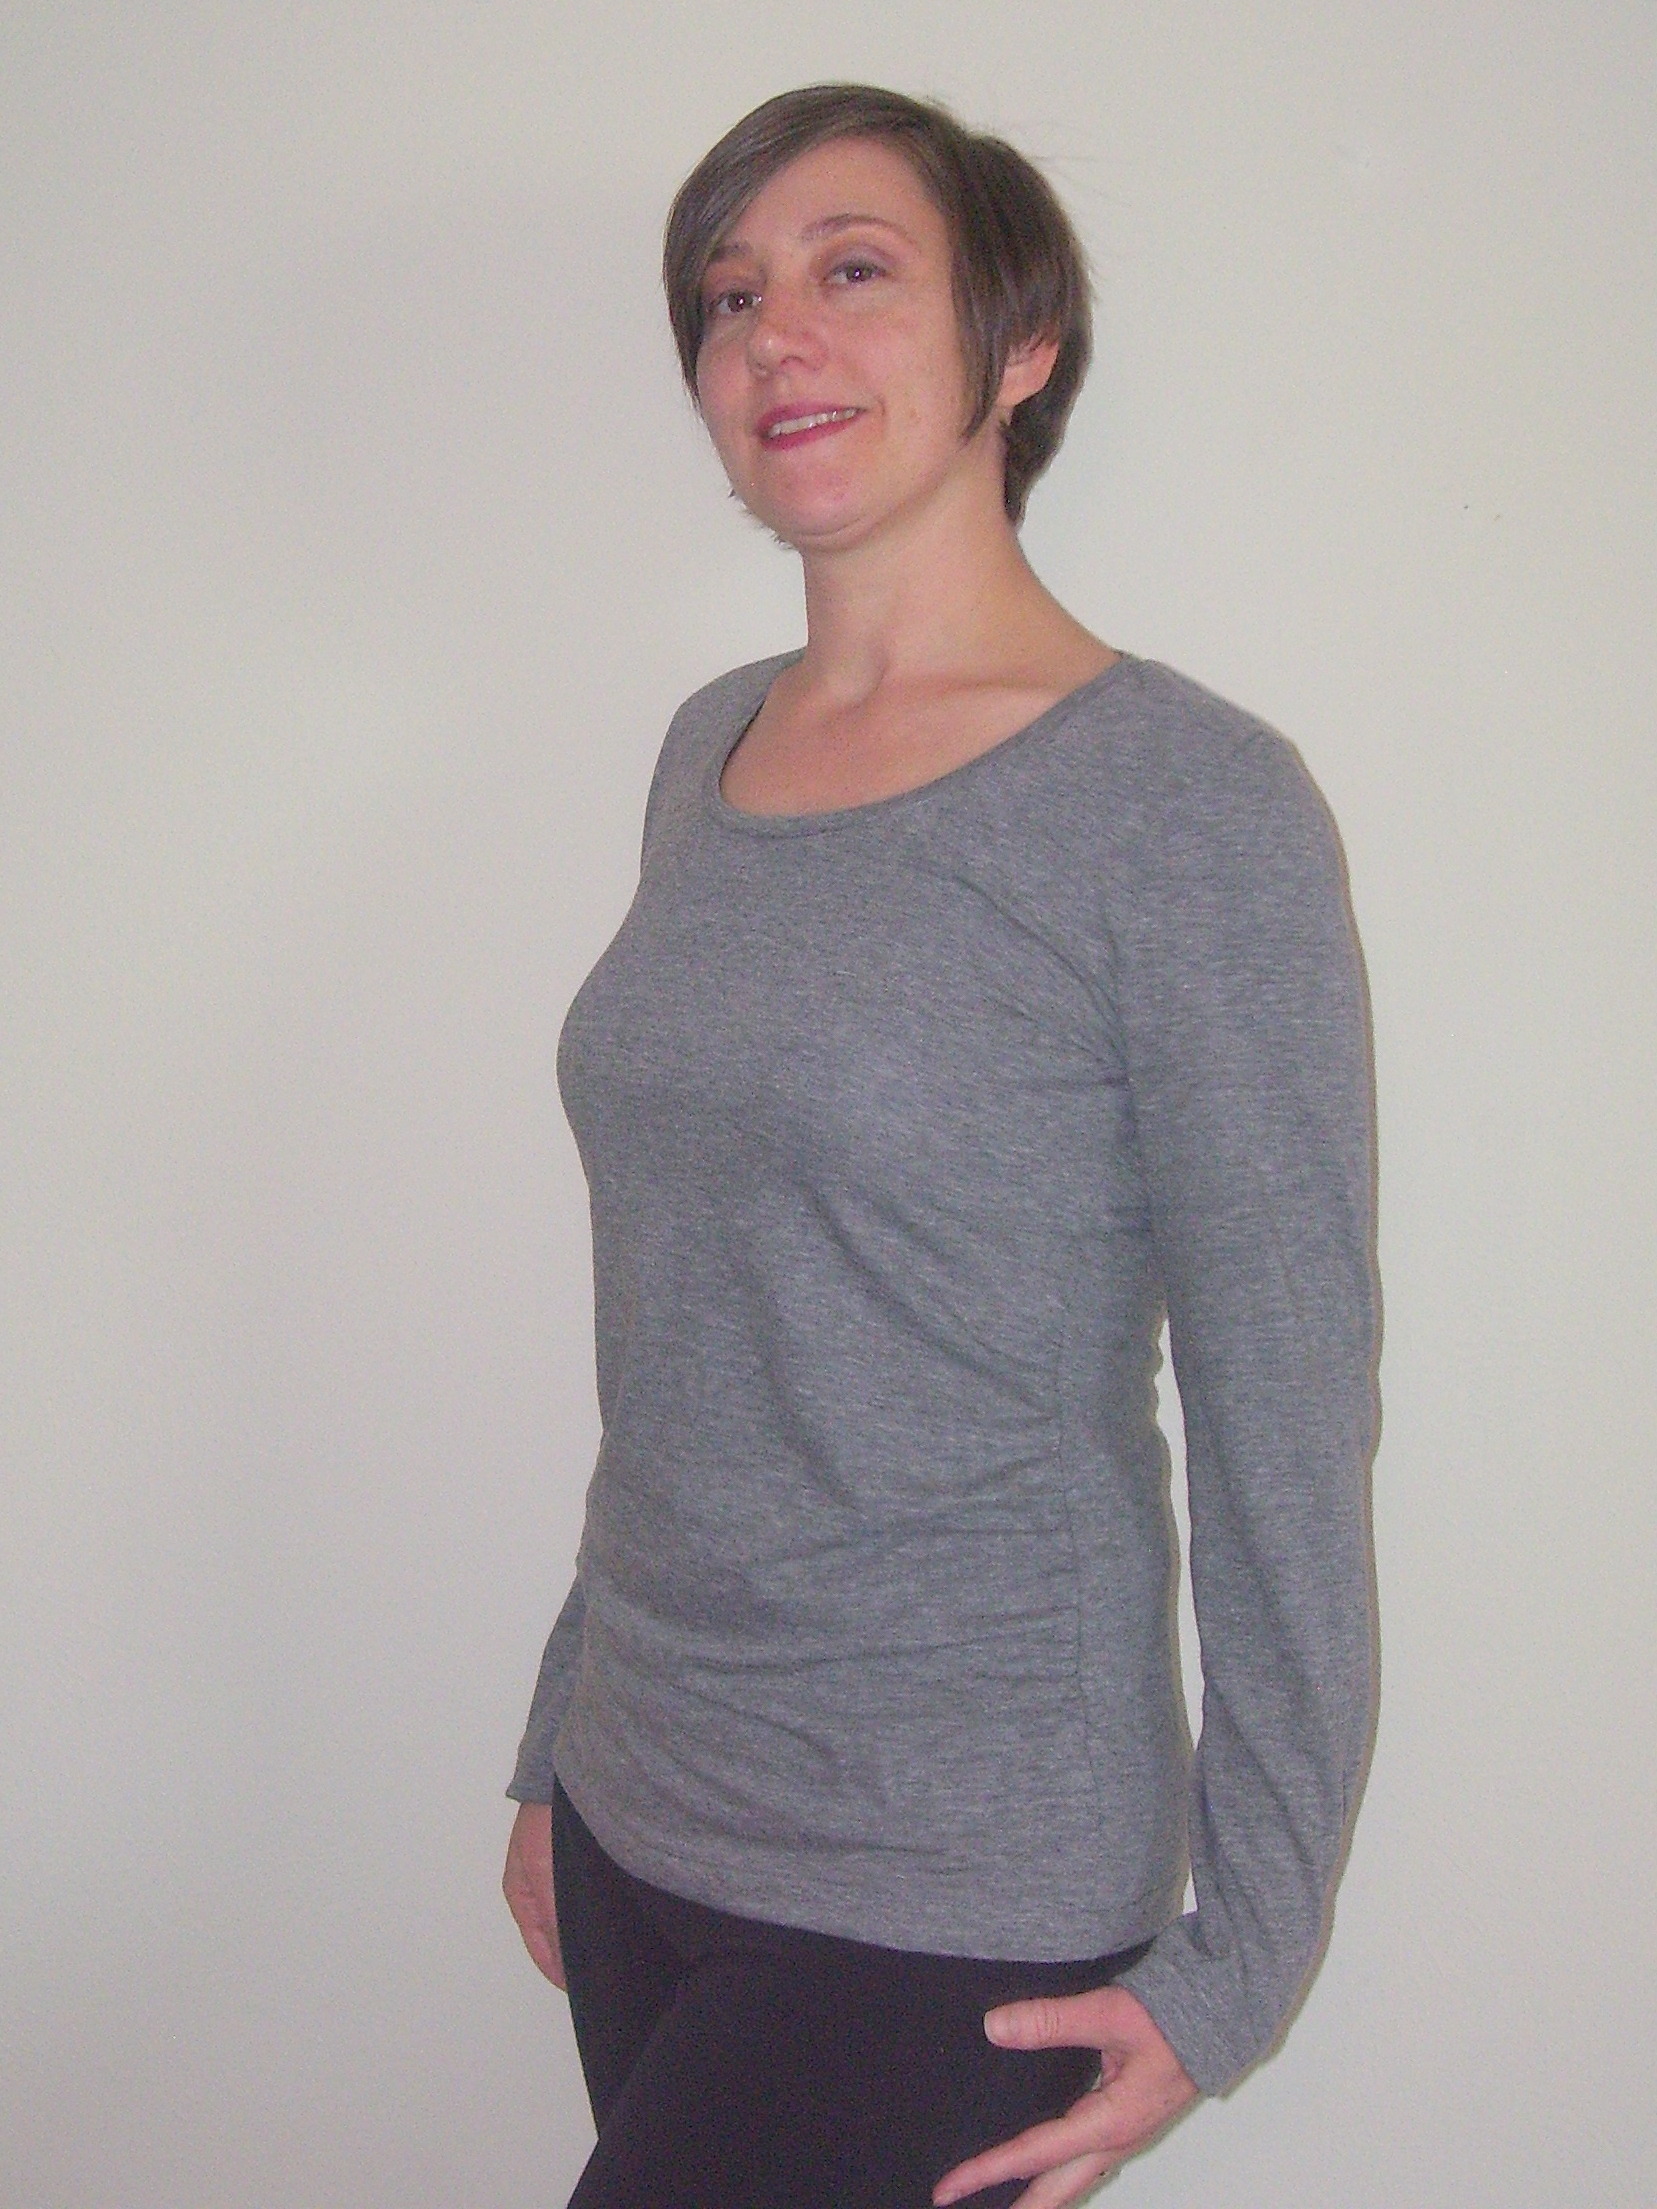
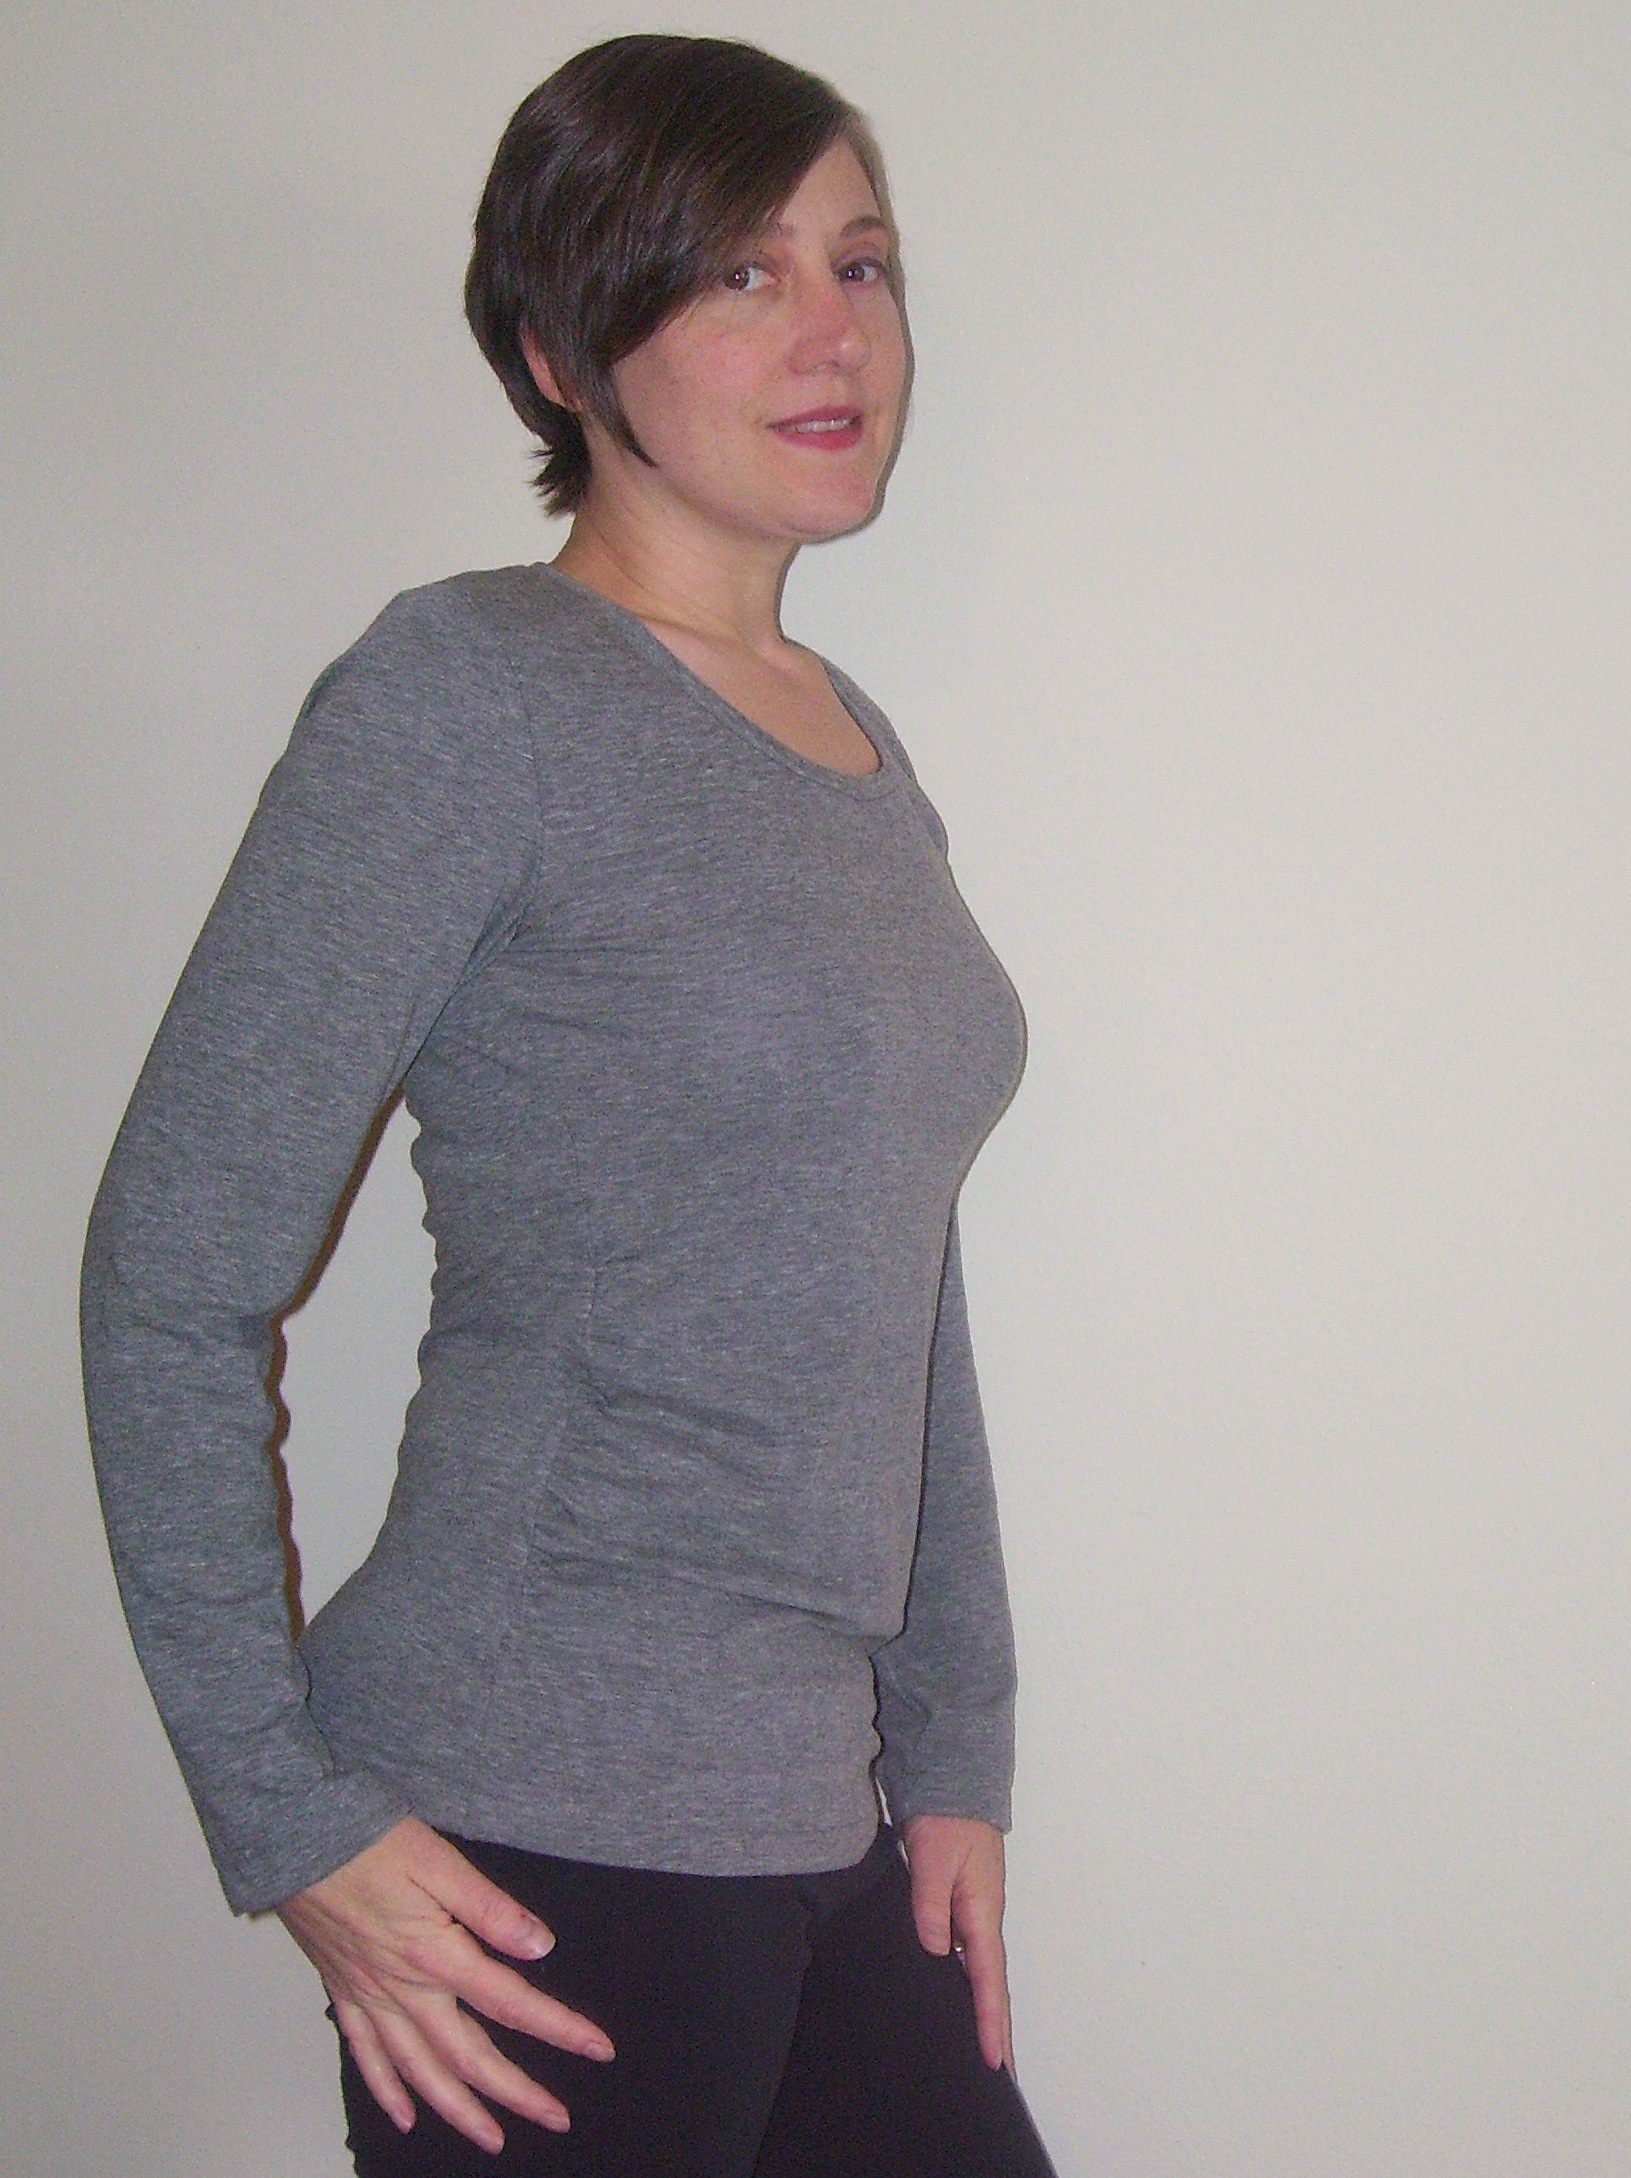
  • The gathering at the front adds some nice ease through the body without making it baggy and I did not need to size up at the hips like usual.
  • Great pattern for a little stash busting of those quilting cottons I haven’t touched in a while.
  • The contrast options at the neckline draw the eye up and away from the tummy and hips.
  • I like inserting sleeves flat.
  • Theres a full facing on the front to cover up all those seams.
  • The pattern can easily be made into a dress with just a little grading for the hip/thigh. (The pattern has been re-released to include a dress option)

Rose Tshirt mahlicadesigns

Criticisms:

  • The seams at the front of the arm scythe are pretty bulky with three layers there. I’d recommend using a lighter weight fabric for the front facing to reduce the bulk.
  • The arm scythe at the front curves in toward the center front a bit and causes some pulling. I’m not going to spend time to adjust the pattern as I’m only planning to use this pattern again for a sleeveless version.
  • I determined that the triangle shape marking on pattern piece#6 needs to be moved by 1in down toward the center front to make the two front pieces #6 and #5  line up correctly. I purchased my pattern from a store, perhaps the PDF versions in the Blank Slate Patterns webstore have been corrected.

    Corrected marking in Red
    Corrected marking in Red

Rose Tshirt mahlicadesigns

Suggestions:

  • Go down a size if you’re between sizes. I’m a 35.5in bust and the small sized for up to a 35in bust has enough ease for me.
  • Understitch the facing around the neckline to prevent rolling, before top-stitching the front facing below the front yoke.
  • Use a lighter weight fabric for the front facing if possible, this will decrease bulk at the arm seams. Alternately, grade the seam allowances if you’re not using a serger.
  • Check your pattern pieces.
  • Lay out your front yoke pieces as demonstrated in the instructions to help keep track of what goes where.
  • I use stay tape at my shoulder seams when sewing with knits.

The Rose Tshirt takes about 3.25 hours to complete.

Ann T Top from Style Arc; Core Wardrobe part 4

SewYourPatternStashSq213

Today I’m working on building my Core Wardrobe and participating in Sew Your Pattern Stash 2015. I’m hoping to work through more of my unused patterns this year.

100_3786

The Ann T Top pattern is from Style Arc. Their size chart suggested I should make a size 10, but after flat measuring the pattern I used an 8 instead and a 3/8in seam allowance instead of the 1/4in allotted. I was drawn to this pattern because of the draping across the tummy area, while still appearing to be a fitted tee.

100_3788

The pattern instructions would be too sparse if you’re a novice, for example there is no instruction on how to use the clear elastic to create the gathers on the front or how to insert a neck binding. If you’ve sewn knit tees before, there is nothing here to challenge you, other than using the clear elastic to make the gathers.

100_3787

Perhaps the fabric I used, a rayon jersey knit, affected the draping, perhaps I need to go down a size through the waist and arms, but I found the overall fit still needs some work for me. I was wanting more draped folds across the tummy, instead it just bags out a little and the arms are too baggy, but these fit problems are easy fixes. I  think I’ll adjust the arm width and remove the front gathers to make this a TNT pattern.100_3793

This project took 2.75 hours.

This is the last fall/winter Core Wardrobe piece for now. I’m turning my focus to spring/summer in hopes that I can get a few items done to wear when the warmth returns.

And, so I can feel a sense of accomplishment here’s what I made for my fall/winter Core Wardrobe:

I’m counting the Kirsten Kimono Tee as a head start on my spring/summer Core.

Kirsten Kimono Tee
Kirsten Kimono Tee

I’m feeling the itch to take a break from making the basics I need and these basic colors. I have a couple projects lined up that I think will lift my spirits with some color.

Jasper Sweater by Paprika Patterns; Core Wardrobe building part 3

I was pleased as spiked punch to participate in pattern testing for Lisa over at Paprika Patterns for her second pattern release, the Jasper Sweater. Check out her first offering, the Jade skirt.

And Ta Da my two work ups of the Jasper.

100_3768

I love how it looks. It’s not too boxy and slouchy as some sweatshirts can be and the welt pockets keep it looking trim at the waist. I also like that the collar isn’t too big. I like a cowl, but not a big fan of them draping all down the front of my shirt.

The epaulet is attached by sewing on the button through the layers. I may remove it or reposition it down a bit.

Ah, you just have to love what a princess seam can do for your shape.

100_3770

This was my second go at the Jasper, following the pattern without modifications. For the cowl version above, I sized up to a 4, but should have stayed at a 3 from waist up.  I used a French terry with about 15% stretch that I found on RaspberryCreekFabric. I just love this fabric.

Bonus! This fits perfectly into my core wardrobe needs.

The Jasper pattern calls for sweater weight fabrics with minimal stretch. I worked up the hooded version below first, in a size 3, in a sweatshirt cotton poly blend with no stretch. In this fabric, it takes just a little wiggling to get it over my shoulders when taking it off. This one may go into my etsy shop. (So, I sized up on the second version. Shouldn’t have though, since the second version used a knit with stretch. whoops)

I followed the instructions as is and did use the suggestion to topstitch down the interior seams around the neckline and within the hood.

Jasper Sweater

Look at the asymmetry and buttons at the collar, that’s always a big draw for me. The hood is pretty big compared to most, think: no terribly messed up hair.

Jasper Sweater

Jasper Sweater

Lisa made modifications the pattern after I made my hooded version and again after the cowl neck version. So the final pattern may be slightly different from what you see here.

I’ve used a variety of pattern downloads (PDFs) from indie pattern designers to the one offs that other bloggers kindly share and Paprika Patterns are by far the best I’ve seen. It’s like they took a little peep into my mind and addressed all the things that annoy me about pattern downloads. I appreciated the efficient layout and a printing guide so you only print the pages you need. Paprika Patterns also has links for help on construction steps and tutorials for pattern alterations.

Jasper Sweater

I’m thinking I need to make the Jade skirt from Paprika Patterns too.

Kirsten Kimono Tee by Maria Denmark Core Wardrobe part 2

Back to building my core wardrobe, for now anyway. I’m at a bit of a block trying to figure out what to make while trying to find the right fabrics for the few things I do have figured out.

Today’s tee is using the Kirsten Kimono Tee pattern from Maria Denmark. The pattern is free when you sign up for her newsletter.

mahlicadesigns

I just loved this subtly printed knit when I saw it at Joanns (can you see the foil chevrons?) and bought 1.5yrds without a specific plan other than to use it for a Core Wardrobe piece. It’s a light weight knit, so I opted for a short sleeve tee for the summer months and chose the Kirsten Kimono pattern to keep trying new designers and silhouettes. The fabric is very transparent so be prepared to wear a camisole underneath if you get this same color.

100_3720

The only draw back to the pattern was having to add a seam allowance to the pattern pieces. Kind of a pain. I didn’t look at the pattern directions, so I can’t give a review of those but I do think this is a great fit and style, well worth making. I would make this again with a small adjustment to make the hip a bit wider for me. This may become a Go To pattern for me, I hate shirts being tight under my arms and the kimono sleeve is just right for me.

The pattern calls for less than 1yd of fabric, so at 60in wide and 1.5yrds I had enough fabric to make two size smalls. If your fabric shrinks more than mine (only 2in in length) you might not have this luck. Now to figure out who gets the second small my etsy shop or a Christmas gift.

100_3722

Hmm, I’m wondering if I need to start doing a sway back adjustment?

This project took 3.75 hours for the two tees.

Teal & Black Tee

As far as sewing for myself goes, I took a little break from Core Wardrobe pieces to work up an idea I had for a modified version of the Tonic 2 Tee by SBCC.

100_3703.2

I really like asymmetry in clothing, so I modified the neckline a bit to make it interesting. I used a bit of the left over black knit from my original Tonic 2 Tee as the neckline trim, waistband, and cuff bands.

100_3698

I removed 3 inches from the lower bodice and added a 3in band in the contrasting fabric. From the sleeves I removed 1in in length and added back a 1in band. I measured my new neckline length and subtracted 15% to get my new neckline trim piece. That math worked well. Next time I’ll make the neckline trim a little wider and make the shape of the neckline opening a little more like a crew.

I’m pretty pleased with the result. This go around I made the small and the fit is so much better. Other than the narrow neckline band, it really came out pretty close to what I was imagining.

SBCC Tonic 2 Tee Core Wardrobe part 1

My first foray into building my core wardrobe is a long sleeve tee using the SBCC Tonic 2 Tee pattern.

I can only think of two items that I’ve done using a knit and one of those was a complete nightmare. This time I’m going in ready for success powered by sewing blogs.

Melly Sews suggests using the lightning aka wobble aka stretch stitch on knits so the seams can maintain the fabrics stretchable quality. Lladybird uses a walking foot so both layers of your knit feed through evenly. The Tiramisu Circus has a nice post on stabilizers for knits.

First off let’s talk about the pattern. It was free so that’s great. Instructions are super easy, though I modified the neckline procedure. The instructions have you apply the neckline trim while one shoulder seam is still open, then tacking down the trim after the shoulder seam is closed. That seamed sloppier than I want, so I did it the old-fashioned way of inserting the circle of trim into the closed neckline. Even if you follow her instructions your left to guess how much to stretch your trim so it will lay flat instead of gaping. A little guidance there would be nice. I had a little gaping that I had to press the heck out of, but it practically disappeared after washing. I like that the pattern calls for self fabric for the neckline trim.

My first seams, the shoulder seams, incorporated all three of my knit fabric firsts; walking foot, stay tape, and lightning stitch. Other than the fabric getting munched on the first couple stitches almost every time, things were working to plan. When I attached the neckline trim though, I found that the stitch length was so short that it was going to take forever to get this sewn. I did a few tests to try to figure out the problem and didn’t have my aha moment until I was half way through attaching the first sleeve.

My solution? Sulky Solvy original water soluble stabilizer that I bought forever ago thinking I’d make one of those lacy thread scarves. So glad I didn’t cause I stopped thinking those were cool after five minutes.  I started laying down strips of this stuff on top of my fabric and it helped my walking foot get enough grab on the top layer to move things through and give me the stitch length I was expecting. Wrapping a bit of this stuff around the beginning of my seams also helped with the afore-mentioned munching.

So here’s the results.

Tonic 2 Tee

I chose to make a medium since I was between sizes and I’m sick of tees that are too tight under the arms. Next time I’d definitely go with the small as I have plenty of room here. I took off 1.5in from the bottom before hemming and this tee is still on the longer side. Overall I’m not displeased with the tee but not terribly excited either. I’m holding judgement until I make this again in a smaller size and can make a couple of adjustments. I think I’d like a smaller neck opening and I’d like to figure out how to pinch out those folds between bust and underarms.

100_3652

Tonic 2 Tee backview

This project took a surprising 3.75 hours. Using the walking foot and fiddling with the stabilizer is just slow going, but worth it to get those seams to play nice.

So I’m wondering if its worth all the time and effort to make something so basic. Would it be better to keep looking for RTW tees that fit? But that would mean clothes shopping.

KCW Project One (and only): The Prepster Pullover

Kids Clothing Week Project One (and only).

Plan: Basic Blazer, PJs, seatback cover, monster pocket sweatshirt

Actual: Prepster Pullover

100_3520

Plan was to work up a blazer to match these clean slate pants for my little guy to wear to my grandfathers memorial service at the end of August. So here’s where my plan falls all apart. While I think it would be a super cute outfit, a blazer and pants in the August heat and humidity of Michigan just sounds mean. Plus I don’t see it getting worn much else and if I’m going to spend the effort it’s got to be worn a lot.

100_3509

So on to plan B, the Prepster Pullover by Blank Slate Patterns. I used the last of this light weight green gingham that I used as an accent on the pants. Yeah stash busting. Now I have a cute outfit that definitely works for the memorial service and will get repeated wear on Sundays to church or anywhere else I want to pull out the adorable factor.

100_3521

This was my first mens style shirt. A monk collar, half-length placket, flat felled seams, and shoulder yoke were all new processes for me. There was nothing terribly difficult about the pattern but all the details definitely took some time and patience.  I typically work as fast as possible to blaze through a pattern, but I really wanted to take my time to get it right. Total time to make was 5.5 hours.

100_3522

Now for the rest of my list, well, I just spent all of my time on the shirt and the rest of the plans go into the queue for a later time.

The Polly Top

I’ve had a really productive month, so stay tuned for future posts featuring some of my work.  It feels great to get some UFOs (unfinished objects) knocked out, to work on some stash busters, and to wrap up some of the mending and utility sewing that just piles up.

I came across this little cutie while scouring Pinterest for top patterns to give my summer wardrobe a little pick up.

100_3314

This is the Polly Top, a free pattern download from By Hand London.

I was drawn to the simplicity of the silhouette and wanted to try out how the shaped piecing of the contrasting front worked instead of darting around the bust.

100_3313

I chose these silkie fabrics to use up some of my stash and hoped it would be a good layering piece under my monk collar jacket.

For the top edge of the contrasting front piece to fall on my bust in a flattering way, I had to shorten the shoulder strap length about 1.5 inches and adjusted the underarm scythe down about an inch also. Pretty easy fitting.

100_3315

The neck and arms are finished with bias binding of the same material. I pressed my binding in half and then again with the edges folded in to make it easier to attach and fold over the raw edges of the top. This was well worth the extra few minutes of pressing time, since I’m certain it gave me a much neater result. The whole project took me just under four hours.

I’m definitely going to use this pattern again to make another summer top in a light weight cotton.

The Sweet Treats Top by mahlicadesigns

The Sweet Treats Top is a one of a kind creation; hopefully one of many more to come as I work on my resolution to use up my stash.

I used two purple fabrics from my stash to create the body and bib.

My mother, a garage and estate sale champion, let me pick through some of her goodies recently. The binding and vintage lace are thanks to her.

The buttons are from a great score I made this summer at a neighbors garage sale.

The Sweet Treats Top is available in my etsy shop.

The Sorbetto Top by mahlicadesigns

I finally had the chance to join the Denver Sewing Collective for one of their meet ups in June. Theme for the night was a blouse sew-along, though I think I was the only one working on a blouse. I really appreciated the opportunity to spend the evening with other sewers as we worked on projects and got to know each other.

I started a simple blouse pattern from Collette patterns, The Sorbetto Top, a free download. The finished project is available in my Etsy store.

Generally, I followed the pattern except:

I added about 2in to the length at the bottom hem line since I thought the finished examples looked a little short. I added a couple of layers of ruffles to my front neckline to spruce up this pretty simple silhouette.

Hemming, one of  the tedious parts of construction for me, is made easier by the use of bias tape around the neckline and arm openings. The ruffles added quite a bit of thickness around the neckline, but I was still o.k. with a 1/2in wide double binding.

Next time I’d shorten the length of the darts, I’m not a fan of how far they come across the chest.

I’d recommend the pattern as a good beginner project or if you’re looking for a quick and easy project. The instructions state that the sizes run small for a fitted look. Heed that warning.

My mother gave me some nice home dec fabric samples that I’ve been thinking of using for bib accents on blouses. This pattern may be a good contender for that future project.

Grey & Purple stripes blouse

I originally bought this Simplicity pattern (2601) to make with a black chiffon, but convinced myself once more that black is the last thing I should be wearing against my pale skin. Thank goodness for purple. And grey. And stripes.

After starting to cut, I began to worry about how the stripes would look on the ruffle, but I was too far in to have second thoughts. I’m glad I didn’t just scrap the idea, because I’m pretty pleased with the result.

I’ve used Simplicity patterns many times before and always have a great fit, but this pattern definitely came out too large for my size. I’m pinching about two inches in the back to make it look right.

My Spring Ruffle Top

I came across this top a while ago at  sewmamasew.com and thought it would work well for a casual summer top that was more modest than most tank tops.

I used some nice fabrics thanks to a gift certificate to Fancy Tiger Crafts.

I thought the instructions were very clear & easy to follow, though having completed the top I would adapt them to be more efficient. Having gone through the fitting of the chest band and creating the underarm divots I would simply trace one of the chest pieces I created, add seam allowance to the top edge, and cut out four chest pieces with the intent to insert the straps in the new top edge.