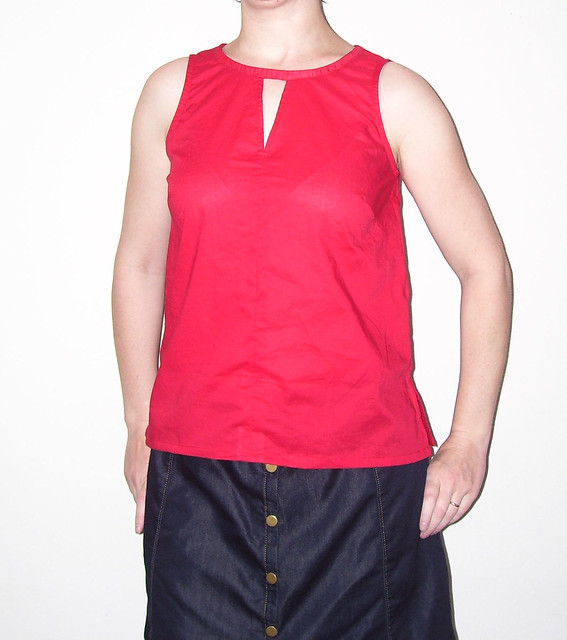
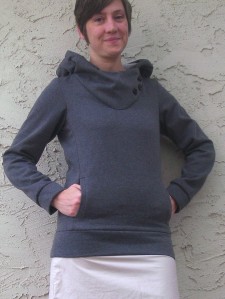
Ally Skirt and Onyx Shirt for the Knock It Off tour

Today I’m sharing an outfit I made for the Knock It Off blog tour hosted by Lulu & Celeste and Sprouting Jube Jube. The mission: Knock Off a look from a designer or rtw.

The challenging part of the tour parameters was finding my inspiration. I hadn’t followed designers or Ready To Wear (rtw) companies at all, but this was the perfect push to broaden my view.

Since I didn’t even know where to start, I had to work backwards. I knew I wanted to make a red skirt for summer, so I started looking at companies I’d heard people talking about- Anthropologie, Mod Cloth, and Urban Outfitters. I searched for red skirts and pinned the outfits I liked. Success! I found this outfit on Anthropologie that I wanted.

Photo from Anthropologie

Putting together the Knock Off was super easy from my pattern stash. The Ally Skirt and Onyx Shirt had the right silhouettes and I quickly hashed a plan to hack the Ally to get the look.

I made the Onyx in a size 4 using a cotton woven (an IKEA sheet from their clearance bin). Simple enough since I’ve made the Onyx before (here).

For the Ally I made a size small again (first Ally here) using a cotton sateen from Joann Fabrics, drafted an angled pocket, added 1.5in in height to the waistband, and added a zip fly and clasp closure.

I’m very pleased with how my outfit came out. It harkens to the inspiration photo and it’s my style and color scheme. I’m gettting better and better at hacking the patterns I own to get a look I want. It’s a learning process and of course there are goof ups like this one:

https://www.flickr.com/photos/51456715@N04/33327095324/in/dateposted-public/

I forgot to extend the waistband to account for the zipper fly extension. Whoopsie. I made it work by tappering it a bit.

I was a little short on fabric after drafting my hacks, so I was able to stashbust a little more of my quilting cotton stash for the waistband facing and fly shield.

I’m really happy with my outfit and that I can make myself a look instead of shelling out the $150 it would have taken for the Anthropologie version. Yikes!

My cost: Total: $13   Fabrics $9    Notions $4  Patterns: $0 Stash

If you’d like me to write up a tutorial on my Ally Skirt hack, let me know in the comments.


Now I’d like you to pay a visit the my fellow bloggers to see how they Knock It Off 

Monday, April 24  Lulu & CelesteCall AjairePaisley RootsAdventures with Bubba and Bug

Tuesday, April 25  Sprouting JubeJube mahlicadesignsSew and Tell Project

Wednesday, April 26  Lulu & CelesteSewSophieLynnNini and AshLittle Heart Threads

Thursday, April 27  Sprouting JubeJubesewingbytiInspinrationHouse of Estrela

Friday, April 28  Lulu & CelesteDuchess & HareCreative CounselorFAM

As always, thanks for reading today.

You can follow me on instagram, Bloglovin, or by entering your email in the right side bar.

V Slit Blouse Simplicity 1430

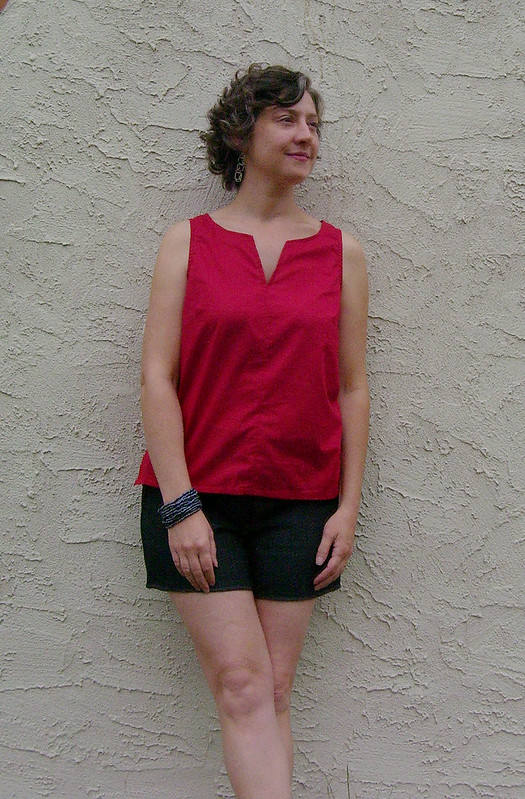
Today I’m going to share just a little bit about the V front blouse that I included in the spring capsule wardrobe I worked on for the Sew Alongs And Sewing Contests fb group.

Me Made May really showed that I was missing some of the Core Colors from my wardrobe, so I immediately started making Simplicity 1430 View B in a red lawn from Fabric Mart and crossed off a long waiting project.

V Slit blouse

This cute number went together pretty easily until I hit the neck band technique. My gut instinct was to apply a bias binding, but I decided to follow the pattern. Uh-Oh. The instructions have you apply a pieced neckband, a neckband facing, and stitch through all the layers. That adds up to seven layers at the shoulder seams. The result, even in a lightweight lawn, was a  thick rope-like neckband.

V Slit blouse 1

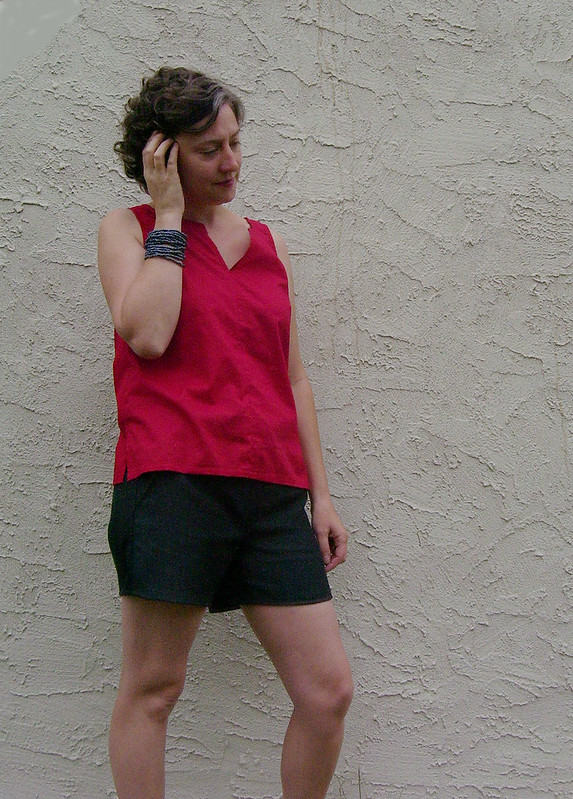
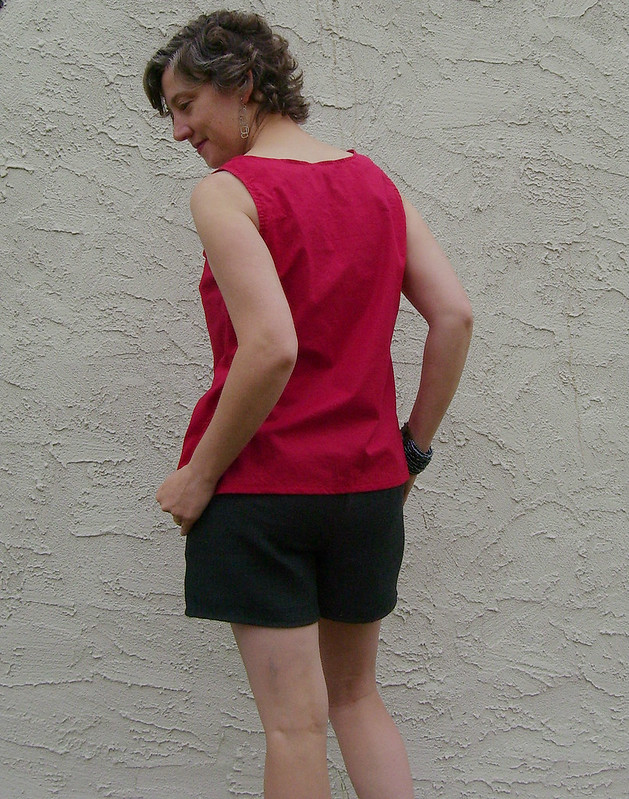
I hated this neckband, so I ripped it off and added a 1in facing instead. I’m so much happier with the fit and feel. To keep that cut out look, you could use a bias binding.

V Slit blouse

V Slit blouse

The pattern: Simplicity 1430 View B, size 12. Stupid neckband removed and replaced with a facing, closure at CB eliminated and 1/2in added to hip.

V Slit blouse

The fabric: 100% cotton lawn from Fabric Mart, long sold out.

V Slit blouse


Notes: Choose an easier option for the neck binding and skip the back closure if you want to.

Simplicty 1430 view B should take you about 3.5 hours to make. A size 12 used 1yd of fabric.

Total cost: $3.50         Fabric $3.50             Pattern $0-stash

Ann T Top from Style Arc; Core Wardrobe part 4

SewYourPatternStashSq213

Today I’m working on building my Core Wardrobe and participating in Sew Your Pattern Stash 2015. I’m hoping to work through more of my unused patterns this year.

100_3786

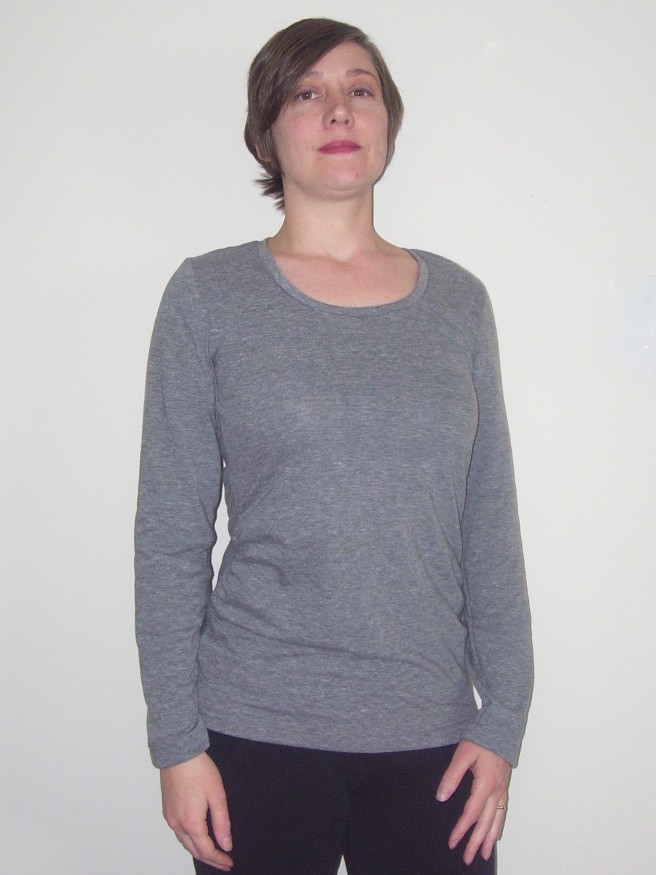
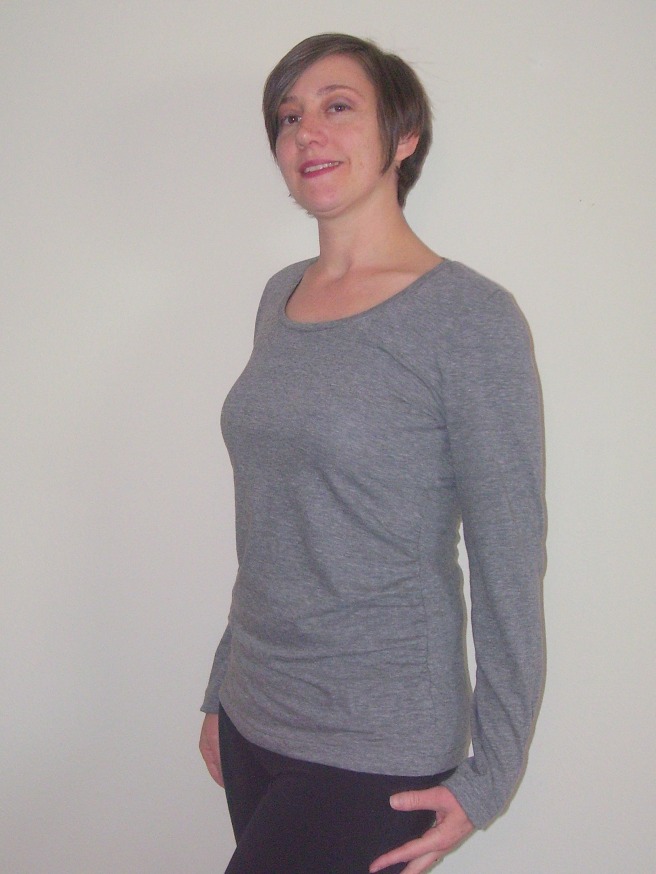
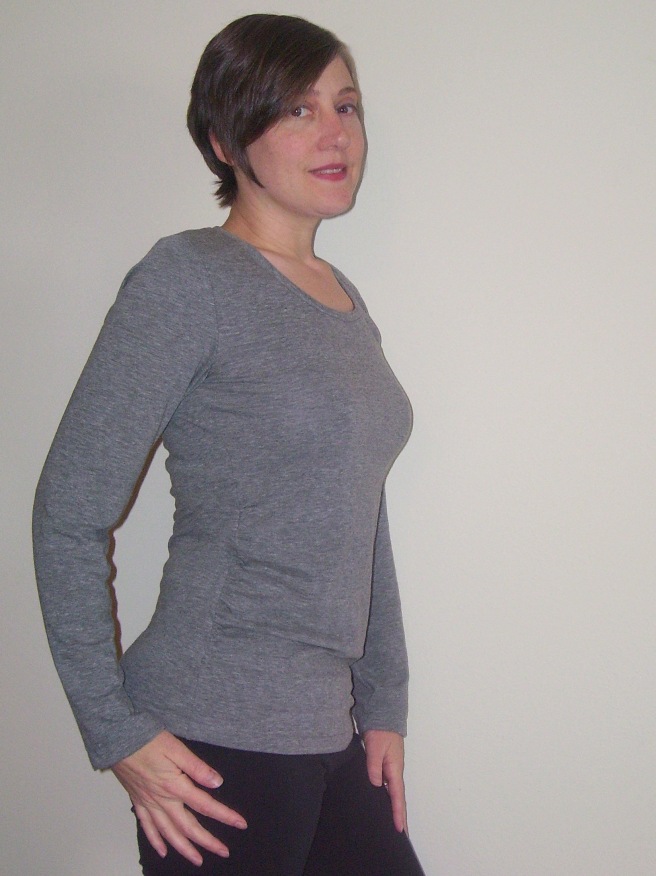
The Ann T Top pattern is from Style Arc. Their size chart suggested I should make a size 10, but after flat measuring the pattern I used an 8 instead and a 3/8in seam allowance instead of the 1/4in allotted. I was drawn to this pattern because of the draping across the tummy area, while still appearing to be a fitted tee.

100_3788

The pattern instructions would be too sparse if you’re a novice, for example there is no instruction on how to use the clear elastic to create the gathers on the front or how to insert a neck binding. If you’ve sewn knit tees before, there is nothing here to challenge you, other than using the clear elastic to make the gathers.

100_3787

Perhaps the fabric I used, a rayon jersey knit, affected the draping, perhaps I need to go down a size through the waist and arms, but I found the overall fit still needs some work for me. I was wanting more draped folds across the tummy, instead it just bags out a little and the arms are too baggy, but these fit problems are easy fixes. I  think I’ll adjust the arm width and remove the front gathers to make this a TNT pattern.100_3793

This project took 2.75 hours.

This is the last fall/winter Core Wardrobe piece for now. I’m turning my focus to spring/summer in hopes that I can get a few items done to wear when the warmth returns.

And, so I can feel a sense of accomplishment here’s what I made for my fall/winter Core Wardrobe:

I’m counting the Kirsten Kimono Tee as a head start on my spring/summer Core.

Kirsten Kimono Tee
Kirsten Kimono Tee

I’m feeling the itch to take a break from making the basics I need and these basic colors. I have a couple projects lined up that I think will lift my spirits with some color.

Kirsten Kimono Tee by Maria Denmark Core Wardrobe part 2

Back to building my core wardrobe, for now anyway. I’m at a bit of a block trying to figure out what to make while trying to find the right fabrics for the few things I do have figured out.

Today’s tee is using the Kirsten Kimono Tee pattern from Maria Denmark. The pattern is free when you sign up for her newsletter.

mahlicadesigns

I just loved this subtly printed knit when I saw it at Joanns (can you see the foil chevrons?) and bought 1.5yrds without a specific plan other than to use it for a Core Wardrobe piece. It’s a light weight knit, so I opted for a short sleeve tee for the summer months and chose the Kirsten Kimono pattern to keep trying new designers and silhouettes. The fabric is very transparent so be prepared to wear a camisole underneath if you get this same color.

100_3720

The only draw back to the pattern was having to add a seam allowance to the pattern pieces. Kind of a pain. I didn’t look at the pattern directions, so I can’t give a review of those but I do think this is a great fit and style, well worth making. I would make this again with a small adjustment to make the hip a bit wider for me. This may become a Go To pattern for me, I hate shirts being tight under my arms and the kimono sleeve is just right for me.

The pattern calls for less than 1yd of fabric, so at 60in wide and 1.5yrds I had enough fabric to make two size smalls. If your fabric shrinks more than mine (only 2in in length) you might not have this luck. Now to figure out who gets the second small my etsy shop or a Christmas gift.

100_3722

Hmm, I’m wondering if I need to start doing a sway back adjustment?

This project took 3.75 hours for the two tees.

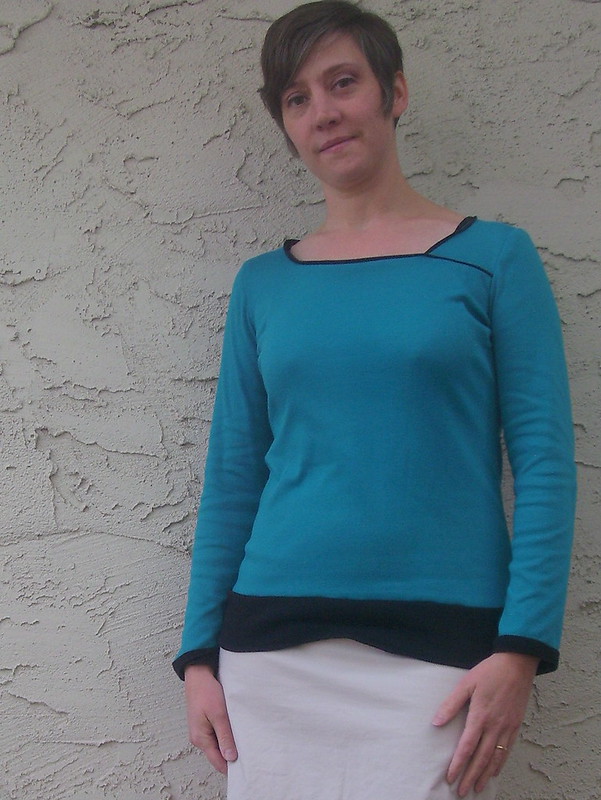
Teal & Black Tee

As far as sewing for myself goes, I took a little break from Core Wardrobe pieces to work up an idea I had for a modified version of the Tonic 2 Tee by SBCC.

100_3703.2

I really like asymmetry in clothing, so I modified the neckline a bit to make it interesting. I used a bit of the left over black knit from my original Tonic 2 Tee as the neckline trim, waistband, and cuff bands.

100_3698

I removed 3 inches from the lower bodice and added a 3in band in the contrasting fabric. From the sleeves I removed 1in in length and added back a 1in band. I measured my new neckline length and subtracted 15% to get my new neckline trim piece. That math worked well. Next time I’ll make the neckline trim a little wider and make the shape of the neckline opening a little more like a crew.

I’m pretty pleased with the result. This go around I made the small and the fit is so much better. Other than the narrow neckline band, it really came out pretty close to what I was imagining.

SBCC Tonic 2 Tee Core Wardrobe part 1

My first foray into building my core wardrobe is a long sleeve tee using the SBCC Tonic 2 Tee pattern.

I can only think of two items that I’ve done using a knit and one of those was a complete nightmare. This time I’m going in ready for success powered by sewing blogs.

Melly Sews suggests using the lightning aka wobble aka stretch stitch on knits so the seams can maintain the fabrics stretchable quality. Lladybird uses a walking foot so both layers of your knit feed through evenly. The Tiramisu Circus has a nice post on stabilizers for knits.

First off let’s talk about the pattern. It was free so that’s great. Instructions are super easy, though I modified the neckline procedure. The instructions have you apply the neckline trim while one shoulder seam is still open, then tacking down the trim after the shoulder seam is closed. That seamed sloppier than I want, so I did it the old-fashioned way of inserting the circle of trim into the closed neckline. Even if you follow her instructions your left to guess how much to stretch your trim so it will lay flat instead of gaping. A little guidance there would be nice. I had a little gaping that I had to press the heck out of, but it practically disappeared after washing. I like that the pattern calls for self fabric for the neckline trim.

My first seams, the shoulder seams, incorporated all three of my knit fabric firsts; walking foot, stay tape, and lightning stitch. Other than the fabric getting munched on the first couple stitches almost every time, things were working to plan. When I attached the neckline trim though, I found that the stitch length was so short that it was going to take forever to get this sewn. I did a few tests to try to figure out the problem and didn’t have my aha moment until I was half way through attaching the first sleeve.

My solution? Sulky Solvy original water soluble stabilizer that I bought forever ago thinking I’d make one of those lacy thread scarves. So glad I didn’t cause I stopped thinking those were cool after five minutes.  I started laying down strips of this stuff on top of my fabric and it helped my walking foot get enough grab on the top layer to move things through and give me the stitch length I was expecting. Wrapping a bit of this stuff around the beginning of my seams also helped with the afore-mentioned munching.

So here’s the results.

Tonic 2 Tee

I chose to make a medium since I was between sizes and I’m sick of tees that are too tight under the arms. Next time I’d definitely go with the small as I have plenty of room here. I took off 1.5in from the bottom before hemming and this tee is still on the longer side. Overall I’m not displeased with the tee but not terribly excited either. I’m holding judgement until I make this again in a smaller size and can make a couple of adjustments. I think I’d like a smaller neck opening and I’d like to figure out how to pinch out those folds between bust and underarms.

100_3652

Tonic 2 Tee backview

This project took a surprising 3.75 hours. Using the walking foot and fiddling with the stabilizer is just slow going, but worth it to get those seams to play nice.

So I’m wondering if its worth all the time and effort to make something so basic. Would it be better to keep looking for RTW tees that fit? But that would mean clothes shopping.

Snuggle Time. Winter PJs for the little guy.

100_3584

I’m trying so hard to plan ahead my sewing projects instead of reacting to the “oh no, we don’t have fill in the blank” moments. A couple months ago, I pulled out the box of 2T hand me downs I have for the little guy to get things into circulation and figure out what we still need. Somehow we always seem to need winter pajamas. Victory! I still have time, I have go-to patterns (Vintage Vneck and Clean Slate Pants by Melly Sews), and I have just barely enough fleece in my stash.

100_3583

To start, I had just under 1/3 square yard of each of the two colors of the fleece. It took some arranging and rearranging to get the pattern pieces to fit that small area. Adding a blue side stripe and waistband was the perfect solution for not enough fabric for the pants and to tie the two pieces together. I cut a 4T instead of 2T width on the top to adjust for the fleece not being as stretchy as a knit. I made the V-neck opening a bit wider to account for this also.

Look, there's a Robot!
Look, there’s a Robot!

The pants went together so easily, hurray!

The top went together so easily until the neckline. Oh man, I just could not get the point of that V without a pucker. So let’s try it on and see how much it shows. AAAARRRGG! It doesn’t fit over his head. I can laugh it off now, but this quick and easy project was already taking on problem child qualities pretty fast.

I can dance like a robot.

Alrighty take a breath, I had just enough of a scrap to make a placket opening instead. Back to the sewing table. I used the instructions from the Prepster Pullover as a guide to add the placket.

The top took 1.75 hours plus an additional hour to add a placket.

The bottoms took 1.75 hours.

(Not counting all my pattern rearranging to make it work on my limited fabric)

The Blank Tank

Melly Sews first offered her Blake Slate Basics pattern set about two years ago, just at the time we found out that we would have a baby boy.

I’m so glad that I bought the Blank Slate Basics as a set, they really are a great value. Melly has really put together great instructions and pictures. I’m already lining up more projects to use her patterns for my little guy.

100_3348

I’ve worked up the blank tank pattern by upcycling one of my husband’s too holey tee shirts. I can’t think of a better use for his old tees than to make this so easy to put together top for baby.

 Thanks to lots of hand me downs and grandma’s thrift shopping, LO already has a full summer wardrobe for this year. Thinking ahead (how unusual), I made the tank for summer 2015 in a 3T. Plenty of room to grow into.

Abigail Bib by mahlicadesigns

I recently made a Caterpillar Onesie as a gift for a girlfriend’s new baby, shortly thereafter I received an invite for a welcome baby party. I sure didn’t want to show up empty handed , so I needed something quick and easy since my new little guy (three months old now) doesn’t give me much time for sewing and crafting any more. Hurray again for Pinterest. I love the bibs made over at Stubbornly Crafty and used her template to make my own simplified version.

Here’s how I made mine.

Supplies: Approximately one 12 x 15 piece each of terry cloth and quilter’s cotton, coordinating ribbon, and sew on velcro.

Cut out one bib in each of the fabrics using the template. Aline your ribbon across the quilters cotton and sew in place along the top and bottom edge of the ribbon. Using one of your machines fancy stitches might look nice here.

Place your bib pieces right sides together. Starting about three inches from one of the bottom corners, stitch toward the corner and around the bib. After rounding back around the other bottom corner, stop stitching to leave an opening about four inches so you may turn the bib right side out. Clip the seam allowance in the curved areas. Turn your bib and use a tool to push out the corners and curves.

Pin the bottom opening closed. Top stitch around the entire bib, being sure to catch the front and back of the bottom opening to secure it shut.

Sew on your velcro to each side of the neck flaps. Be sure one piece is sewn on the front, and one piece to the back so it will close properly.

Follow me on Pinterest

The Helene Bib Onesie by mahlicadesigns

I’m borrowing my bib idea from my Sweet Treats Top to make another baby gift for one of my friends. This will use the third of a five pack of Onesies I  purchased recently; I’m challenging myself to use them all in a creative way. Let’s see how I do.

Here’s how I made the Helene Bib Onesie.

Supplies: Onesie or other top, two 3/8 in buttons, 1 1/4 in x 2 in fabric for the placket, 4 in x 7 in fabric for the ruffle, and 3/4 in x 1 1/2 in fusible interfacing (optional).

Fold the 4 x 7 in ruffle piece of fabric in half length wise, right sides facing. Sew along the short ends using a 1/4 in seam allowance. Turn and press. Using a long basting stitch, stitch along the top raw edge of the ruffle piece. Use the basting stitches to gather the upper edge into a ruffle.

Pin the ruffle in place at the center front of your neckline.

Center and fuse the interfacing to the wrong side of the placket piece, then fold in all raw edges by 1/4 in and press towards the center of the wrong side. Pin the placket in place over the ruffle, being sure to cover the raw edges of the ruffle.

Top stitch around the edge of the placket through all layers.

Hand sew on your buttons.

Caterpillar Onesie by mahlicadesigns

I came across diddledumpling‘s  really cute idea for a caterpillar detail on Pinterest and was inspired to make one as a gift. This will use the second of a five pack of Onesies I  purchased recently, I’m challenging myself to use them all in a creative way.

Here’s how I made mine.

Supplies: Onesie or other top, six 3/8 in buttons,  small bit of black embroidery floss.

Arrange your buttons along your top and sew in place. Use the embroidery thread to create the antenna. I made french knots and back-stitches.

Follow me on Pinterest

How to make a monogram top for baby by mahlicadesigns

I came across a really cute appliqued top by Dana at made and was inspired to make a monogram onesie for the new guy on his way to our family. Since the Onesies I purchased came in a 5 pack, I’m challenging myself to use them all in a creative way. Let’s see how I do.

Here’s how to make the monogram.

Notes: You can skip the fusible part and attach the letter directly to the top using your outlining stitches in the step starred below**

Supplies: Onesie or other top, craft felt approximately 2in by 2in,  embroidery floss, fusible interfacing**, letter templates, fabric marking tools, large eyed needle, scissors, iron.

Choose a letter template that fits the area on your top or trace it out free hand. Place your letter template (right side down) onto the wrong side of your craft felt, trace the outline, and cut out your shape. Repeat this step for the fusible interfacing, the non-fusible side should be face up when looking at your letter.

Now, start adding running stitches to the interior of your letter using the embroidery thread. Fill up the middle area first, we will use the last row of running stitches along the outer edge to baste on your interfacing. This is a great way to use up those short lengths of threads you’ve been keeping.

I placed all my knots to the back, but you could have them on the front for more texture if you like.

Attach the fusible interfacing to the back of your letter using one last row of stitches around the outer edge of your letter. **(Alternately you can use this last row along the outer edge to attach the letter directly to the top and skip the fusible.) All those knots should now be covered and the fusible side should be facing out.

Center your letter onto your top and pin in place. Set your iron to the setting recommended for the fusible interfacing. From the inside of the top, press to fuse the letter in place.

These instructions and your finished project are intended for personal use, please do not resell.

The Sweet Treats Top by mahlicadesigns

The Sweet Treats Top is a one of a kind creation; hopefully one of many more to come as I work on my resolution to use up my stash.

I used two purple fabrics from my stash to create the body and bib.

My mother, a garage and estate sale champion, let me pick through some of her goodies recently. The binding and vintage lace are thanks to her.

The buttons are from a great score I made this summer at a neighbors garage sale.

The Sweet Treats Top is available in my etsy shop.

The Sorbetto Top by mahlicadesigns

I finally had the chance to join the Denver Sewing Collective for one of their meet ups in June. Theme for the night was a blouse sew-along, though I think I was the only one working on a blouse. I really appreciated the opportunity to spend the evening with other sewers as we worked on projects and got to know each other.

I started a simple blouse pattern from Collette patterns, The Sorbetto Top, a free download. The finished project is available in my Etsy store.

Generally, I followed the pattern except:

I added about 2in to the length at the bottom hem line since I thought the finished examples looked a little short. I added a couple of layers of ruffles to my front neckline to spruce up this pretty simple silhouette.

Hemming, one of  the tedious parts of construction for me, is made easier by the use of bias tape around the neckline and arm openings. The ruffles added quite a bit of thickness around the neckline, but I was still o.k. with a 1/2in wide double binding.

Next time I’d shorten the length of the darts, I’m not a fan of how far they come across the chest.

I’d recommend the pattern as a good beginner project or if you’re looking for a quick and easy project. The instructions state that the sizes run small for a fitted look. Heed that warning.

My mother gave me some nice home dec fabric samples that I’ve been thinking of using for bib accents on blouses. This pattern may be a good contender for that future project.

Grey & Purple stripes blouse

I originally bought this Simplicity pattern (2601) to make with a black chiffon, but convinced myself once more that black is the last thing I should be wearing against my pale skin. Thank goodness for purple. And grey. And stripes.

After starting to cut, I began to worry about how the stripes would look on the ruffle, but I was too far in to have second thoughts. I’m glad I didn’t just scrap the idea, because I’m pretty pleased with the result.

I’ve used Simplicity patterns many times before and always have a great fit, but this pattern definitely came out too large for my size. I’m pinching about two inches in the back to make it look right.