Ally Skirt and Onyx Shirt for the Knock It Off tour

Today I’m sharing an outfit I made for the Knock It Off blog tour hosted by Lulu & Celeste and Sprouting Jube Jube. The mission: Knock Off a look from a designer or rtw.

The challenging part of the tour parameters was finding my inspiration. I hadn’t followed designers or Ready To Wear (rtw) companies at all, but this was the perfect push to broaden my view.

Since I didn’t even know where to start, I had to work backwards. I knew I wanted to make a red skirt for summer, so I started looking at companies I’d heard people talking about- Anthropologie, Mod Cloth, and Urban Outfitters. I searched for red skirts and pinned the outfits I liked. Success! I found this outfit on Anthropologie that I wanted.

Photo from Anthropologie

Putting together the Knock Off was super easy from my pattern stash. The Ally Skirt and Onyx Shirt had the right silhouettes and I quickly hashed a plan to hack the Ally to get the look.

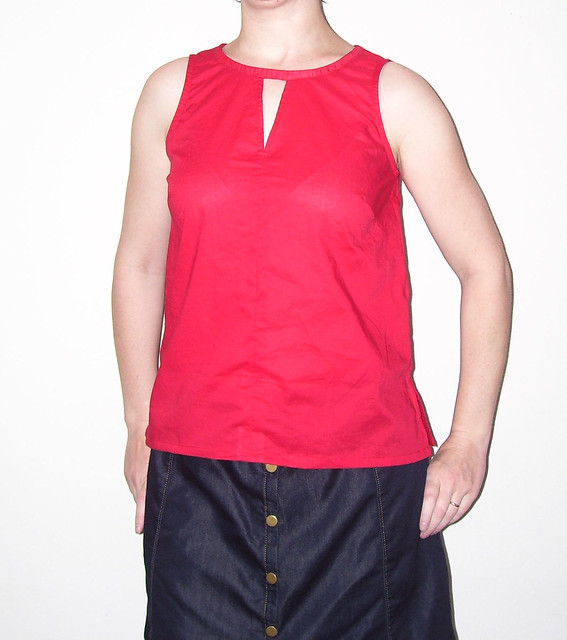
I made the Onyx in a size 4 using a cotton woven (an IKEA sheet from their clearance bin). Simple enough since I’ve made the Onyx before (here).

For the Ally I made a size small again (first Ally here) using a cotton sateen from Joann Fabrics, drafted an angled pocket, added 1.5in in height to the waistband, and added a zip fly and clasp closure.

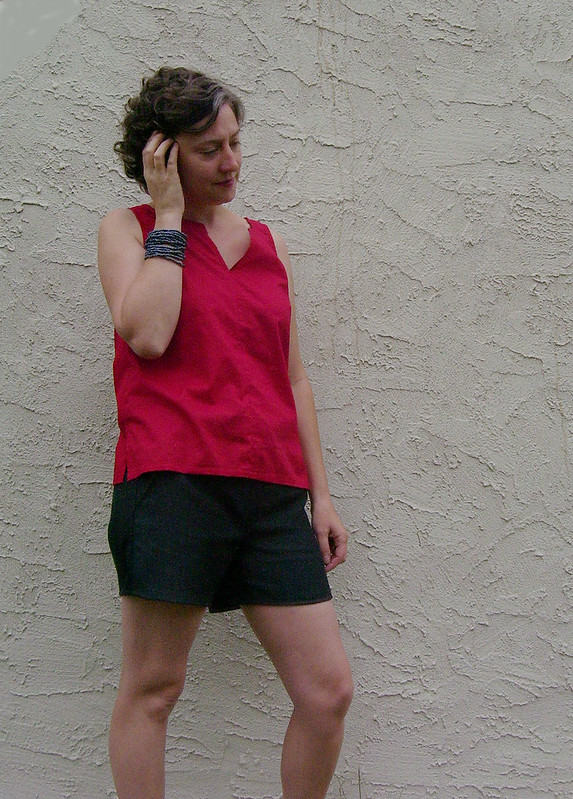
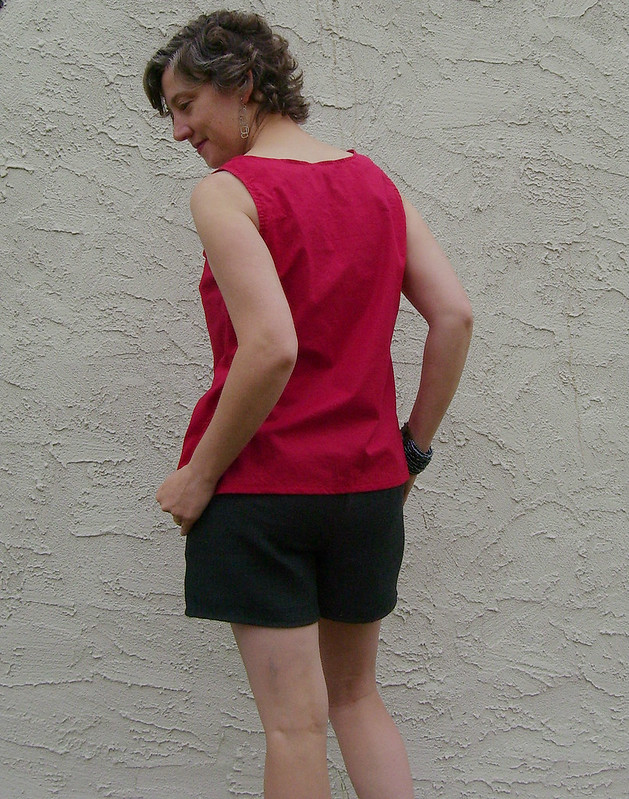
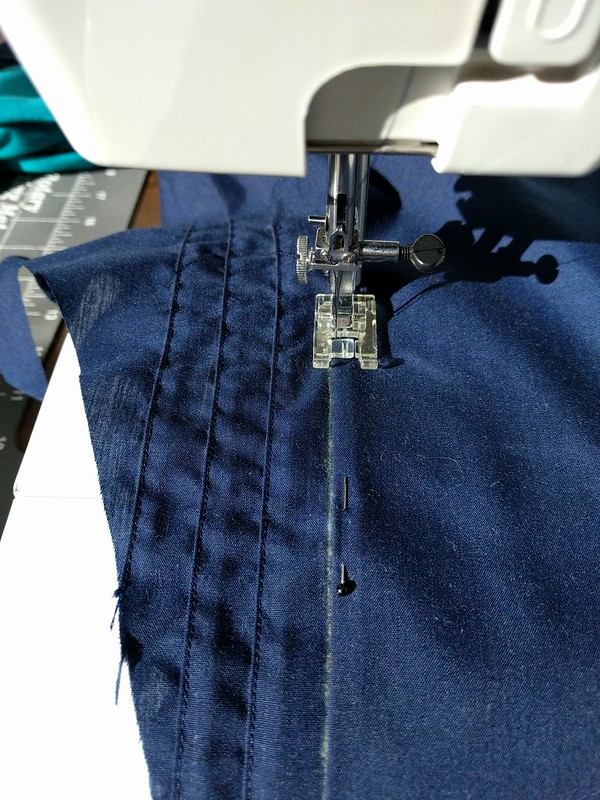
I’m very pleased with how my outfit came out. It harkens to the inspiration photo and it’s my style and color scheme. I’m gettting better and better at hacking the patterns I own to get a look I want. It’s a learning process and of course there are goof ups like this one:

https://www.flickr.com/photos/51456715@N04/33327095324/in/dateposted-public/

I forgot to extend the waistband to account for the zipper fly extension. Whoopsie. I made it work by tappering it a bit.

I was a little short on fabric after drafting my hacks, so I was able to stashbust a little more of my quilting cotton stash for the waistband facing and fly shield.

I’m really happy with my outfit and that I can make myself a look instead of shelling out the $150 it would have taken for the Anthropologie version. Yikes!

My cost: Total: $13   Fabrics $9    Notions $4  Patterns: $0 Stash

If you’d like me to write up a tutorial on my Ally Skirt hack, let me know in the comments.


Now I’d like you to pay a visit the my fellow bloggers to see how they Knock It Off 

Monday, April 24  Lulu & CelesteCall AjairePaisley RootsAdventures with Bubba and Bug

Tuesday, April 25  Sprouting JubeJube mahlicadesignsSew and Tell Project

Wednesday, April 26  Lulu & CelesteSewSophieLynnNini and AshLittle Heart Threads

Thursday, April 27  Sprouting JubeJubesewingbytiInspinrationHouse of Estrela

Friday, April 28  Lulu & CelesteDuchess & HareCreative CounselorFAM

As always, thanks for reading today.

You can follow me on instagram, Bloglovin, or by entering your email in the right side bar.

V Slit Blouse Simplicity 1430

Today I’m going to share just a little bit about the V front blouse that I included in the spring capsule wardrobe I worked on for the Sew Alongs And Sewing Contests fb group.

Me Made May really showed that I was missing some of the Core Colors from my wardrobe, so I immediately started making Simplicity 1430 View B in a red lawn from Fabric Mart and crossed off a long waiting project.

V Slit blouse

This cute number went together pretty easily until I hit the neck band technique. My gut instinct was to apply a bias binding, but I decided to follow the pattern. Uh-Oh. The instructions have you apply a pieced neckband, a neckband facing, and stitch through all the layers. That adds up to seven layers at the shoulder seams. The result, even in a lightweight lawn, was a  thick rope-like neckband.

V Slit blouse 1

I hated this neckband, so I ripped it off and added a 1in facing instead. I’m so much happier with the fit and feel. To keep that cut out look, you could use a bias binding.

V Slit blouse

V Slit blouse

The pattern: Simplicity 1430 View B, size 12. Stupid neckband removed and replaced with a facing, closure at CB eliminated and 1/2in added to hip.

V Slit blouse

The fabric: 100% cotton lawn from Fabric Mart, long sold out.

V Slit blouse


Notes: Choose an easier option for the neck binding and skip the back closure if you want to.

Simplicty 1430 view B should take you about 3.5 hours to make. A size 12 used 1yd of fabric.

Total cost: $3.50         Fabric $3.50             Pattern $0-stash

Zamora Blouse from Itch to Stitch by mahlicadesigns

I had the opportunity to test the newly released Zamora blouse pattern from Itch to Stitch. The Zamora is a buttoned front, deep V neck with a tie bow. The Zamora is a modern version of a very classic look.

Zamora

I liked the combination of the tucks on the front, the tie, and the slightly loose blousing. Making the Zamora was a good way to replace the classic blouses in my wardrobe that no longer fit.

Zamora Blouse detail

Zamora Blouse

Zamora blouse

Because this is my test version I made very few alterations. I made a dropped shoulder adjustment of 1/4in and graded the back piece from waist to hem increasing by 1/2in in width. This is the bracelet length sleeve option, which is long on me but actually falls at a length I like.

Zamora blouse

I’m not satisfied with how the back bunches up above the waist line. Part of this is due to my need to do a sway back adjustment and possibly grade wider at the hips, but I think some of this is the pattern design. It looks better tucked in, which is how I will wear the blouse. Several other testers removed the back darts all together and I may go back and remove them too. I think that will make the back look so much better and maybe help with a drag line on the front.

This is a size 4 with D cup, made up in a cotton/poly broadcloth. I ended up using 1 3/4yd @44in wide. The techniques in the pattern are not difficult, but it does take some time to complete because of the pintucks and waist darts.

Zamora blouse pin tucks

The Zamora is one of four new pattern releases from Itch to Stitch this week. Itch to Stitch has put all of her patterns on sale this week too.


The Zamora could take you 7 hours to complete.

Fabric $4  Pattern $ 0*  Total cost $4

*I received the pattern for free as a tester.


Peasant Blouse from MellySews, Core Wardrobe part 6

Peasant blouse by mahlicadesignsAhhh, spring wardrobe sewing is so glorious. Color and breezy materials are what I’ve been missing. I am very ready to say goodbye to thick fabrics, layers, and wearing socks to bed.

I happened upon this polyester charmuese at Denver Fabrics a few months ago and thankfully got enough yardage to make the Peasant Blouse from Melly Sews. I’m thinking a red like this will be one of the main colors for my Core Wardrobe.

100_3862I was a bit nervous about working with this kind of fabric for the first time. My strategy: keep it sharp and pin the stuffing out of it. I made sure my rotary blade was sharpened, used a brand new Microtex needle, and pulled out my “good” sharp pins.

I took the sewing pretty slowly to keep those slippery edges neat and to make sure my machine didn’t eat the fabric. I also spent a lot of extra time making French Seams to containing the fraying edges. The neckline is finished with bias binding that also is the casing for elastic. The sleeves and bodice are finished with a fold over hem.

100_3863The Peasant Blouse is a free pattern from Melly Sews blog and her post gives some really good tips on how to style a peasant blouse, just the kind of hand holding I need. The instructions are streamlined since they are given in a blog post as a tutorial, so some sewing experience is assumed. I had no problem with the instructions, but did have a little wonkiness along the neckline where the sleeves met the bodice front and back. The pieces just did not match up to make a smooth neckline. Operator error? Beats me. I just smoothed out the line a bit when I attached the bias binding.

100_3853The instructions recommend 23-26in elastic length around the neckline; 23in made a pretty high neckline and pulled the sleeves a little snug at the underarm. 28in of elastic for the neckline worked best for me and gave a little more room at the underarm.

I used elastic thread for the first time on this project. I hand wound the elastic thread on my bobbin, used the longest stitch length on my machine, did a test, and added one row of shirring 1/2in from the sleeve hem.

This project took 3.75 hours to complete. I’m guessing half that time was making the french seams. Working with a fabric that does not require the french seams would cut down your time.

The Sweet Treats Top by mahlicadesigns

The Sweet Treats Top is a one of a kind creation; hopefully one of many more to come as I work on my resolution to use up my stash.

I used two purple fabrics from my stash to create the body and bib.

My mother, a garage and estate sale champion, let me pick through some of her goodies recently. The binding and vintage lace are thanks to her.

The buttons are from a great score I made this summer at a neighbors garage sale.

The Sweet Treats Top is available in my etsy shop.

The Sorbetto Top by mahlicadesigns

I finally had the chance to join the Denver Sewing Collective for one of their meet ups in June. Theme for the night was a blouse sew-along, though I think I was the only one working on a blouse. I really appreciated the opportunity to spend the evening with other sewers as we worked on projects and got to know each other.

I started a simple blouse pattern from Collette patterns, The Sorbetto Top, a free download. The finished project is available in my Etsy store.

Generally, I followed the pattern except:

I added about 2in to the length at the bottom hem line since I thought the finished examples looked a little short. I added a couple of layers of ruffles to my front neckline to spruce up this pretty simple silhouette.

Hemming, one of  the tedious parts of construction for me, is made easier by the use of bias tape around the neckline and arm openings. The ruffles added quite a bit of thickness around the neckline, but I was still o.k. with a 1/2in wide double binding.

Next time I’d shorten the length of the darts, I’m not a fan of how far they come across the chest.

I’d recommend the pattern as a good beginner project or if you’re looking for a quick and easy project. The instructions state that the sizes run small for a fitted look. Heed that warning.

My mother gave me some nice home dec fabric samples that I’ve been thinking of using for bib accents on blouses. This pattern may be a good contender for that future project.

Grey & Purple stripes blouse

I originally bought this Simplicity pattern (2601) to make with a black chiffon, but convinced myself once more that black is the last thing I should be wearing against my pale skin. Thank goodness for purple. And grey. And stripes.

After starting to cut, I began to worry about how the stripes would look on the ruffle, but I was too far in to have second thoughts. I’m glad I didn’t just scrap the idea, because I’m pretty pleased with the result.

I’ve used Simplicity patterns many times before and always have a great fit, but this pattern definitely came out too large for my size. I’m pinching about two inches in the back to make it look right.